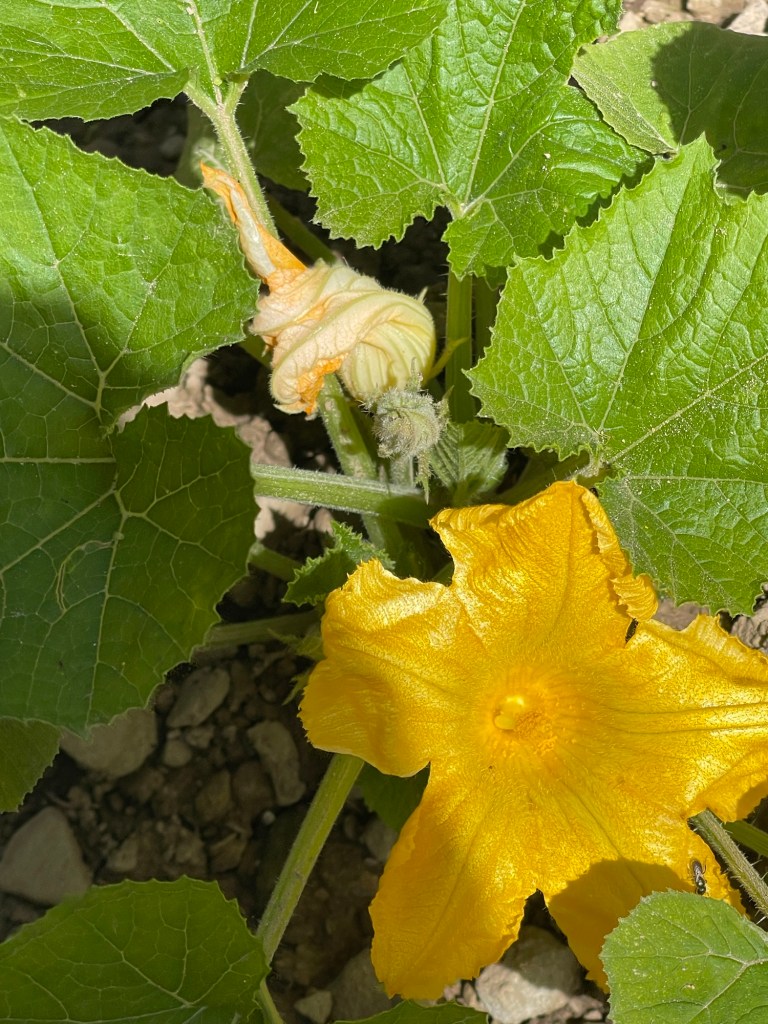
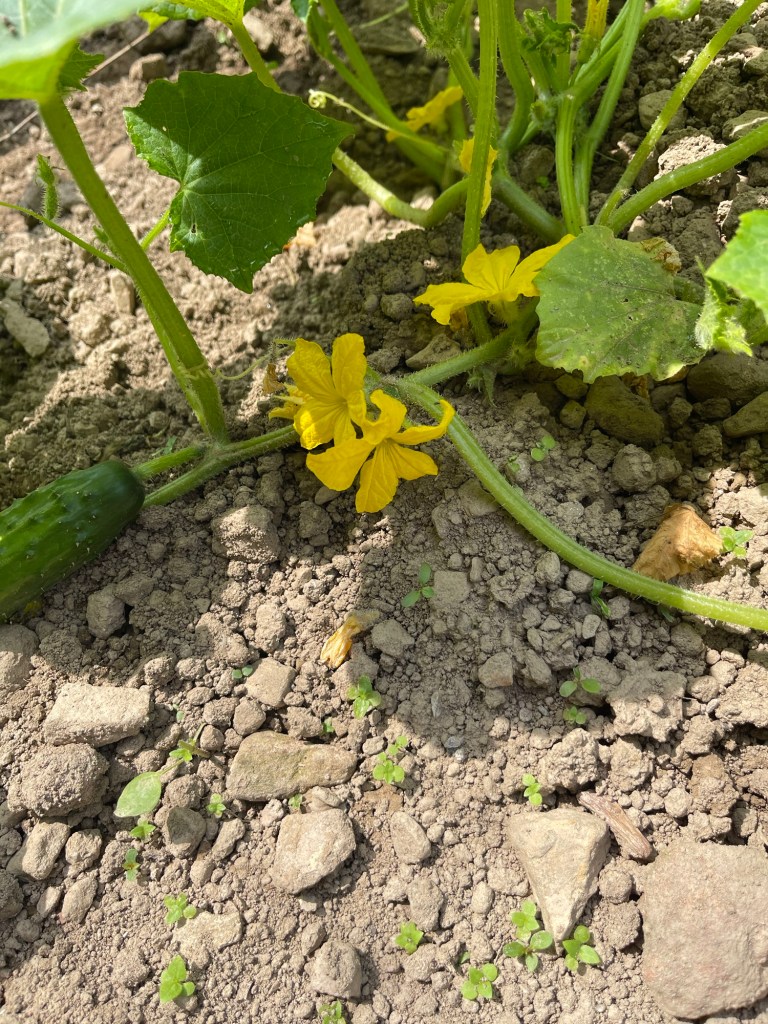
Hello from the mountains of Kentucky. I hope your week has been filled with blessings and sunshine. Life’s been busy in our neck of the woods! We finally have all our garden planted. The squash and zucchini are blooming and beginning to produce. We harvested our first two this week. The cucumber vines are running and blooming! We have our fence up and have a lot of small cucumbers on the vines. Now comes all the tilling and hoeing! But great rewards will follow!
Zucchini bloomsFirst cucumber of the season almost ready to pick!
This is the third part of my ten favorite herbs. I want to share my love and experience with chocolate mint, which is my third favorite herb post. Remember, I’m not posting in any particular order.
My chocolate mint bed.
I discovered chocolate mint about ten years ago when a friend gave me a small section she had propagated. I maintained it in a large pot in hopes it would come back the next spring. I was disappointed when it didn’t return. I could not find it at the local nurseries, so I ordered a small plant from Amazon and chose to plant it in one of my herb beds. It has thrived since then. Chocolate mint is in the peppermint family. The leaves of this wonderful mint is a deeper green than peppermint and the underside of the plant and stem is a purplish color. It is hardy in zones 3-9. The aroma is amazing!
Chocolate mint can quickly become invasive. The more it’s pruned, the thicker and bushier the plants become. If left unpruned the plants become leggy. I have had mint spring up outside the bed, in nearby pots, and even random places in the yard. If you are pruning but not harvesting, be careful with the clippings. They will sometimes take root where you discard them.
Chocolate mint makes a refreshing cold tea, by simply washing the leaves and adding them to glass of cold water. You can infuse them with an infuser or as whole leaves. It also makes excellent hot tea, especially in the winter months. Feel free to mix mints for a more bold flavor, add cinnamon for a festive tea, or just enjoy the flavor alone. It’s very refreshing.
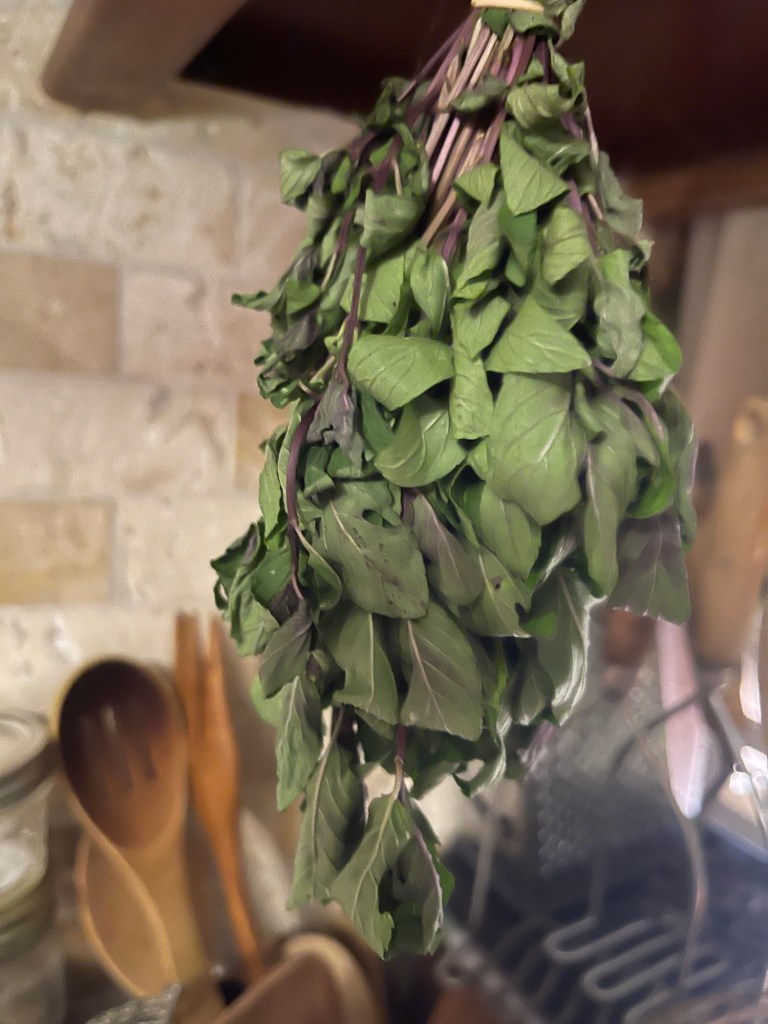
I dry my mint by clipping the plants and pruning any damaged leaves. I then wash the mint and gently pat it dry with a clean towel or unbleached paper towel. I like to hang herbs in bundles to dry. Once the mint is dry to the point of crumbling, I give it a rough grind with the mortal pestle, and add to a glass jar and place it in the cabinet away from the light. I add the dried tea leaves to a tea ball or infuser for hot and cold tea.
Chocolate mint drying in the kitchen.
The dried mint can also be ground in a spice grinder for a powdery type spice to use when making brownies, cakes, and as a fun additive to a cup of hot chocolate. The uses for this tasty mint are endless.
I just chocolate mint tea to help sooth an upset stomach, help digestion, and ease indigestion. It is also beneficial in soothing oral mouth pain, and to add antioxidants in my body. It and versatile herb that has been used for centuries. Chocolate mint has a multitude of benefits with great taste whether you enjoy it as a hot or cold tea, or as a spice.
I hope you’ve enjoyed this post. Feel free to ask a question, or leave a comment. You may follow my blog for more recipes, posts about mountain living, herbs, and gardening tips. Homesteading is a wonderful way of life that helps us to be independent, sustainable, and a way of life. God bless from the mountains of Kentucky.
Hello, from the mountains of Kentucky. It’s a beautiful day in the mountains today. The sky is clear, which I’m so thankful for. It’s been a very rainy May in our part of the world. Hard storms wreaked havoc on our mountains Sunday. Many are still without power, cable, telephone, and Internet. Ours was restored yesterday. One thing about loss of Internet… is it’s a great time to catch up on reading, writing, housework, and yard work. Today’s post is the second post of my top ten herbs. Keep in mind that these posts are not in any particular order. Check out my first post My Favorite Top Ten Herbs (part one – mint)
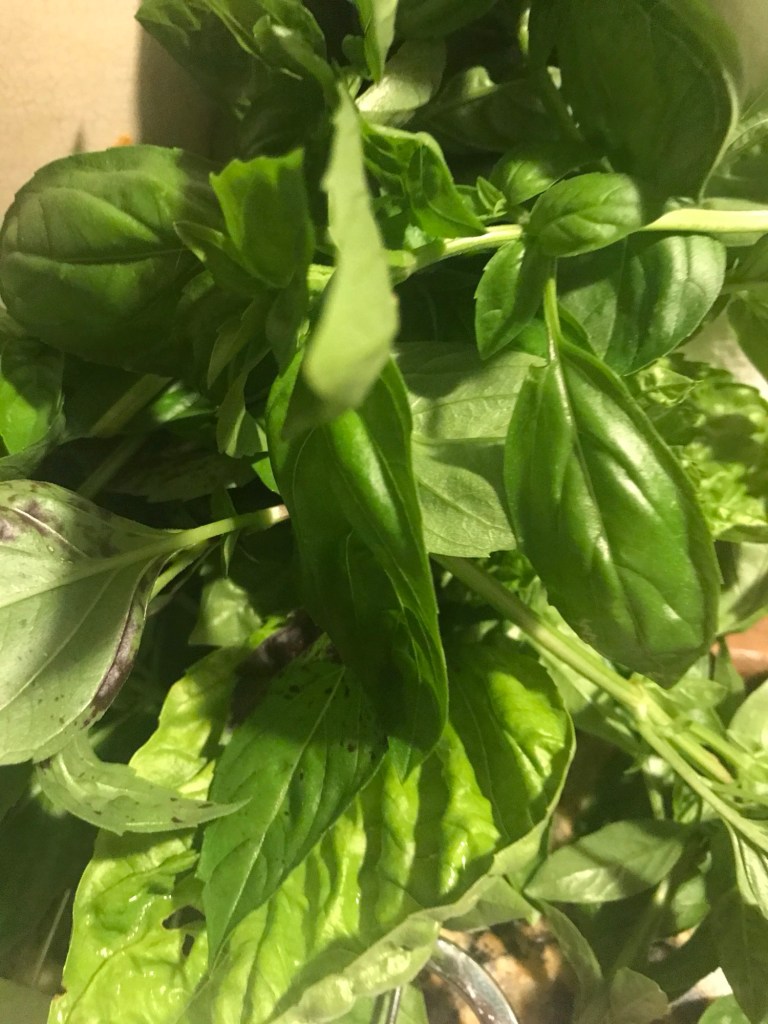
Pictured above is Italian basil
Basil is a must have for our pantry and spice cabinet. It is low maintenance, easy to grow, tastes great fresh, easy to dry for spices to use when cooking, fresh it adds wonderful flavor to dishes, makes great tortillas, makes great aioli, delicious pesto, it helps repel mosquitos, it tastes great in salads and so much more. Let’s get started!
Basil is a spicy herb that is commonly found in Italian dishes. It is actually a member of the mint family. It is a native plant of Africa and Asia. It loves plenty of sunshine, rich soil, moderate watering, and it loves to be pruned! It can tolerate some shade as well. Its wonderful taste can be identified in spaghetti sauces, pesto’s, on pizza, and in lasagna and many more delicious cuisines such as Italian tortillas. Vegan Italian Spinach Wraps. There are many types of basil. Believe it or not there are over one hundred types of basil. However, my two favorite types of basil are Genovese also known as, Italian basil it is often confused with common basil. The leaves of common basil is typically lighter than Italian basil. Another favorite of ours is lemon basil. I will address them in this post and might make a post about other types of basil at a later date.
Basil of all kinds is fairly easy to grow. It is an annual plant, which means it will need to be replanted each year if you live in a zone that has cold winters. In Kentucky, I plant basil each spring after the last frost. Don’t worry about expense. A good quality organic basil plant is only a couple of dollars. I typically purchase three to four plants per year, which is still more economical than buying fresh basil at the grocery store. One small packet of fresh basil, that may or may not be fresh, can cost nearly five dollars. I would prefer to have enough basil to enjoy fresh from spring until fall, and then harvest it for the winter.
I harvest and use it throughout the year and harvest the remaining plant before the hard frosts come to the mountains. Basil grows well in the ground, or in large pots. I prefer to plant mine in large pots within my herb garden. I also keep a pot of basil on my back porch for easy access for fresh basil. And again, it also helps deter mosquitos. Your basil will require good drainage, if you grow it in pots. I water my basil when the soil feels dry. I typically water daily when the temperatures are high. If the soil is damp, skip the watering. Over watering can be detrimental for basil. I like to add a looser potting mixture in the bottom of the pots. I enjoy caring for and growing orchids. So, I normally have an extra bag of the orchid potting mid on hand. It is a great addition to the bottom of the pot, and it helps the soil drain. I prefer to use a good quality organic potting soil for my potted herbs. If I’m going to eat them, I don’t want toxins from additives in the soil. Both lemon and Italian basil love and thrive in sunshine! I give my herbs an occasional spritz of Neem oil to prevent insects from building nests, primarily spiders, in the herbs. I also feed my herbs an occasional drink of weakened herb tea. The antioxidants are a great fertilizer. I do not add traditional fertilizer due to the additives in the fertilizer. Natural is always best!
Italian basil. Close up of lemon basil.
Again, basil likes to be pruned. Trimming your basil on a regular basis allows the basil to become fuller and less leggy and promotes lots of new growth. I also keep the blooms pinched back on my basil to help promote growth and prevent a bitter taste in the herb. If you are not harvesting to eat, basil blooms a pretty white flower that is a nice addition to a flower garden. I harvest basil throughout the season by clipping stems of leaves to add to a glass of water, much like you would flowers, for fresh basil for cooking. I usually only do this if I do not want to harvest to dry but want to prune the basil. For dying, I prune the stems, rinse well, and pat dry, then pick the leaves from the stems, and allow them to air dry on cookie sheets that are lined with white or unbleached paper towels. If i want to dry the basil by hanging it, I prune the stems, rinse, pat dry, and tie small bunches of the herbs together and hang from a drying rack or hook in my kitchen. Either way that you choose to dry basil, the aroma will fill your house. Herbs can be dried in a dehydrator, the oven, or even in an air fryer. It’s quicker, but I find that it lowers the quality of taste. Air drying is my personal preference.
Basil typically takes at least two or three weeks to completely dry. Once the basil is dry, I add the whole dried leaves, which will be much smaller than fresh leaves, to a glass jar. I prefer amber jars, but clear will work. The jars are then added to a dark corner of my spice cabinet. I add the dried basil to dishes by using a mortar and pestle to grind it as I need it. I also grind some of the leaves into a finer powder using a coffee grinder. This method of storage eliminates a step in the cooking process, but still packs great flavor. The shelf life of fresh dried basil is one to two years. I usually have almost completely eliminated my dried basil from spring to spring, especially if I make many of the spinach Italian tortillas. See the link above.
A few clippings for cooking. I’ll add them to a glass of water after removing any damaged leaves.
Both Italian and lemon basil are great for pesto’s, aioli’s, makes a nice additions to salads, great on pizza, and delicious fried for a crispy bite of deliciousness for any Italian dish, or a salad topper. I also like to add fresh basil to omelets or tofu scrambles, spaghetti, and lasagna. I find that it adds an interesting taste to fresh baked bread, especially with the addition of garlic. Lemon basil is also a great addition to Asian dishes. I will try to add the recipe that is pictured below soon.
Vegetable stir fry with basil and garden veggies.
Basil not only helps deter mosquitoes and other unwanted pests on or near the porch, but it makes a great companion in the vegetable garden to help deter pests from tomatoes, and other plants. Crushing the leaves can also act as soothing compress for bee stings.
These are only a few ways that I use basil at our house. I could write a book on basil alone. I hope to include a post soon about the other types of basil that we use on frequent basis. The smell of fresh basil is intoxicating. I love to brush my hands over the basil and enjoy the vibrant invigorating aroma.
Feel free to leave a comment or question. Check back next in upcoming days for my third herb post. Also, feel free to subscribe or follow. For now, God bless from the mountains of Kentucky!
Good afternoon, from the mountains of Kentucky. I hope your week is going well. It’s been a busy one this week in our neck of the woods. Spring is usually busy with planting, foraging, preserving, harvesting and drying. We’ve managed between long bouts of rain to plant our squash and zucchini, tomatoes, kale, cucumbers, and peppers. The garden is taking shape. Yet, there’s a lot more to plant. A lot of work with great rewards.
We’ve planted and foraged mullein to dry for tea. We’ve found mullein tea good for our respiratory problems, common colds, flu, and bronchitis. It’s a staple in our household. The tea can be made a few different ways. The leaves can be cleaned and dried for steeping hot tea, or the leaves can be cleaned and added to filtered water and placed in a covered glass container in the fridge for cold tea. A little honey in either and we’ve found it to be a tasty bit of nature that has wonderful results. (More to come about the use of mullein.)
Harvesting the bottom mullein leaves.Iris blooms are my favorite!
Our flowers and herb garden is flourishing this year. I’ve harvested chocolate mint, peppermint, and strawberry mint twice already. We keep fresh mint for cooking, be stings, and for baking. Dried mint is used for steeping delicious teas. Peppermint tea has great medicinal qualities for digestion issues. It’s a great addition to green tea as well, and is tasty in a cool glass of water from our Berkey. Yesterday, was a day for clipping basil, more mint, and chive blooms for seeds. I also harvested tarragon and bit of lemon basil. Our herbs are doing exceptionally well this year. I am a believer that when nature produces an abundance of something, it will be needed in weeks or even months ahead. We enjoy sharing our harvest with the elderly who can no longer garden and those who do not have land for gardens. We are believers of tithing our blessings with others. It seems the more we give, the more our gardens grow and produce.
The basil is thriving!Fresh strawberry jam!
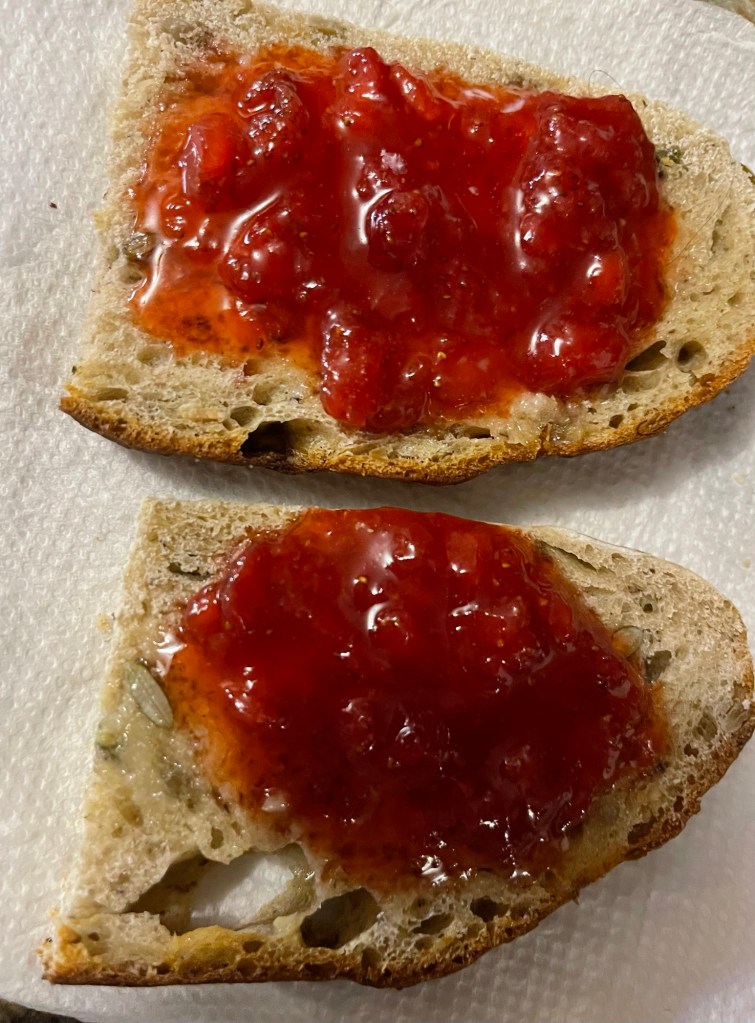
Yesterday was spent preserving strawberry jam. It’s easy to make and delicious to eat! I will post this recipe soon. I couldn’t wait for weeks to eat the jam! So, I opened a jar this morning and had it on fresh-baked bread for breakfast.
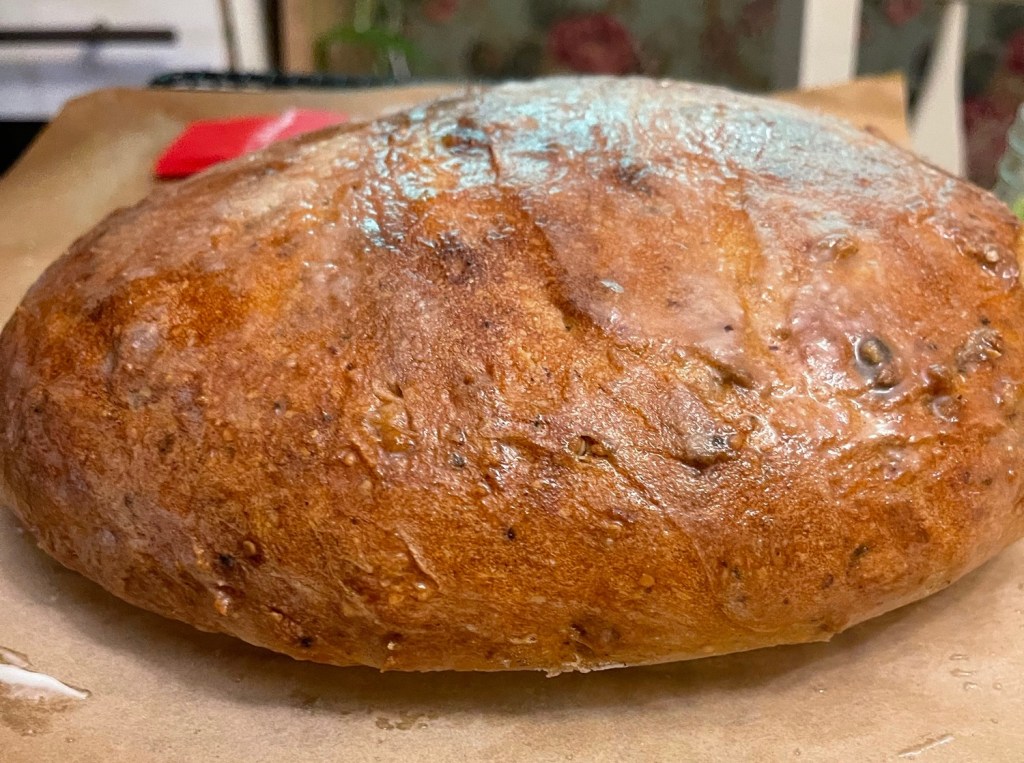
Freshly toasted baked bread and homemade jam! Home baked seeded yeast bread.
Our kitchen today is an aroma of drying herbs, yeast bread cooking, and banana bread baking. Oh, and lemon essential oil diffusing in the diffuser. Lemon essential oil is great for focus, clarity, and helps deter ants, while making the air smell clean and fresh. Essential oils are part of our daily life. We use them for medicinal purposes, to make cleaning products, to add to recipes, and to help us relax at night. We are firm believers that God created nature for mankind to enjoy and along with the enjoyment, to use for the physical, medical, and even for spiritual needs.
Chocolate mint hanging to dry.
For now, God bless, from the mountains of Kentucky. Happy foraging, planting, and preserving! Feel free to follow and or leave comments or questions. Have a wonderful Thursday!
Good afternoon, from the mountains of Kentucky! It’s a windy spring day in the mountains. The trees are beautiful! All of the blooming trees are in full color. Friday finds me busy with assignments that signify the spring semester is winding down. During this time, there is always extra work consisting of year end meetings, various writing assignments that need to be scored, classroom observations, and numerous interviews with students entering the education program. Thus, comes added stress to complete work in a timely manner. So, how do I deal with this added stress?
First and foremost, I like to rise early to pray and spend time in the word. Anything we need or questions we have, can be found and answered in His word. Secondly, I love to cook and bake. Cooking and baking are both therapeutic and help relieve anxiety and stress. While in the kitchen, I find it to be an opportune time to focus on Him. I love to listen to good gospel music, inspiring podcasts, and videos about the goodness of God. Today, I listened to a good friend of mine speak about sounding the alarm! This was the topic of the sermon at church yesterday! It’s time to sound the alarm. Time to be about our Father’s business. it’s time to be out in the highways and the byways and asking others to come to church, get to know Christ, and form a relationship with Him. During my time in the kitchen listening to and being inspired by others, it was also a wonderful time to pray.
Spending time in the word is a way to grow and learn.
As I chopped vegetables for a big kettle of homemade soup I called out the names of neighbors, friends, and family. I lifted them up to the Lord for their various needs, and most of all for their salvation. It’s time to sound the alarm! While I kneaded dough, I thought of the process of baking bread. We should follow the instructions in the recipe. If a step in the process is overlooked, the bread may not rise. Likewise, we must always follow the Lord’s instructions. If we overlook others whom the Lord is bidding us to invite to know Him, they may not be saved. If we don’t follow what He asks us to do, we may not grow to our full potential in Christ. Let’s follow His instructions. Sound the alarm!
Homemade crusty seeded yeast breadfresh from the oven! Homemade vegan beef less veggie soup
So, for now, I’m off to bake my bread! I’m anxious on this rainy spring day to enjoy a bowl of homemade vegetable soup with a slice of crusty homemade bread. This has been a prosperous and insightful Friday in the mountains. I’ll leave you with the message from our Thursday night service! Sound the alarm! Work while there’s time! Sound the alarm! Invite those you may see in the grocery store, witness on social media, encourage all those whom you meet. During her live, my friend shared about a young couple she recently invited to church. They were anxious to come, and they came. It was sad to find out they had wanted to go to church before she asked them, but hadn’t been invited by anyone and didn’t know where to go. Be that person who loves and invites others to get to know Christ. You never know when the person behind you in the checkout line at the store, may be waiting for someone to invite them. Don’t pass opportunities up, instead, sound the alarm! Jesus is coming back! God bless! Feel free to comment and follow.
Hello, from the mountains of Kentucky! It’s been a busy Saturday of baking and spring cleaning! I’ve been on decluttering journey for a couple of weeks. I’m nearing the homestretch of decluttering. Baking for the week ensures I have fresh bread for breakfast toast, lunch, and for supper. It also ensures I have snacks for the week. I also enjoy sharing with others at work, family, and church. But, the biggest reward is that my bread and snacks for the week are healthy, clean, organic, and not processed!
I have baked what I call mookies for years. You might be wondering what a mookie is. It’s not quite a cookie and it’s not quite a muffin. It’s kind of somewhere in between a cookie and a muffin. It’s a mookie. I am anxious to share this recipe with you. It’s a great snack, a healthy snack, awesome with coffee in the morning or tea in the evenings. Our grandchildren love them too. They’re made with minimal ingredients and takes a total twenty minutes to mix and bake. Let’s get started!
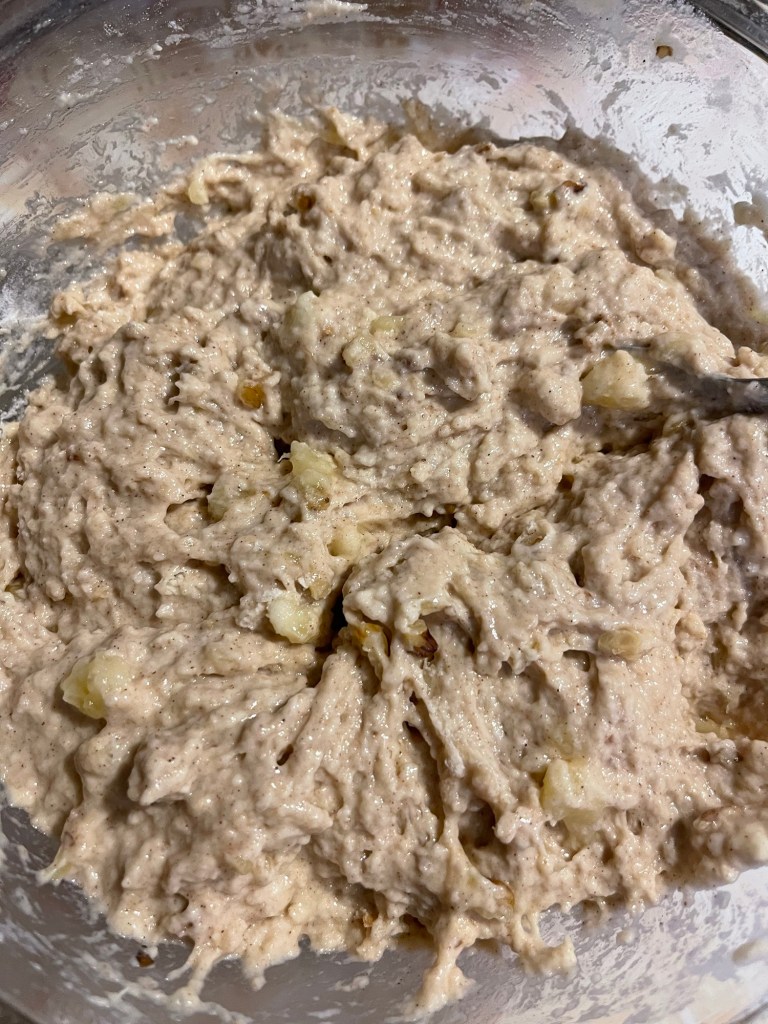
Preheat oven to 350. Line a cookie sheet with parchment paper. Mash the banana and add syrup and vanilla and mix well. Add flour and baking powder and mix. Fold in peanut butter and mix. Finally food in chocolate chips.
Mookie mix
Drop mixture by tablespoons to the lined cookie sheet. Leave a little space between the mookies. Bake for fifteen minutes. I like to brown mine slightly under the broiler. Allow to cool and enjoy!
Peanut butter chocolate chip mookies
These are great without the peanut butter for more of a banana taste. They’re great with chopped walnuts for a take on banana bread flavor. They’re also great with a bit of cocoa powder for a chocolate mookie. The possibilities are limitless.
They’re airy, light, and delicious.
I hope you and your family enjoy this delicious treat as much as our family does. For now, God bless from the mountains of Kentucky.
Hello, from the mountains of Kentucky! It’s a rainy day in the mountains, which always puts me in the cooking and cleaning mood! So, today I decided to begin cleaning the pantry out and realized that I had an abundance of oats and nuts that I needed to do something with. I went down a rabbit hole and started planning granola! The pantry didn’t get cleaned completely, but I did make some delicious granola! I hope you and your family enjoy this recipe as much as we do.
Ingredients:
Three cups of organic old fashioned oats
1/2 cup organic chopped walnuts
1/2 cup organic chopped almonds
1/2 cup organic chopped pecans
3 tbs organic raw pumpkin seeds
2 tbs organic sunflower seeds
1 tbs organic chia seeds
2 tbs organic ground flax seeds
3 tbs gogi berries or raisins
1/2 tsp pink Himalayan salt
1/2 cup of organic pure maple syrup or honey
1/2 cup smooth organic peanut butter
1/2 cup organic olive oil
Agave or honey for drizzling not mixing.
Mix all the dry ingredients and preheat the oven to 320 for convection. Mix the remaining ingredients over low heat until it comes together smoothly. Pour the wet ingredient into the bowl of dry and gently stir with a rubber spatula. When mixed spread out on a parchment lined baking sheet. Spread evenly and bake for 20 minutes. Remove and mix the granola with a metal spatula. Return to the oven and bake 20 more minutes. Take out of the oven and drizzle your choice of honey or agave and put under the broiler for just enough time for the granola to brown up lightly. Remove from the oven and allow it to cool completely on a wire rack.
Mixing the ingredients.Spreading the granola in a baking sheet.
Using the spatial mix the granola gently once it’s cool. Store the granola in a glass jar. Keeps for a couple of weeks if it is in an air tight container.
This is a two gallon jar! I’ve got another batch of granola to add to it.
I hope your family enjoys this tasty granola. I think it’s great alone as a snack and wonderful in a parfait. I also like it in a bowl with almond milk as a cereal.
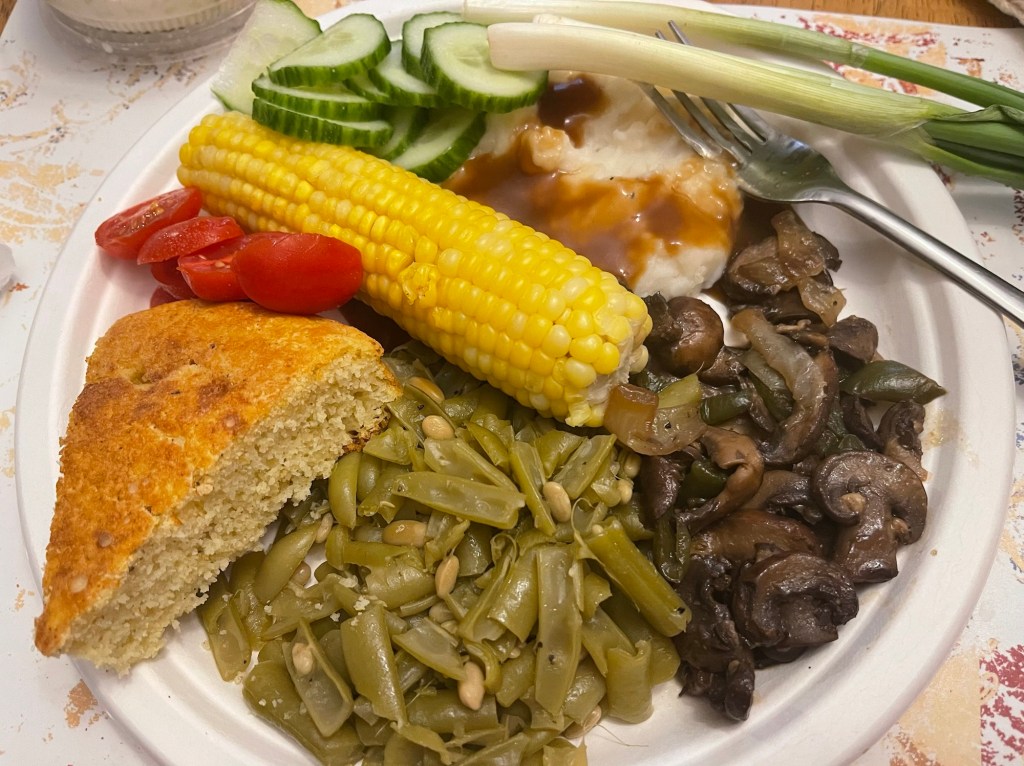
Dinner
Just for fun! A picture of dinner this evening. Fresh beans, corn, potatoes, onions, cucumbers and tomatoes with sautéed portobello mushrooms with peppers and onions and a slice of cornbread. Nothing better than veggies from our garden!
For now, God bless from the mountains of Kentucky! Don’t forget to like, comment, and or follow! We
Good morning from the mountains of Kentucky! I hope your day is a blessed one. I am excited to bring to you my new spinach wrap recipe that I’ve been working with for a couple of weeks. Saturday’s wraps were the success that I’ve been working toward! I hope you enjoy them as much as we do!
Ingredients:
3 cups fresh organic baby spinach
3 cups all-purpose flour (I prefer King Arthur unbleached or wheat)
1 1/2 teaspoon pink Himalayan salt
3-4 tablespoons organic extra virgin olive oil
1/3 cup cold filtered water (this can be modified if needed)
1 teaspoon fresh ground oregano
1 teaspoon fresh ground basil
1 teaspoon fresh ground parsley
1/2 teaspoon fresh ground black pepper
1/2 teaspoon organic ground garlic
Add one cup of spinach and one cup of flour to a food processor dicing it to allow room for an additional cup of each. Dice again and add the remaining spinach and flour. Add spices, and process adding oil slowly as the mixture mixes. Add water until you have a dough consistency. Sometimes the amount of water varies. Only add what you need. If the mixture is too wet, add an additional spoon of flour and mix. You can’t go wrong on this mixture if you achieve a doughy consistency. You can play with the oil as well. If you need more, add a tiny bit.
Fresh spinach is the best!!
Preheat a cast iron skillet. I use ceramic cast iron for this and it works great. Add a tiny spray of organic extra virgin olive oil to the pan to heat. While the pan is heating spoon out a large spoon of the mixture onto a floured dough sheet or parchment paper. Using flour on your hands roll the dough into a ball and then begin rolling the dough flat.
Ball of spinach dough.Second rolling of the wrap.
A second rolling of the wrap ensures the desired thickness of the wrap. You can sprinkle flour over the wrap to prevent it from sticking. Once you have achieved the desired thickness, lay your bread in the hot pan. It only takes about 1 1/2 minutes per side. While my bread is browning, I usually roll another piece of dough. Parchment paper, coffee filters, cheese cloth, or white paper towels between the wraps will help prevent them from sticking until they’re cooled.
Preparing the wrap! This is the thickness that I like!
Remove the bread and place on your choice of liner. Once the wraps are completely cooled, I place mine in an airtight container and keep them in the fridge for fresheners. This recipe usually yields eight to nine wraps. They taste great warmed with fresh veggies, a smear of peanut butter, as a side for Italian dishes, and extremely good with no dairy cheese melted on them.
You may substitute seasonings for Mexican seasonings, plain with a little salt and pepper, or with curry seasonings. The possibilities are endless. I hope you enjoy these as much as we do. I look forward to posting new wraps. I am currently working on a high fiber flax wrap. I would love to hear how you eat yours! Feel free to like, share, comment and follow. For now, God bless from the mountains of Kentucky!
Good morning from the mountains of Kentucky! Cold air invaded the mountains last night. It was a chilling 28 degrees when I awoke this morning. I was thankful that I had covered my ferns up last night. We have several mountain winters in March and April in Kentucky. With so many of the trees and bushes blooming early this year, it’s difficult to determine which winter it is. I’m not sure if this cold snap is redbud winter or dogwood winter. Nevertheless, hope remains as these small winters only last a day or two and then it’s mild weather again.
The smell of yesteryears lingers in the air as the garden was turned this week. The smell of fresh soil always reminds me of growing up only a few miles from where we live. Papaw plowed with a mule and plow from morning till evening. He would wipe the sweat from his brow, fan with his hat, rest a bit and return to his work. The smell of the rich dirt lingered in the air just as it does here today. The chickens are enjoying the freshly plowed ground as well. They love to scratch and search for worms in the loose dirt.
As I prepare breakfast this morning, I am reminded of eating oatmeal with my Papaw. I felt an unction to prepare a hardy bowl of oats, as he called them. I like to use a half cup organic oats, filtered water, fresh honey for the sweetening, and whatever fruit I have available. This morning I added a half of an organic banana, and some organic blueberries. I include a tablespoon of organic walnuts, a teaspoon of flaxseed, hempseed, and chia seeds. White serving I drizzle with almond milk and a tiny bit of honey. I toasted a slice of my homemade seeded bread with breakfast this morning. It’s a hard breakfast that will sustain me until late in the afternoon.
Delicious plant-based breakfast for a busy day!
I’m excited about planting this year. The manure has been spread and the first turning of the garden is complete. Seeds have been sewn in miniature green houses, and in the hydroponic garden. Fresh vegetables are a joy in the summer months. Fall is a time of harvesting and preserving for the winter months ahead. It’s not for the faint of heart, but for those who enjoy eating what they’ve grown from seed to nourish their bodies.
Spreading natural fertilizer.
Gardens can be as large or as small as you want them to be. For us, a large feeds our families all summer and sustains in the cold months. We usually have an abundance to share with neighbors, extended family, and church family. It seems the more we give to others, the more it grows.
Organic lettuce in one of the hydroponic gardens seven days after seeing the seed.
Eating healthy is a large part of being healthy. Eating organic, plant-based, and clean is a foundation for overall health. Get up and get moving! Being active helps prevent and fight many diseases that plague people across the world. Make it a point to know the ingredients in the food that you put in your body. Know the vocabulary of hidden toxic ingredients. Do your research, and start small and make changes weekly. For example, I no longer buy bread that is deemed healthy, but is it really when you can’t pronounce fourteen of the twenty seven ingredients. I choose to bake bread formy family on Saturday mornings. My recipe has four ingredients, of which one is water, and I add various organic seeds for the crunch and fiber. The following is a link to my bread recipe. It’s easy, doesn’t require an abundance of time and tastes delicious. Give Us This Day Our Daily Bread
Living a clean and holistic life is very gratifying. The rewards are great and exceeds the long days and time spent prepping, preparing, and growing, foods that nourish your body, not poisoning them a little at a time with toxic ingredients found in processed foods.
The first turning of the garden!
I would like close with a great book suggestion for young readers, as a read aloud, and great for the primary classroom. It is written by our daughter and it’s beautifully written and illustrated. Check the book out at the following link;
God bless from the mountains of Kentucky! May your day be filled with joy, hope, the love of Christ, and good nutritious foods that can help heal you from the inside out. Feel free to leave a comment, like, and or follow by blog for more posts on clean and holistic living.
First turning of the garden complete! Awaiting a second plowing and plants!
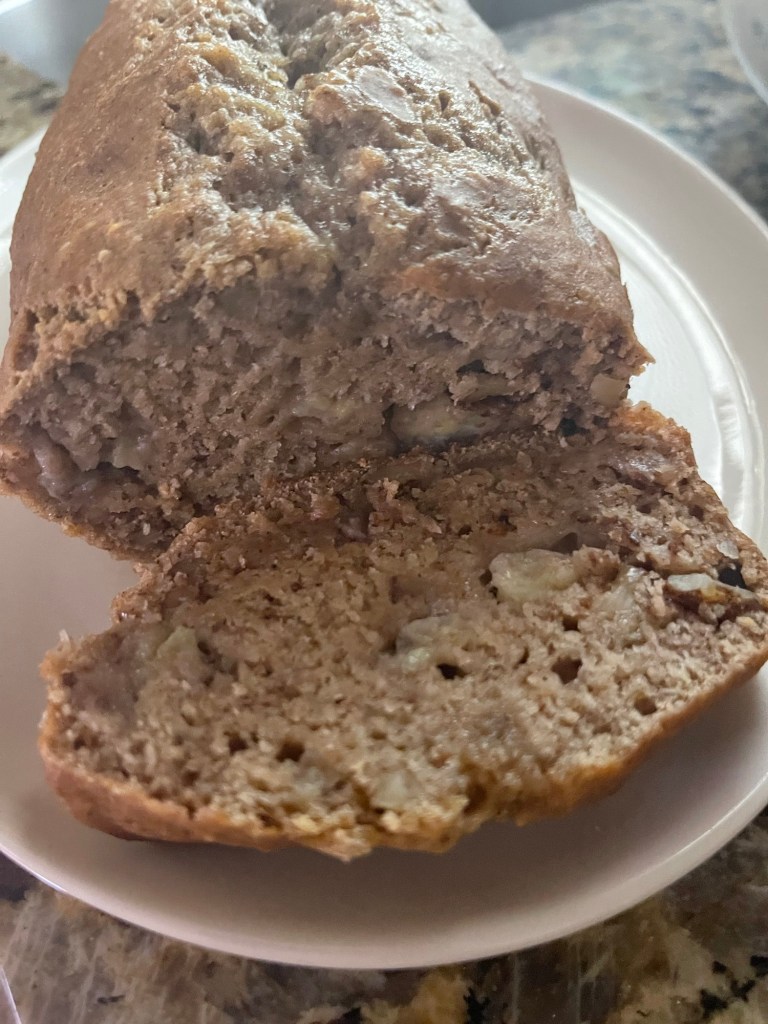
Hello from the mountains of Kentucky! I am super excited to share a new recipe that I have been experimenting with and finally perfected it last week. I love a good moist banana bread. I have tried several vegan recipes with little to no luck with the right amount of moisture and sweetness. This recipe fits the bill for both. It’s quick, easy, and requires minimal ingredients and those that you probably already have in your pantry. It’s also delicious with a cup of hot tea!
Ingredients:
One large overly ripe organic banana or two small overripe bananas
2 cups all purpose flour (I like King Arthur’s unbleached flour)
1/2 tsp pink organic Himalayan salt
1/2 tsp anti-caking organic baking soda
1/2 tsp organic all spice
3/4 cup organic cane sugar
1/2 cup almond milk
1 tsp good quality Non-GMO vanilla extract
1 tsp organic apple cider vinegar
1/2 cup unsweetened applesauce
1/2 cup chopped organic walnuts
Add in options can be; chocolate chips, pecans, raisins, or cranberries.
Process:
Preheat oven to 350 degrees. Spray or butter a glass 8×8 baking dish. Line it with parchment paper and then spray or butter the paper.
Mash the banana, vanilla, and sugar and mix well. Add salt, baking soda, flour, vinegar, and applesauce and fold the ingredients together without overmixing. Add the milk a little at a time and until the batter well. Fold in the walnuts. Add the bread mixture to the lined glass baking dish. I baked my bread for 45 minutes. I checked it at 30 minutes and determined it needed fifteen more minutes to be baked through and through.
Mixed ingredients
I removed my bread from the parchment paper and set it on a baking rack to cool for thirty minutes. Once the bread was cooled, I placed it in an airtight container. I have enjoyed this bread all week as a snack with my lunch, toasted for a light breakfast, and in the evenings with coffee or tea. It is tasty, moist, and not overly sweet but flavorful.
You may add more sugar or even honey for a little more sweetness. If you’re not a fan of walnuts, pecans are a great substitute. I like to toast this bread for breakfast. It’s delicious with a smear of honey or plant butter. Unsweetened dark chocolate chips are a great addition as well. Either way you eat it, as breakfast, a snack, or dessert, it’s a delicious bread.
For now, God bless from the mountains of Kentucky. Feel free to comment, like, and subscribe. I look forward to hearing from you.
Good afternoon from the mountains of Kentucky! Today feels like spring in the mountains. Easter Lillie’s are bloomed, some of the trees and bushes are budding, and I see green plants emerging through the flower bed covering. I am excited about spring as it always feels like an opportunity for new beginnings, time to plant, and time to enjoy the beautiful mountains that we are blessed with.
Summer in the mountains!
For those of you who are serious tea drinkers, and for those who enjoy a cup of tea from time time… you’ll enjoy my series, Tea Time Tuesday. It will be a reoccurring blog post that will include random topics ranging from making teas, uses of teas, to recipes that include tea in them, and occasional recipes for goodies to eat while drinking tea. I will also review books I’ve read while enjoying a cup of tea. While some posts might be simple ramblings or inspirational words. However, today’s post is about a topic that is worthy of conversation. Loose tea verses tea bags.
I’ve been an avid tea drinker for years. I like almost all flavors of teas. But, I do have a few favorites. I love a good chai tea with oat milk, and lavender. I drink peppermint tea almost every day. I like black teas and love a good chamomile tea with either honey or lavender and sometimes both. Regardless the tea I drink, I prefer loose leaf to tea bags. The tea that I grow and dry does not even compare to purchased teas, but there are times when I buy loose leaf, especially black tea and chamomile tea. So, why do I prefer loose leaf to bagged tea? Loose leaf is more flavorful, I don’t have to worry about how long it’s been shelved, I don’t have to wonder if the bags are good quality or could they be toxic. There are so many different reasons, but flavor and the ability to use a tea ball of loose leaf tea a second time, which is a great money and tea saver, especially if you purchase tea. If you don’t like a tea ball, you can always purchase organic tea bags that you can fill yourself. The organic tea bags are great for tea on the go. They store easily in my lunch bag that I carry to work.
I’m curious about your preferences. Which do you prefer bagged tea or loose leaf, and why? I would love to hear from you. For now, God bless from the mountains of Kentucky. I think I’ll enjoy a cup of tea and porch sit a little while on this beautiful spring-like day!