Canning Our Favorite Pickle Relish

It’s bean picking time in the mountains!

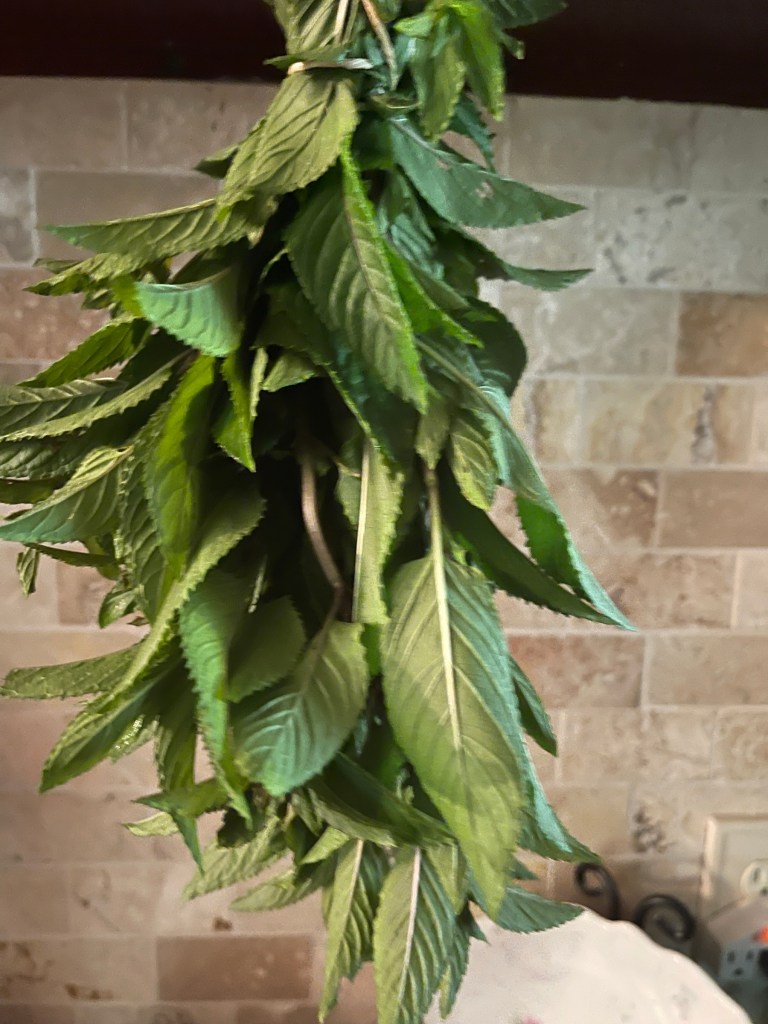
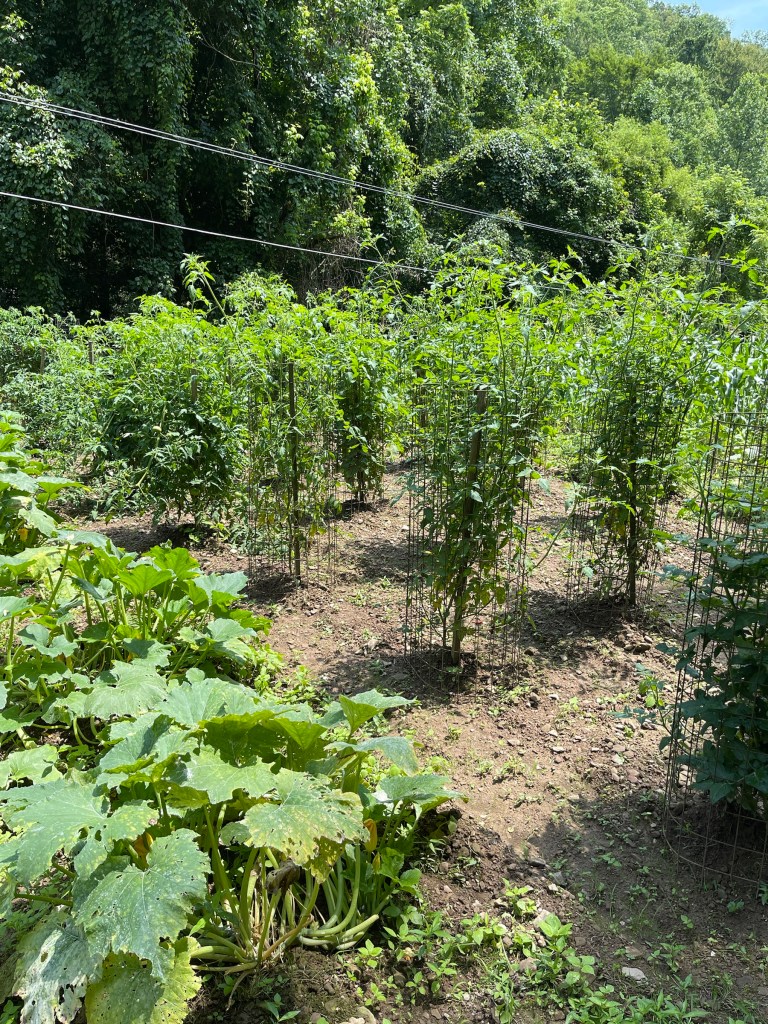
Good morning, from the mountains of Kentucky. I hope your Saturday is off to a wonderful start! It’s been a busy day already for our household. Early morning prayer and meditation with our Heavenly Father, devotion, and studying His word and enjoying fresh perked coffee. God is so good. I love seeing His fingerprints on the small things in our lives as well as the big things. We are truly a blessed people. As you can see from the picture above, it’ll be bean picking time this week!

A larger pot of spearmint grown primarily for mint water and teas.

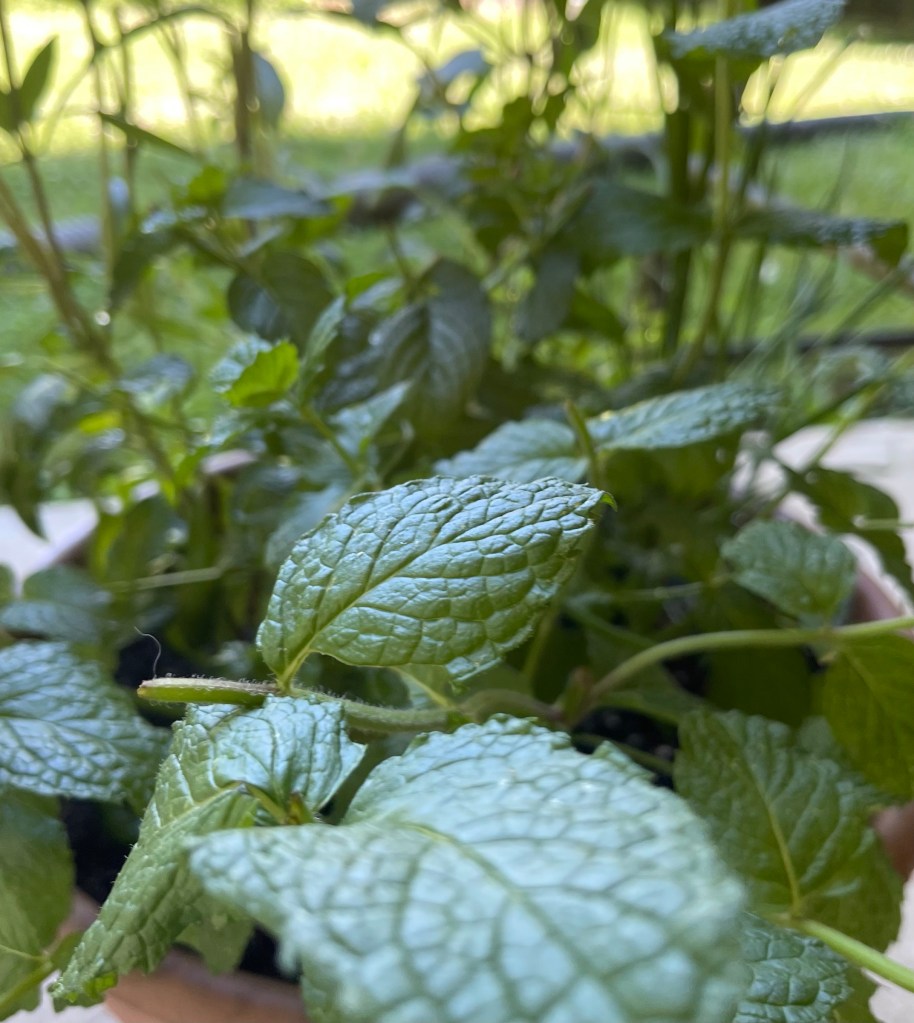
I was amazed to see so much new growth in the mint garden this morning. I created a weak mint tea from teabags yesterday and generously watered both the peppermint and spearmint. Wow! This morning both mints were strutting and showing off lots of new leafs that were healthy and shiny. Don’t throw away those used teabags or tea that might be out of date. Create your own fertilizer that is a rich organic treat for your herbs. I’ll try to make a post later about the uses of tea in the garden. Now, let me share our favorite relish recipe with you!

So, for this delicious pickle relish you’ll work in two a two complete this relish in a two day setting. You’ll need the following ingredients for day one;

Day one:

  • Two or three gallons of fresh cucumbers washed and dried.
  • One medium yellow/sweet onion.
  • One small red bell pepper washed and dried.
  • One tablespoon of salt.

Process for day one; dice cucumbers, yellow onion, and bell pepper into very small diced pieces. Put in a bowl that has a lid. Sprinkle the tablespoon of salt over the veggies and gently toss. Put in the fridge over night.

Day two:

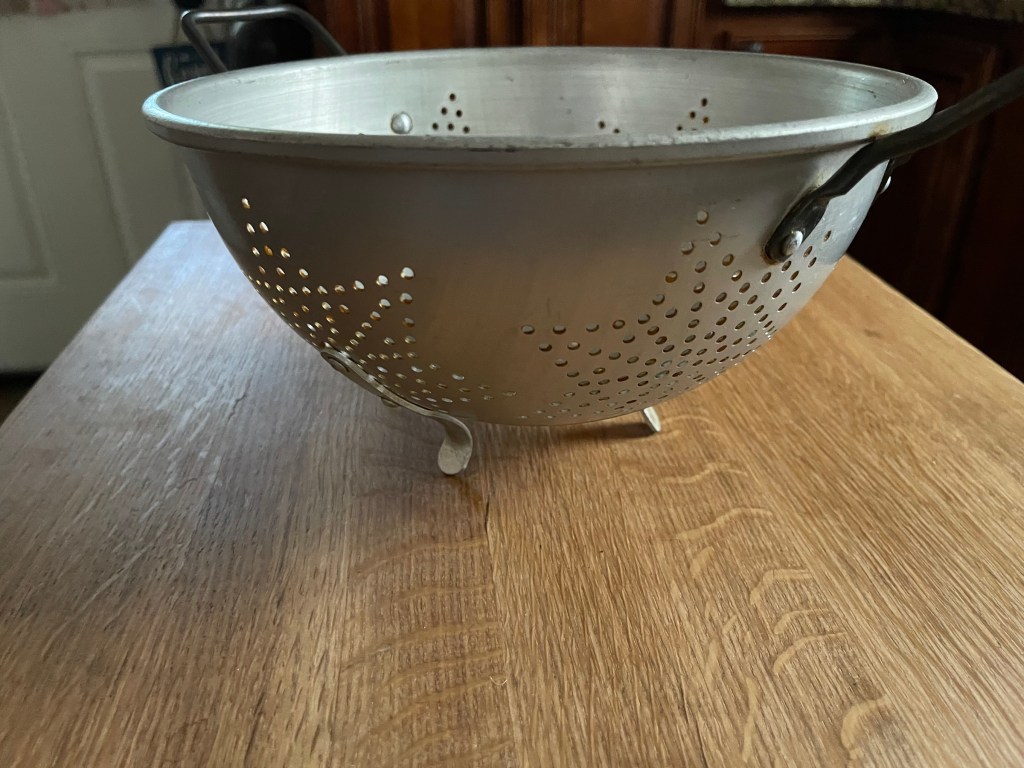
Wash and sterilize pint jars, rings, and flats. Allow them to drain and dry on a clean towel. If you use the dishwasher to sterilize you can bypass this step. Next, remove the veggies from the fridge. Line a colander with either cheesecloth or sturdy white paper towels. Put the colander in the sink bowl and pour the veggies into the lined colander and drain well. You may use additional paper towels to blot and gently squeeze the veggies to help remove the excess liquid. Allow veggies to sit and drain while you make the brine.

For the brine you will need the following ingredients;

  • Three cups of distilled white vinegar
  • One cup of water
  • 1/4 cup kosher salt
  • 1/4 cup white sugar
  • 1 1/2 tablespoons diced garlic
  • 1 1/2 tablespoons of mustard seeds
  • 1 1/2 tablespoons of course black pepper
  • One tablespoon turmeric
  • A couple sprigs of fresh deal
  • One teaspoon of dried dill weed

Combine the ingredients above other than the fresh dill along with the diced veggies in a large pot. Bring slowly to a boil. Reduce heat and simmer on low for ten minutes. Put a little fresh dill in the bottom of each jar and then add the relish mixture to clean jars. A funnel makes this process easier and less messy. Wipe the rims of the jars and add the flats and rings. Place jars in water bath canner with the water covering the lids. Bring the water to a hard boil, and set timer for 10 minutes. Turn the stove off when ten minutes has passed, and remove jars with a jar lifter. Set them aside on a folded towel or cutting board and listen for that wonderful pinging sound to assure you that your jars have sealed. Once the flats have cooled, write the date on them with a permanent marker.

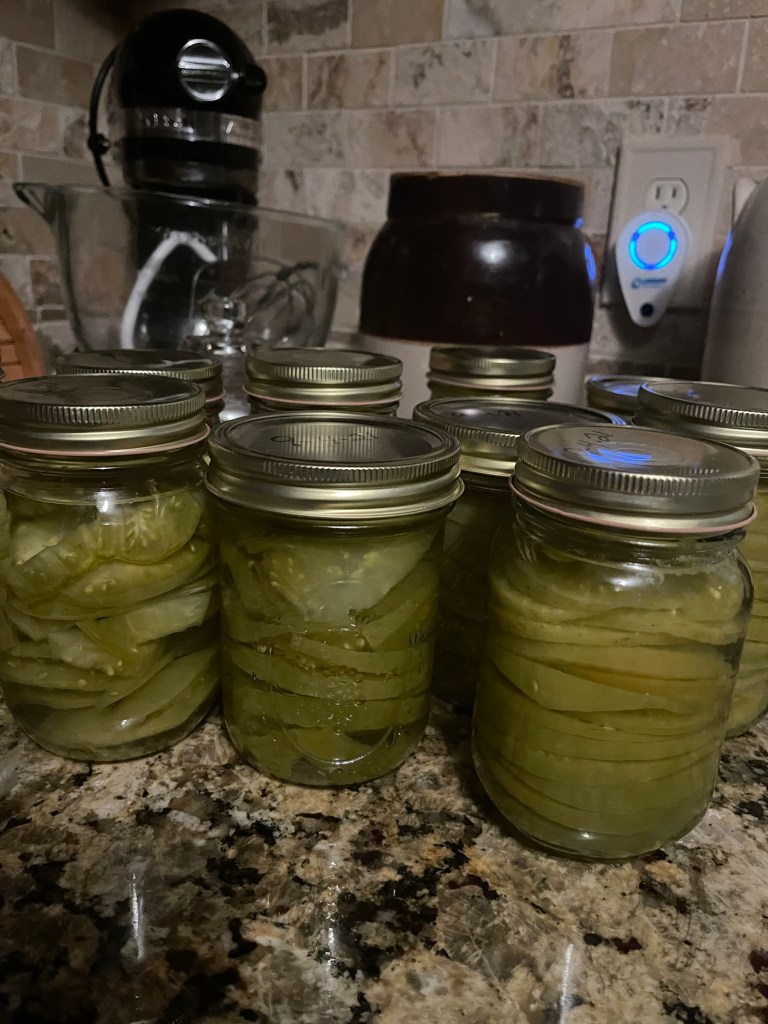
I hope your family enjoys this relish as much as we do. We add it to chili dogs, hot dogs, and hamburgers. My husband loves it on beef burgers and I love it on plant based burgers! Using organic ingredients creates an even tastier and healthy choice for dishes. You may also add a jalapeño in the diced veggies to create an extra spicy relish. Both are a great addition to your summer dishes! This relish is also quite tasty in potato salad or egg salad. Experiment and feel free to let me know you how used this recipe.

Feel free to leave comments or ask questions. I love to hear from my readers. God bless from the mountains of Kentucky.

A Busy Day in the Mountains

Hello, from the mountains of Kentucky! I hope your July is off to a beautiful start! We’ve had a blessed week with just enough rain to water our thirsty garden and make the zucchini, summer squash, and cucumbers explode. The number of gorgeous veggies awaiting my attention caused me to wake even earlier today. After having a hot cup of coffee, relaxing with my daily devotional, prayer, and another fascinating chapter of the word, I looked at the tasks that lay ahead of me for the day. Farming looks glamorous to those who see it as all the veggies you can eat, decreased payout at the grocery store, and the many wonderful health benefits. All of these benefits are true, but the work and the labor are also very real… but satisfying. Chores are a big part of planting, growing, maintaining, and harvesting the rewards. After reading a chapter of my chosen summer read, What the Wind Knows, it was time to get up and get started checking things off my list. Yes, I am a list maker! It helps me feel organized.

The day began with watering the herbs, which needed harvesting again. It’s been a great year for all of our herbs. I quickly clipped lavender blooms to dry for flavoring teas, and clipped various types of mint. After washing and drying the herbs, I quickly tied them in bundles to hang for drying. The aroma of fresh herbs drying in the kitchen makes me happy.

Fresh mint hanging in the kitchen! This is chocolate mint. It makes great tea!
Lavender Blooms for flavoring Tea

Weekly household chores were next on the agenda. One by one, I checked them off my list. But, between chores… the squash, zucchini, and cucumbers were reoccurring thoughts. So, I decided to bake a little zucchini bread. I also vacuum sealed a few bags of sliced squash and zucchini for the freezer to enjoy this winter. Next on the list, was the sink full of cucumbers. Checking my time, I decided that I would have time to make seven quarts of spicy kosher dill pickles, which are always tasty any time of the year. If you’ve not tried my recipe for spicy kosher dills, you can follow the link below to learn more. These pickles are a family favorite, as well as a favorite among many of our neighbors. Canning Spicy Kosher Dill Pickles

We’ve had an abundance of summer squash and zucchini this year!

Now to proofread. My editor is expecting the final revisions of the last chapters to be ready later this week. I am in the homestretch of finishing this nearly year long project. I’m excited for my students to have this new workbook in their hands. It is designed to accompany the textbook I wrote in 2019. Thankfully, the abundance of rain we received over the last few weeks allowed me to work ahead of schedule, but also resulted in lots of weeds. That was another thing on the list to attend to. Hoeing usually means all hands on deck! Again, lots of hard work, but very satisfying work.

The zucchini kept calling my name! I ended up grating several zucchini for the freezer for bread this winter. I use a hand-held box grater and a glass measuring cup lined with white paper towel or cheese cloth. I grate the clean zucchini into the cup until the measuring cup is full. This is perfect for breads as my recipe calls for one full cup of grated zucchini. It also works well because the paper towel or cheesecloth is already holding the zucchini, and ready to be squeezed to remove the liquid before freezing. I felt better about having used several of the beautiful green bounty.

Three hours later, seven quarts of spicy kosher pickles are cooling and waiting to be taken to the basement for good eating this winter! Zucchini bread will be cooling soon. One loaf to eat and one for the freezer. Yes, you can freeze whole loaves of homemade bread. Allow the bread to completely cool, remove from loaf pan, and wrap twice with plastic wrap, then once with aluminum foil. Once the bread is frozen, you can vacuum seal for reassurance of no frost gathering on the bread. When you’re ready to eat the bread, allow it to thaw in the fridge. Once it’s completely thawed, remove the vacuum seal and unwrap and enjoy. It’s amazing how moist the bread is.

Spicy Kosher Pickles

I hope you’ve enjoyed spending a little time with me in the mountains of Kentucky. It’s been a busy day, but one that makes me feel accomplished. Feel free to leave comments. I love to hear from my readers. I’ll share the vegan zucchini bread recipe soon. It’s a keeper. Also, I’m excited to share my new Indian relish recipe with you! I’m hoping to have it posted later this week. Check out the picture beneath the bread photo! God bless from the mountains of Kentucky.

Fresh baked chocolate chip zucchini bread.
Indian Relish recipe coming soon!

Five Organic Gardening Tips

Quote of the week:

Garden work is satisfying to the body and soul, as is the harvest.” ~Dr Bowling

Hello, from the mountains of Kentucky! I hope you’ve been blessed with awesome weather for your gardens! It’s been very dry in the mountains. Our garden is growing and we’re picking, but a lot of hard work has been involved with watering by hand through the month of June. Needless to say, we’ve decided to invest in ground soaking hoses that will water the ground when we want it, or as we need it. For a garden of our size, I’m not sure why we hadn’t already thought about this. I’m often asked questions about the difficulties involved with organic gardening. So, I decided to share five organic tips that can beneficial for your garden at this time of the year.

Love eating from the land… even though it’s a lot of hard work. Our garden early in the year!

Tip One: We’ve also dealt with low calcium in the soil through this very dry beginning to summer. So, through research and back work, we’ve added ground organic oyster shells to the soil around the squash and zucchini. As well as eggs shells and diatomaceous earth. Thankfully the rotting squash and zucchini have come to a stop and we’re back to picking our fill and then some of both fruits!

A few of the straight neck summer squash from our garden.

Tip Two: to add a little extra fertilizer to our herb garden, I’ve been saving organic tea bags and reboiling the bags for a weaker tea and watering the herbs. This is a game-changer for herbs. My favorites are chamomile, mint, and black tea. The plant feed on the rich antioxidants, and the the tea bags are added to the garden as the bags are biodegradable. We add the spicy cinnamon black tea bags around the garden for an additional deer repellent.

Nothing better than fresh herbs to cook with.

Tip Three: in the battle against those pesky beetles on beans, cucumbers, and squash plants. In a spray bottle we mix a spray of 10 drops of lavender essential oil, 10 drops of peppermint essential oil, and 10’drops of citronella essential oil, with a tsp of organic plant based dish detergent. Then fill the bottle with water. This makes a great spay to repel all kinds of munching little friends. We also dust our plants with organic food grade diatomaceous earth for an extra layer of protection.

Tip Four: adding a little potassium to tomatoes while repurposing banana peels. A lot of bananas are consumed at our house. I eat two a day most days. I love organic bananas for oatmeal, baked oatmeal, and as a snack and frozen ones in smoothies. So I’ve learned that not only roses like bananas, do do tomatoes in the form of a tea. To make tea, keep a pitcher of water in the fridge. The pitcher should be about half full to allow for room as you add banana peels. Once you’ve peeled the bananas, add them to the water. You can cut the peels, but don’t have to. There’s no need to cover the pitcher. After a week, take the bananas out and add one part banana tea to five parts water. Use this transit the base of tomatoes. It provides potassium to the soil. This will help produce stronger roots, stems, and great fruit. Banana tea can also be added beside of pepper plants as well.

Banana peel tea.

Tip Five: Begin saving egg shells a couple of weeks prior to planting tomatoes. When it’s time to plant, place an egg shell in the hole before putting the plant in the ground. Egg shells are loaded with calcium and will feed the soil at the roots of the tomatoes and help prevent blossom rot and what some of the old timers called, the blight.

I hope that you find these tips helpful and you have success with your garden this year and for years to come. Feel free to leave comments or ask questions. I love to hear from my readers. Well, it’s time to go pick a while and reap the joys of our labors. God bless from the mountains of Kentucky.

Harvesting Mint for Teas

Good Morning from the mountains of Kentucky. I hope your morning is off to a great start on this beautiful Saturday. We’ve been hammered with extreme temps this week, so today’s high seventies is a welcomed relief. It’s that time of year when the garden needs to be hoed, the weeds need to be pulled, herbs are coming in like crazy, and the harvesting and drying have begun. I took advantage of the cooler temps this morning to prune my herb garden, which desperately needed a trim. I like to trim my herbs in the early morning hours while the dew is still on the ground, and clinging to the leaves. I also like the cool temperatures as it is easier on me and on the herbs.

This is about a fourth of our vegetable garden.
Spearmint for teas and salads.

I have been enjoying mint-infused water this summer, and quite a bit of mint tea. I have already dried two cuttings of various types of mint, as well as other herbs. They’re carefully tucked away in my kitchen herb cabinet in glass jars in the kitchen. Glass jars with air-tight lids are the best method of storing dried herbs. I have had several questions about how I harvest mint. It’s actually quite easy. As I mentioned above, I trim herbs before they become leggy. Trimming herbs actually causes the herbs to take on a more bushy consistency.

Lemon balm for cooking, teas, and health.

As I trim the mint, I place the fresh-cut mint on large cookie sheets lined with a white paper towel or butcher paper. This allows me to keep the mints separated and labeled if necessary. I rinse the mint to ensure there are no ticks or other small pests. While the mint is draining in the sink, I inspect the mint for the best leaves. I try to pick the mint that is void of holes where insects may have nibbled, dark spots, or any other imperfections. I gently pat the leaves dry and place them on a clean, lined cookie sheet and place them where they are not in direct sunlight. It doesn’t take as long for the herbs to dry with this method.

Chocolate mint tea drying in the kitchen.

A second method I use is to follow the above steps, except do not remove leaves from stems. I pat the stems of aromatic leaves dry, gather the mint into a bunch, and wind cotton twine around the stems to tie the mint in a bunch to hang dry. I hang the mint in an area that is not directly exposed to windows or sunlight. It takes a little longer for the mint to dry by this method, but it allows you to harvest the stems as well as the leaves, while also filling the kitchen with a nice fresh mint aroma.

Once the mint in the tray is dry, you may either crumble the mint and add the mint to the mint jar or simply store the leaves in the jar. I use both methods. I like the crushed mint for baking and the whole leaves for tea. You may use either method of storing the dried bundle.

Chocolate mint leaves drying for tea.

A second question that is often asked is; what type of mint do you grow? To answer that, I respond as much as possible. Then I elaborate and explain that I grow peppermint, spearmint, chocolate mint, apple mint, lemon mint, and strawberry mint. I always reply that spearmint and chocolate mint are my favorites.

Finally, the third most asked question is; how do you make your tea? I tell them that I enjoy iced teas and also hot teas, depending on my mood and seasonal temperature at the time. For hot teas, I will typically place an organic black tea bag in my cup, put the water on to boil, choose the flavor of mint I want to have in my tea, and then add the mint to my tea ball. Once the water has reached the right temperature, I pour the water into the cup and allow the black tea and mint in the tea ball to steep for three to four minutes. I add a tiny bit of organic agave to the tea, stir and enjoy. You may add milk if you like your tea milky. I occasionally add almond milk or oat milk to mine.

Small jar of dried chocolate mint.

For cold tea, I boil enough water for a quart jar. I add two black tea bags, and if you like green tea, you can add green tea bags instead of black. I also add a larger tea ball filled with my choice of dried mint or even a mix of mints. Allow the tea bags and the tea ball to steep for forty-five minutes to an hour in the glass quart jar. Stir occasionally, and once the tea has darkened and cooled, you can pour tea over ice and add a little lemon, agave, and fresh mint leaves. This is an awesome drink, that is refreshing, full of antioxidants, and tastes great!

Tips of the week: you can pot various types of mint in flower pots to prevent the mint from taking over your garden, or if you have the room, you can isolate each type of mint in separate herb beds. Mint has a way of being intrusive and will quickly take over and can smother other herbs out. I like to do both pots and beds. My second tip is; as you know, I am a doTERRA essential oil consultant and recently I discovered that one drop of peppermint essential oil takes my peppermint tea to a totally new level. One drop of spearmint essential oil can be added to spearmint tea as well. Do not add essential oils from typical over-the-counter, or aromatherapy blends. doTERRA oils that are identified as supplemental can be added for internal use and wonderful internal benefits.

Lavender awaiting plant butter, teas, or cookies.

I hope that you’ve enjoyed learning about how I harvest mints for teas. I encourage you to grow mint, as it is probably the easiest herb to grow. It is also a very versatile herb that can be used for bee stings, headaches, bruising, as a natural pesticide, and also baking and delicious teas. Comments, ideas, and questions are welcomed. For now, God bless, from the mountains of Kentucky. Remember, God has given us an abundant supply of plants that will help sustain us.

Air Fryer Baked Blueberry Oatmeal

Hello from the mountains of Kentucky!! It’s been a while since I’ve posted. It’s been a busy semester with lots of changes and some exciting news. I’ve just finished writing a lab workbook that aligns with the textbook I wrote in 2019. It should be on the market by the end of summer.

We’ve also been working hard to get our garden planted this spring. With all the rain and some vital equipment breaking down, it’s been a journey. But, we’re in the home stretch! Now comes the hard work, but also the wonderful rewards of fresh veggies!!

Delicious baked blueberry oatmeal

I’m anxious to share one of my favorite breakfasts with you! Baked oatmeal… but not traditional baked oatmeal. I stumbled upon this delicious and very easy recipe while experimenting with ingredients and on the search for something delicious, filling, vegan, and healthy!

I like Quaker Oats because they’re Non GMO

Ingredients include:

1 tsp organic cinnamon

1/2 cup old fashioned oatmeal

1-2 scoop organic vanilla protein powder

1 tsp organic ground flax

1/2 tsp organic chia seeds

2 tbs organic smooth peanut butter or preferred nut butter

1 tsp baking powder

1 tbs organic raw agave or honey

A splash of plant milk (I prefer almond milk)

1/2 cup organic blueberries

My favorite plant-based protein powder!
Add dry ingredients first and mix before adding moist ingredients.

Process:

Before you begin mixing, preheat the air fryer for five minutes. My air fryer doesn’t have a temperature gage, but would assume a moderate temperature would work. Mix all the dry ingredients. Then one by one add the most ingredients. Wash the blueberries and add them as the last ingredient. I like to mash some of the blueberries for extra flavor. The mixture will look similar to a thick cookie dough.

Mixture after mixing all ingredients

Don’t worry about having a big fancy air fryer! my larger air fryer is actually taking up space in the basement! I love this small air fryer for individual servings and servings for two! It works just as well and easier to store away when finished. Empty the mixed ingredients in the pre-heated air fryer. I alway form mine into a larger patty and bake for ten minutes. Check oatmeal at the half way mark as all air fryers vary in baking time. When the oatmeal is browned to your preference, empty the oatmeal in a plate and flake the oatmeal up with a fork. I like to add a drizzle of organic maple syrup over my oats, but that’s just my preference. I also like some type of fresh fruit on the side.

A small air fryer works well for this dish!

There’s something delicious that happens when the peanut butter and protein powder bake together. The berries are tender and burst in your mouth! This is honestly more like a dessert fruit crumble than breakfast. I’ve made this with pumpkin instead of fruit and it’s quite awesome! check out the plate! This was a recent thrift find. I automatically grabbed it when I saw it. It is identified to the plates that my mom used when we were growing up. I enjoy reflecting on the meals she prepared while eating. It’s now my favorite breakfast plate.

One of my favorite breakfasts!

I hope you enjoy this delicious, quick, easy, plant based breakfast. Feel free to leave a comment or share your version of air fried baked oatmeal. For now, God bless from the mountains of Kentucky!

Teatime Treasures

Good Morning, from the mountains of Kentucky. I hope your week has been filled with happiness, good food, family, and lots of sunshine. We’ve gone from 70 plus degree temperatures to forties within a few days and now, we’re expecting up to six inches of snow for the weekend! March weather in Kentucky is always full of surprises.

I love a good surprise! One my favorite kind of surprises comes from thrifting! When you thrift, you never know what you’ll find. I have found thrifting to be a therapeutic hobby, and a lasting tradition in our family for generations. When I grew up in the mountains of Kentucky, spending time with family was a priority. We found joy in things that we loved to do whether it was congregating for a big family dinner, attending a special church service, gathering on my Mamaw’s store porch to catch up on the events of the week, working the gardens, or thrifting at the dime store.

A Hidden Gem

I am a bit of a creature of habit. I love many of the old traditional dishes from my youth, but I also love trying new dishes. However, I find it a bit of a struggle to change a timeworn tradition. As a child it was a tradition to go to the dime store on Saturday mornings. The dime store was what we called the second hand mission store where everything cost a dime. My cousin, and I, would load up with our grandmother, great aunt, and uncle who was the designated driver. Neither my grandmother or grandfather ever learned to drive, but they never planned a trip that didn’t include a family member who enjoyed driving them. It was an exciting time as kid to hold those well earned dimes in our hands and dream of the treasures that awaited us.

As time passed thrifting wasn’t as much of an interest for us as teens. But, what most of us discovered is that the love of thrifting never completely left us, but lay dormant waiting for just the right time to surface. Since the days of our youth in the late sixties and early seventies, dime stores have grew in popularity. They’ve become the stores to find retro clothing, farmhouse decor, and much more. The prices have increased from everything being a dime to various different prices, depending on the store. But the love of searching for treasures remains the same and for many a way of carrying on a mountain tradition.

Redbird Community Store in Beverly Kentucky

Our daughter, daughter in law, and two of our granddaughters share a love for this time worn tradition. We enjoy a couple of days a month browsing vendors malls, GoodWills, estate sales, mission stores, and flea markets. There’s something about searching the shelves that are filled with dishes, glassware, odds and ends, baskets, and bins of household goodies, shelves of books, and racks of clothes, that brings an element of excitement and unity. We’ve learned that the joy lies not only within the findings, but also in the search and spending time with family.

I’m excited to begin sharing weekly treasures with you! I’ll share just a few of the treasures we found, but it would be impossible to share them all. The picture below is one of my new favorites! This absolutely gorgeous hand embroidered and crocheted table runner was definitely a score for only 1.25. Once it is washed and pressed, it will adorn the fireplace mantle in my bedroom. Based on the material and research, it appears to be an early 1950’s piece. Whoever made this treasure, really put a lot of tender loving care and obvious heart into the intricate details. It’s also in excellent condition.

A gorgeous hand crocheted and embroidered table runner.
Seven Star Vintage colander

I also found an aluminum seven star vintage colander. It didn’t look like much when I pulled it out of the bin, but after cleaning it up… it was in excellent condition. It has been housing bananas in our kitchen, and I’ll be honest, I’ve enjoyed using it as well. There’s something about the simplicity of its lightweight design that makes straining foods easy. Truly another great find that has stood the test of time. I’m not sure about the date, but I’m still researching and will update you later.

I’m truly a nerd at heart. I love to strap on my vintage apron, and cook barefoot in our kitchen while using some of my thrifting treasures. I like to imagine who’s kitchen the sifter or crock came from. I like to imagine their homes, their faces, the dishes they’ve prepared, and wonder what their lives were like and what their names may have been. I also enjoy decorating with vintage utensils, crocks, linens, and other tried and true treasures.

Thrifting is a year-round hobby, that brings joy to my heart, keeps a tradition alive, and family time well spent. We found an abundance of treasures on our last thrifting spree. I’ll share more teatime treasures next week. For now I’m going to relax with a cup of sweet and spicy hot tea and enjoy re-browsing our treasures. God bless from the mountains of Kentucky!

Scrambled Tofu and Spring Daydreams

Good morning, from the mountains of Kentucky! It’s a beautiful sun shiny Saturday morning in the mountains. The birds are whistling their good morning calls and filling the trees with beautiful spring-like music.

I’ve missed everyone! Its been a while since I’ve posted. We had a fairly mild winter in the mountains with enough snow for the grandchildren to enjoy sledding and building snowmen. I love snuggling in with a good book during winter, but the colder weather also brings out the crafty side of myself. I’ve enjoyed perfecting a few older dishes and creating a few new ones. One of my previous favorite breakfast dishes is now a new favorite! I am super excited to share with you my new and improved recipe for tofu scramble! It’s even tastier than before and tastes more like scrambled eggs, is very satisfying, and also keeps you full for hours! See the recipe beneath the image below.

Scrambled Tofu for breakfast.

Ingredients:

3 ounces of extra firm organic tofu pressed

One teaspoon of organic extra virgin olive oil

1/4 cup organic vegetable broth

1 tsp of your favorite nondairy plant butter

Cup of sliced organic portobello mushrooms

Two cups of organic baby spinach

One slice of preferred nondairy cheese

Spices include: turmeric, paprika, salt, black pepper, garlic powder, onion salt, and black salt

Begin by warming a skillet over medium heat add the olive oil and sliced mushrooms. I like to add the vegetable broth next which allows the mushrooms to absorb the broth. Lightly season the mushrooms with salt and pepper.

While the mushrooms are sautéing, dry and press the tofu and weigh if it isn’t pre weighed. When the mushrooms appear to be moist and darkened, crumble the tofu in the pan. Add turmeric, about a teaspoon should suffice. Fluff the tofu to incorporate the turmeric, which will give it the color of eggs and also be beneficial for your bones and inflammation. Add remaining seasoning, except the black salt, which adds the eggy flavor. Reduce the heat and shred the slice of your preferred nondairy cheese. My preference is provolone. Add the spoon of nondairy butter. I enjoy Country Crock best. Add a generous sprinkle of the black salt and spinach to the scramble. You may add extra seasoning to suit your preference. Sauté until the spinach has wilted to your liking and the nondairy cheese has melted.

I enjoy the tofu scramble with Ezekiel toast lightly buttered with non dairy plant butter and fruit. You may add any breakfast side or seasoning that you enjoy. For instance, some mornings I add sautéed onions and peppers with a dash of cayenne for a Mexican dish. The possibilities are endless. I was amazed at how adding the black salt made this scrambled egg imposter a vegan delight! I hope you enjoy this dish as much as I do.

I’ve also enjoyed crocheting again! With winter came several new projects. I’ve enjoyed crocheting and sharing handmade afghans and other gifts with family. I’ll share pictures of this project once it’s completed. I can’t wait to surprise a very special family member with this afghan.

A surprise gift in the making!

While the mountains slept beneath the snow and the cold temperatures surrounded our home, my laptop was ablaze with a new book! I’ve been busy writing a workbook to accompany the textbook that I wrote for my college courses. I’m happy to say that this project is in the home stretch, and will go to print before the fall reel begins. My goal is to have all edits complete before time to plant our garden, which I’m more than ready to begin.

I hope you’ve enjoyed my post this morning and will enjoy my scrambled tofu dish! I love to hear from my readers! Feel free to stop by and read other posts and enjoy new and upcoming recipes and experiences from life in the mountains. My next post will include my recipe for delicious vegan protein balls!! They really satisfy a sweet tooth with no guilt! Honestly, it’s hard to stop eating them!

Now, let’s go enjoy some sunshine and a little porch sitting! God bless from the mountains of Kentucky!

Porch sitting, planning gardens, flowered, herbs, and counting our blessings.

Canning Green Tomatoes For Frying

Hello from the mountains of Kentucky. Can you feel fall in the air? With the days becoming shorter and the nights getting much cooler, you can tell that fall is just around the bend. With fall also comes garden remnants. Lingering tomatoes here and there, an occasional head of kale that decides to sprout new growth, and the last nubbins of corn. We’ve had a really good tomato crop this year. We’ve ate our belly’s full, canned nearly one hundred quarts of tomato juice, an abundance of tomato sauce, and a good deal of crushed tomatoes. We’ve canned pickled tomatoes and and fried quite a few, which by the way is one of my all time favorite dishes!

A few of our tomatoes early in early summer.

A few years ago while frying a pan of fried green tomatoes memories of eating my mom’s delicious fried green tomatoes filled my thoughts. I savor those memories and enjoy the trips down memory lane. When I was growing up life in the mountains was simple, plain, and a time filled with family and always good southern cooking, With that thought, I decided that fried green tomatoes didn’t have to be a seasonal food. I wanted to enjoy them year around. So, I began the journey of trying new recipes.

I fried the tomatoes as if they were ready to eat and froze them in vacuum sealed bags. That was a great way to have access to a quick dish of deliciousness, but it wasn’t quite the same as frying them fresh. They’re good, just not as good as fresh fried tomatoes. So, moving forward, I decided to try an idea to can green tomatoes. This is what I died. While canning a batch of my grandmothers pickled tomatoes, I made up a jar of sliced tomatoes with a few preserving ingredients, sealed the jar and added them to the canner of pickled tomatoes. All I could lose was one jar of tomatoes. I was excited to see how they turned out. The rest of the story is why I’m posting about my recipe for preserving green tomatoes for frying! It was a success!

Sliced green tomatoes preserved for frying!

It’s a simple recipe. I hope you like it.

Ingredients: Green tomatoes, lemon juice, salt, and water. You’ll also need clean pint bars and a canner.

Process: Wash and sterilize jars. Add a teaspoon of lemon juice and 1/4 teaspoon of salt to each jar. Rinse tomatoes, pat dry, and slice tomatoes. Place slices of tomatoes in pint jars leaving about a half inch for head space. Bring a tea kettle of water to a boil and using a funnel add boiling water to each jar. Don’t forget to leave about at least a half inch of space for head space. Add a teaspoon of lemon juice and 1/8 teaspoon of salt to each jar.

Wipe rim of jars and place clean and sterilized flats and rings on each jar. Place jars in a canner of water with water covering the jars by at least two inches. I use a stove top canner because I enjoy the old fashioned method of a water bath for canning. Allow water to come to a boil. Allow to jars of tomatoes process under the boiling water for 35 minutes. Remove carefully and allow to cool. Always add the date to the lid of all jars. This year, I added a 1/8 teaspoon of pickle crisp to few pint jars as an experiment. When I fry the first batch, I’ll let you know how they turn out. Experimentation is one of the best methods of learning. Feel free to check out my pickled tomato tomato juice recipes!

I hope you enjoy this method of canning and winter fried green tomatoes as much as we do! Feel free to leave comments and also check back for my new recipe of refrigerated spicy pickled grape tomatoes. I’m going to try to post that easy and delicious recipe next week. For now, God bless from the mountains of Kentucky!

Reflecting on the Past

Good morning from the mountains of Kentucky! I hope your day is off to a great start! The weather is beautiful here in the mountains this morning. Temperatures were in the mid-fifties when I awoke this morning. Mornings like these transport me back to mornings that I cherish. Cool September mornings reminds me of my childhood in the mountains. I loved early cool mornings and porch sitting with my mom or grandmother. We called our grandmother, Mamaw. She and Papaw were a huge part of all of our lives, and our small community.

Enjoying a good book on a cool September morning.

While porch sitting this morning, I began to think about days of my youth. I thought of how when we were children the days seemed to last forever. Now as an adult days often don’t feel long enough to get everything on out to do list done. Maybe we’re rushing life instead of appreciating it. Have you noticed fall holiday decorations come out in the stores before the hot days of August have passed? What are you supposed to do? Do we enjoy days by the pool, a summer walk, or are we supposed bypass August and begin decorating with pumpkins?

Maybe, it’s that we don’t take time to cherish the moments in the day. Maybe we’re overlooking the smaller things that amazed us as kids. A school of minnows swimming in the creek, a squirrel gathering nuts for the winter, or the amazing web a spider so cleverly wove. Maybe, we spend too much time on social media wishing our lives were like others, or worrying too much about things we can’t fix anyway. Before we know it, we’ve been robbed of precious hours of our day worrying and wondering, instead of appreciating the simple things in our life. Simple things can be a flower bloom, a gentle breeze, a good book, an afternoon of fishing, or spending time with grandkids canning and preserving, and teaching them about family traditions.

Teaching even the youngest grandchildren about gardening.

As a young girl growing up in the mountains, September days were filled with days of canning the final vegetables from the garden. It was a time to can and preserve the final lingering tomatoes and peppers, dry the last of the beans that were left clinging to the fences, and a time of preparation, work, and family. This was and still is a time of a mixed emotions; happy and grateful for the bounty of our hard work, and also sad that the fresh vegetables will soon be gone. It’s always a time of reflection for me. Cool foggy September mornings takes me back to my youth in the mountains of Kentucky when life was simple, hard, yet a life filled with love, family, and respect.

Fog rising above the mountains.

I remember rising early with excitement to sit on the porch of Mamaw’s store with her. The air was cool, fog lingered near the tops of the mountains, and relatives were busy getting their mornings started. Papaw was usually in the garden, mommy would be working in our garden or the flowers. Customers walked to Mamaw’s store to spend a few dollars or sometimes just to share conversations or news they had to share. Neighbors passed always waving or greeting us with a howdy, hello, or good morning. All the while, we worked for hours stringing the last of the garden green beans on heavy quilting thread. The long strings of beans were then hung on the front store porch from old rusty nails near the ceiling of the porch. They hung there to dry during the later days of summer. Once the beans were dry, they were removed from the string and placed in a plastic container and stored in the old deep freeze that stood in the back of the store. They were later rehydrated and cooked as what we referred to as, shuck beans. I remember Mamaw cooking them with a piece of pork and plenty of seasonings. They were delicious served with potatoes and cornbread.

Mamaw, my aunts, and my mom were always planning ahead for cold days of winter when traveling to a grocery store was not as common as it is today. Life in the mountains in the sixties and early seventies was a simple time devoid of social media, television drama, opinionated media, and especially devoid of a lazy society. We were raised hard, but raised with pride, good work ethics, and raised to know about Jesus. Life was simple, but yet life was happy and we knew how to plan ahead for a rainy day.

Mamaw’s pickled green tomato recipe still alive today.

Life in the mountains has changed since I was a little girl, let’s face it life as we all know it has changed a lot in the past three years. However, we still have a choice to enjoy the simple things in life, take time to stop and smell the roses, rise early to greet the day, savor family time, work hard, love deeply, forgive others, help a friend or neighbor, and to plan ahead for our rainy days. With the many recent changes in our world, I am even more determined to hold on to traditions of the past. They were good traditions filled with checking on neighbors, baking a friend a cake, checking on the elderly, taking time to listen to their stories of the past, attending church on Sundays, praying for others, taking pride in our homes, working, and loving others, while also planning ahead through canning and preserving.

Fresh canned tomato juice from our garden tomatoes.

There’s something rewarding about planting seeds, watering them, watching them sprout from tiny sprout into a beautiful plant filled with a rainbow of vegetables. It’s even better to set a table for your family that is spread with a meal that was 90 percent grown on your land with love of your own labor. Yes, planning ahead for a rainy day was a tradition that I enjoy still carrying on. I also enjoy sharing with our elderly neighbors who seem to ever so quickly be leaving this life for their eternal home.

I’ve thought much about that dying generation of elderly grandmothers and grandfathers a lot lately. I miss my grandmother even more when I think of all the memories that we made stringing beans and also canning them. I miss the days of porch sitting in the afternoons, listening to my relatives stories of days gone by, laughing at their funny tales and also quivering a little from the scary stories. I miss star gazing at night with my cousins in the backyard, playing red-light, green-light in the lane beside Mamaw’s store, catching crawdads in the creek, hearing my relatives praying at night before they turned in for the night, and miss those that have passed on.

Yes, cool September mornings brings back a flood of memories. I recall happy memories, sad memories, and memories of a time when the simple things in life, hard work, our neighbors, and self was appreciated. A time when people took time to love deeply, enjoy the fun times and work through the hard times without blaming others. When respect was taught, caring for elderly neighbors was just what we did, and days that families planned and worked together planting, tending, harvesting, preserving, and enjoying the time together listening to stories of days gone by, while carrying on a mountain tradition.

Three generations picking poke salad.

After a beautiful morning of emotional reflection, quiet time of prayer, finishing a chapter in the book I’m reading… I’m off to work on canning tomatoes today. I hope you have enjoyed my reflective ramblings this morning. Have a safe and wonderful holiday weekend. For now, God bless from the mountains of Kentucky.

Vegan Apple Bread

Good Evening from the mountains of Kentucky! It’s a gorgeous day in the mountains today! I enjoyed a walk around the garden today with the warm sunshine on my face. It felt good to relax a bit. Life has been hectic on our small farm this week. We picked our first picking of beans this week. We picked a bushel and a half, which is not bad for the first picking! We enjoyed them with dinner last night and canned the remaining beans for a total of thirty quarts. Farm life is a busy life, but one that I truly enjoy. There’s a sense of satisfaction with planting, tending, watching the crops grow, and then harvesting, cooking, and canning the fresh veggies! It’s nice to have home canned vegetables and fruit for meals in the cold winter months while the garden is resting beneath the mountain snows gaining nourishment for the next season.

First batch of beans of the season canned.

I’ve also enjoyed trying a few new recipes this week, with fresh produce. Im excited to share my recipe for vegan apple bread with you. It’s the perfect time to try this recipe as the apple trees are loaded with beautiful apples right now. My family described the vegan apple bread as being the best bread I had made! This brought a big smile to my face. I love to create recipes that makes my family happy! I hope you and your family enjoys this recipe as much as mine did. I have a feeling that I’ll be making this moist, flavorful, and delicious bread for most family gatherings in the future.

Vegan apple bread

Ingredients:

  • Two apples of choice (I used honey crisp)
  • One half cup of craisins
  • One half cup of golden raisins
  • One half cup of chopped organic walnuts
  • Two cups of whole wheat flour
  • One cup of organic raw cane sugar
  • Two tablespoons cinnamon
  • One tablespoon nutmeg
  • One teaspoon cardamon
  • One pinch of salt
  • One tablespoon baking powder
  • One teaspoon pure vanilla
  • three flax eggs (see recipe below)
  • One cup unsweetened apple sauce
  • One half cup unsweetened almond milk
  • One half cup unrefined coconut oil

Preheat oven to 350. Spray a Bundt pan with organic cooking spray and set aside. Mix all dry ingredients fold in fruit and nuts. Add remaining ingredients one at a time folding the mixture after each addition saving the milk until the final ingredient. Once all of the ingredients are combined (the mix will be thick) use an ice cream scoop to dip mixture into the pan. Press mixture gently once all of the mixture has been added to the pan. Bake for 60 minutes. Remember oven temperatures may vary. When a tooth pick comes out clean, your bread is ready. Allow the bread to cool completely before trying to remove it from the pan to prevent it from sticking.

Once the bread is cooled, place a large plate on top of the pan and gently turn the bundt pan upside down still holding the plate and the pan to allow bread to come out onto the plate. I run a small flexible spatula or small handle of a spoon along the edges of the bread to help ensure it releases. You might have to tap the bottom of the pan as well. Once the bread is on the plate, using a small mesh strainer, sprinkle organic confection sugar over the top of the bread.

This bread is a great breakfast treat, can be made into muffins, and also tastes great with hot cup of coffee. I hope you and your family enjoy this delicious bread. Feel free to leave a comment and tell me how you enjoyed this recipe and if you ate it for breakfast, or dessert. For now, God bless each of you. Have a blessed week and weekend. Check back in a few days for my newest squash soup recipe and more memories from the mountains of Kentucky!

Tomatoes are doing great this year!

Flax eggs are basically ground flax seed and water. Mix one tablespoon of flax seed to two tankards of warm water for the equivalent of one egg. Mix ingredients using a fork in a small bowl.