

It’s hard to believe that fall is upon us! While walking Freckles this morning I noticed the colors of the leaves. The subtle changes that are already taking place are beautiful, which make me anxious for all of the fall festivities, foods, colors, fashion and every part of fall except knowing that winter follows these wonderful months. Dreading the snow and ice of winter is a natural part of living in the heart of the Appalachian Mountains…but I can honestly say, there’s no place like home and I can’t imagine living anywhere but the mountains of Kentucky.
With the happy thoughts of fall also came a bit of sadness. As we walked past our garden a mix of emotions consumed me. We’ve been very blessed with a bounty of delicious vegetables this year. But, seeing the final tomatoes of the season struggling to cling to the dying vines, the bean vines turning yellow and the corn stalks anxiously awaiting becoming decorative fodder shocks…a bit of sadness consumed me and filled my heart. I knew that I would miss visiting our garden and picking vegetables each evening. I would even miss hoeing the rows of ripe delicious vegetables, all the hours of hard work…but then thinking about the abundance of canned food our garden has provided somehow made the upcoming days of winter a little less undesirable. Suddenly, I had an overwhelming urge to cook a bit stock pot of homemade vegetable soup!
With the last days of summer approaching also comes the time to can tomato juice. My family loves tomato juice in homemade vegetable soup, chili, macaroni and tomato juice and sometimes just as a wonderful and tasty juice to drink. Anyway homemade tomato juice is incorporated…it’s delicious and always makes the dish a bit tastier!
When I first began canning for myself and my family. I was eager to incorporate skills I learned as a child growing up in a farming community and also experiment and create strategies of my own to discover my own style. I was eager to make it mine, to know it and to own it! Over the years I have learned many new tricks, strategies, and ideas that have made canning much more pleasurable and shortcuts that also helps canning fit into my busy schedule. As a college professor, writer, wife, mother and grandmother my schedule can fill up very quickly, as I’m sure yours does as well. I also wanted to find methods to can healthier food to accommodate my style of clean eating. I’m anxious to share my quick and easy method of canning delicious time-tested tomato juice with you so that you can also preserve your own delicious jars of tomato juice for you and your family.
Ingredients:
Fresh tomatoes (I typically process 3-5 gallons of tomatoes at a time, but you may process as few or as many as you have)
Table salt
Lemon juice
Tools:
Quart jars with rings and lids
Water canner
Large fine mesh wire strainer or sieve
Ninja, blender or food processor (I prefer using a ninja but either will work)
Large stock pot
Wooden spoon
Funnel
Process:
Wash and sterilize jars, rings and flats. Add a tablespoon of lemon juice and one-quarter teaspoon of salt in each quart jar and set aside. Wash tomatoes, cut the core and any bruised or bad spot out of the tomatoes. There’s no need to peel the tomatoes. Cut tomatoes into quarters and place in the ninja or blender. Using the ninja I pulse several times and then process the tomatoes for a couple of minutes, usually only two minutes or so, just until they become a thick tomato puree. Pour the puree into the large stockpot. Once all of the tomatoes have been processed through the ninja and poured into the stockpot turn the burner on and slowly bring to a boil. Once the tomato puree is boiling begin stirring and allow tomatoes to boil five minutes stirring constantly. After five minutes turn the burner off and remove tomatoes from heat.
Place the funnel in the mouth of the quart jar. Holding the strainer or sieve over the funnel begin adding the tomato puree into the strainer. You may use a ladle to add the tomatoes to the strainer. Using the wooden spoon press all of the tomato mixture through the strainer and through the funnel filling the jar with beautiful tomato juice. Once the jar is full with at least a half-inch head space remaining wipe the rim of the jar and place the sterilized flat and ring on the jar. You can then clean your strainer out. You will notice that there’s not much left in the strainer, but you will find seeds and a little tomato peel remaining. The great news is there are little to no seeds in your juice! Yay!
Continue filling the jars by pressing the tomatoes through the strainer and into the jars. Once you’ve filled the jars (usually a 3-5 gallon bucket of tomatoes makes at least 7 quart jars of juice) place jars in the canner with water covering the jars by at least an inch. Slowly bring water to a boil. Once the water begins to boil process the jars of juice for twenty minutes. After twenty minutes turn the stove off and allow the water to settle and slightly cool. Carefully remove jars from the canner and place on a towel or cooling rack. You should hear that wonderful popping sound that we all enjoy hearing so much! The jars should begin to seal right away. Once they’ve sealed and cooled you are ready to add the dates on the lids with a permanent marker and add the beautiful jars of red deliciousness to your pantry shelves!
I have learned that canning a few jars of juice at a time prevents me from getting burn out and becoming overly exhausted with making tomato juice. I have also found that I still gain as many jars of juice over a period of weeks or possibly two months as I do when I have tried to juice bushels of tomatoes at one time. I like juicing in increments as I can involve my grandchildren and allow them to learn the process of canning and gaining a cultural experience and learn a tradition that many have already forgotten. I love passing down cultural experiences from generation to generation.
Update:
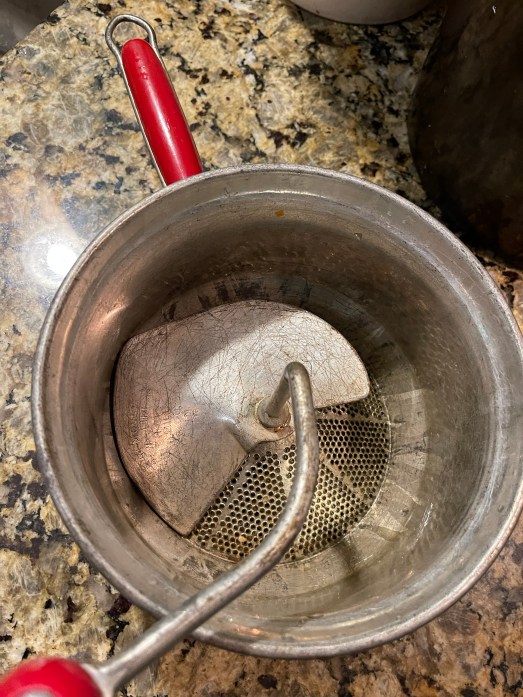
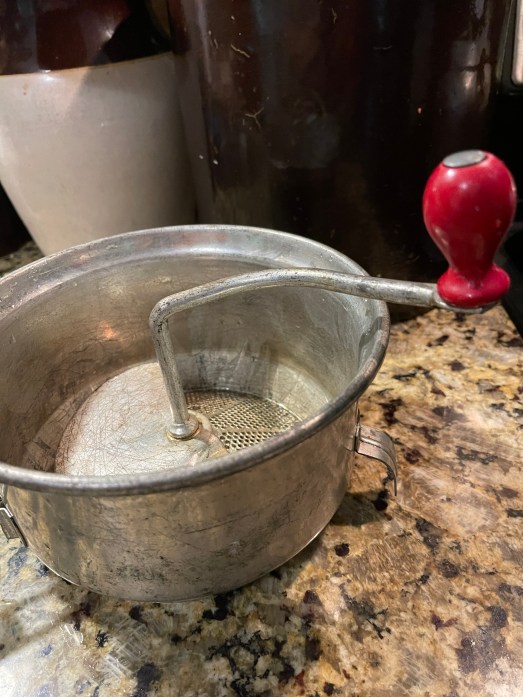
Since I made juice last year, I purchased an antique utensil primarily for decorative purposes, but decided to give it a try today while we were canning tomato juice. Let me say this was a game changer! We followed all of the steps above, except the strip with the strainer. Instead of straining, we added the boiled tomatoes to the food mill. New mills can be purchased in multiple places, but I’m passionate about antique utensils. Anyway, we filled the canner with jars of beautiful red juice in less than thirty minutes.
I hope that you enjoy my methods of canning tomato juice as much we do and find as much pleasure in the dishes that you create with this tasty deliciousness. Be sure to check out Canning Green Beans the Time-Tested Way for another time-tested method of preserving your beautiful bountiful vegetables. If you’ve enjoyed my recipes or articles, please feel free to leave a comment. I truly enjoy hearing from my readers. Also, thank you for your continued support. For now, blessings from the mountains of Kentucky!
Discover more from A Healthier Me...Homesteading Simple & Clean
Subscribe to get the latest posts sent to your email.

Pingback: Vegan Chocolate Chip Coconut Protein Bites | A Healthier Me...Simple & Clean
Pingback: Why We Homestead | A Healthier Me...Homesteading Simple & Clean