Gluten Free Plant-Based Carrot Cake

Hello, from the mountains of Kentucky. Snow still covers the ground on the homestead. While it has melted in a lot of places, it lingers here. Our farm lies down between two mountains resulting in us being behind the north side of the mountain. Our farm is located in what Appalachian people call a holler! We don’t mind it… I can’t imagine living anywhere else. Our homestead is the property in the end of the holler. No one above us, in front of us, or behind us. We love the privacy and lack of a of seeing traffic passing by. We have one neighbor who can see the lower end of our land, which helps with insurance and to keep an eye on our property if we’re gone. All that being said, I am excited to bring a new recipe that is gluten free, dairy free, and vegan it can easily be changed to non-vegan as well.

I was challenged with creating a dessert for our daughter’s birthday, that our youngest grandson could eat. He has recently become gluten and dairy intolerant. He tested negative for celiac disease and allergy tests are scheduled to help diagnose the problem. Until an official medical diagnosis is made, we’ve strived to remove both dairy and gluten from his diet, as this is what seemed to give him the most trouble. Our efforts seem to be working. We also discovered while on this gluten free journey that many spices contain gluten. I have used organic spices for years and was happy to learn that the majority of organic spices are gluten free. However, we must always read the labels to be for sure. With all that being said, I am excited as we move forward to post gluten free recipes that are also dairy free and vegan in upcoming posts. Here we go with a first, which was a huge success! Carrot Cake!!!

Cake Ingredients:

  • Egg substitute equaling 4 eggs ( I like just egg)
  • 1 1/2 cups of organic cane sugar
  • 2/3 cup of organic light brown sugar
  • 2 tsp of pure vanilla extract
  • 1 cup of melted organic unrefined coconut oil
  • 1/2 cup of sweetened almond milk with a tsp of organic white vinegar (you may sub for buttermilk if not following a plant based diet)
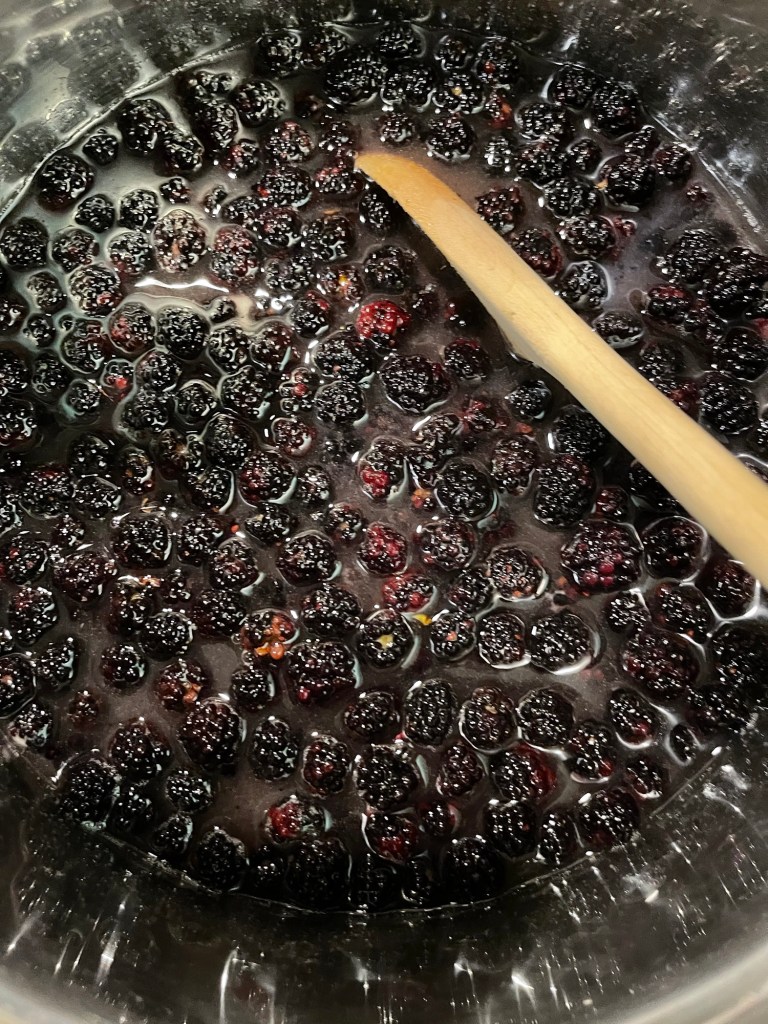
  • 1/2 cup drained crushed pineapple in pure juice no sugar added
  • 2 tbs of pineapple juice from pineapples
  • 2 1/4 cup of gluten free King Arthur’s organic flour (may sub for all purpose flour)
  • 1 1/2 tsp good quality non caking baking powder
  • 1 tsp non caking baking soda
  • 1 tsp organic cinnamon
  • 1/4 tsp organic ginger
  • 1/4 tsp of organic nutmeg
  • 1/2 tsp non caking salt (I like pink Himalayan)
  • 2 1/2 cups finely grated organic carrots
  • 1/2 cup organic pecans finely chopped (optional)
  • 1/2 cup choice organic raisins (optional) I like dark raisins but you may use golden

Frosting Ingredients:

  • 3 cups sifted organic confection sugar
  • 1 stick (equals 1/2 cup) of Country Crock plant butter
  • 8 ounces of organic plant based cream cheese (I like the Simple Truth brand)

Ingredients can be substituted for non-vegan cake.

Process:

Preheat oven to 350, spray and line a 13×9 glass baking pan with unbleached parchment paper. Mix vinegar into milk and set aside. Mix sugar, eggs or egg substitute, oil, vanilla, pineapples, milk, and juice. In a separate bowl mix dry ingredients and then fold the dry ingredients into the wet ingredients. Fold in the carrots, pecans, and raisins. Gently stir and when well mixed pour into the prepped cake pan.

Gently tap the pan of batter on the counter top to decrease air bubbles. Bake on the middle rack. Bake for forty minutes. Due to difference in oven temperatures test at 30 minutes with a skewer for doneness. If the skewer comes out clean, the cake is done. If the cake is not ready, return to oven and check again at 35, etc. Bake until the skewer comes out clean when resting for doneness. I baked in a Pyrex glass baking pan, which is thicker. My cake was done at 42 minutes.

Unfrosted cake

When the cake is baked, set it on a cooling rack. Wait until cake is completely cool before frosting. While the cake is cooling, make the frosting.

Process:

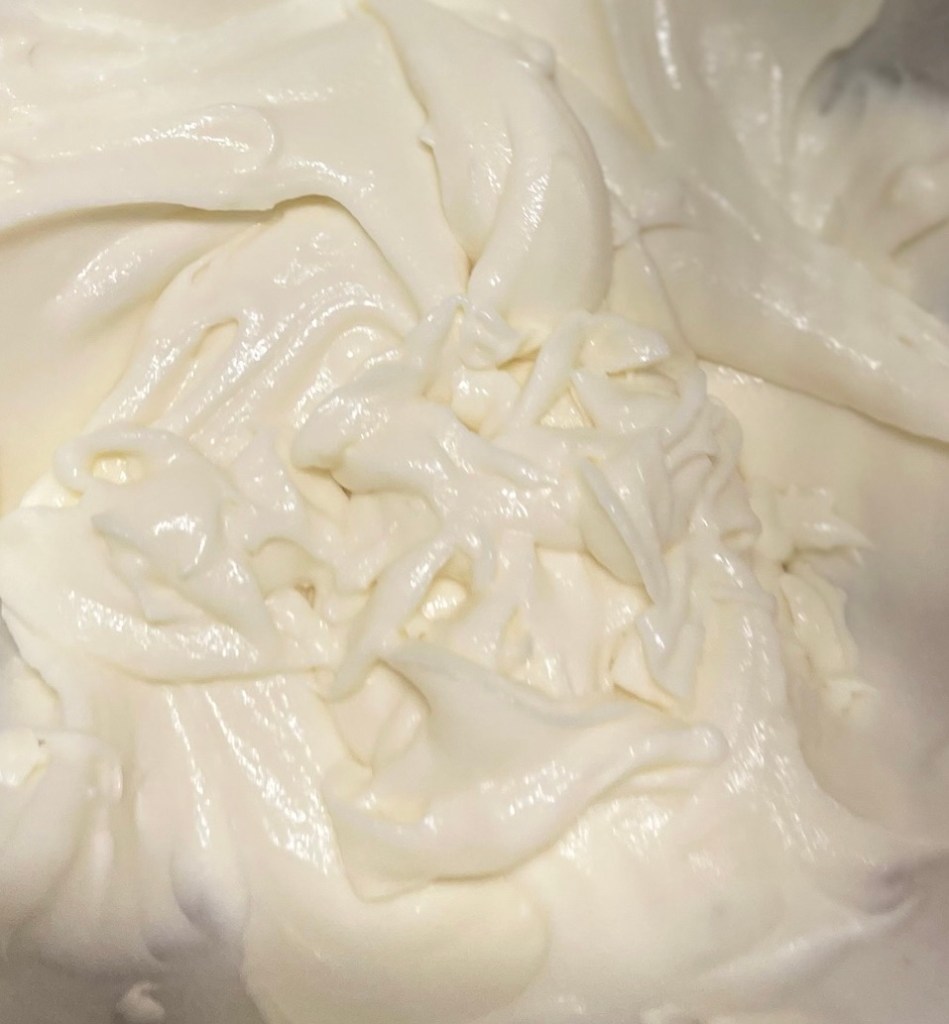
Mix room temperature plant-based butter, room temperature plant-based cream cheese, and three sifted cups of confection sugar on slow in a stand mixer. Once the sugar is incorporated, speed the mixer up to create a fluffier frosting.

Frosting is ready for the cake!

When the cake is completely cooled, using a rubber spatula, frost the cake. (Optional) Sprinkle chopped pecans over the top.

Top of frosted cake. I didn’t add pecans to the top.

I was amazed how creamy the frosting turned out. It is smooth, creamy, and tart enough to be delicious. The frosting didn’t have a phony taste like store bought frosting often has. I couldn’t wait to taste the cake after it was frosted. I actually didn’t wait until our daughter’s birthday dinner. I tasted the corner of the cake and was super happy with the results! I explained to her why a tiny little piece was missing from one of the corners. She understood and said she would’ve done the same.

Plant-based gluten free carrot cake.

The cake was a success! Everyone enjoyed it and loved the addition of the raisins. I had additional chopped pecans for those that wanted to add nuts to the top of their cake. The moisture level was off the charts! Had I not told everyone the cake was non dairy, plant-based, organic, and gluten free, they would have never known. Eating healthy doesn’t mean that you have to scrimp on taste.

I hope you and your family enjoy this cake as much as our family has. It is a great sweet treat for evening coffee, after dinner dessert, or even a breakfast treat. For now, God bless from the mountains of Kentucky. Feel free to like, share, subscribe or comment. If you’re enjoying our recipes and adventures in homesteading, go check out our podcast, Homesteading in the Mountains on Apple Podcasts. Have a wonderful week and weekend!

My Top Ten Herbs (Part Six; Rosemary Recipes included)

Hello from the mountains of Kentucky! I hope your Thanksgiving was amazing and your Christmas will be even better. It’s been busy in our little part of the world as we finish our Christmas shopping, and decorating for our family celebration as Christmas is only days away. With preparing for the festivities I decided to bake some rustic herb bread using two of my top ten herbs, rosemary and thyme. I love experimenting and trying new flavors, new breads, and new recipes. I am excited to share a few of my favorite recipes and uses for my sixth favorite herb in my top ten posts, Rosemary. But first a little information about Rosemary.

One of our smaller pots of rosemary .

Rosemary is an evergreen type of perennial herb that derives from the Mediterranean region. It is reasonably hardy in cooler temperatures as well. I usually pot some each year for quick access for recipes. I also grow several plants in our raised bed that winters over very well as we cover our bed during the winter months. It is easier to start the plant a plant than from a seedling. Rosemary is difficult to start from seed, but not impossible. This aromatic plant also withstands drought quite well. Keeping the rosemary pruned prevents the plant from becoming woody and stiff. Pruning will also help the plant to become more bushy and promote new growth.

Rosemary is a member of the sage family. It has a wonderful aroma that unique and pleasant. It flowers in the summer, but can flower more often in warmer climates. The flowers are small and light pinkish or white blooms. The height of this woodsy plant can vary in size, depending on the location and the amount of pruning. It’s fairly easy to grow, dry, and store. Its aromatic needles have many culinary and medicinal uses as well as uses for personal hygiene. Let’s get started with a few ways that we use rosemary on the homestead.

Rosemary can be used fresh or dried. I dry my rosemary by pruning the plant and washing the sprigs well to remove soil and possible insects that might be hiding. Gently pat to dry and place the herb on a white cloth in a shallow pan. If I have a larger amount, I add the herbs to my hanging rack, which hold much more. Place the herb away from direct sunlight and leave to dry until the sprigs are crisp. I store my dried rosemary on the stems in quart jars and strip the leaves as I need them.

One of my favorite recipes for dried rosemary is my crusty herb bread. A small amount of this delicious crusty bread packs a punch of flavor. I use the following basic bread recipe Give Us This Day Our Daily Bread: Homemade Crusty Vegan Bread and add a tablespoon and a half of finely chopped rosemary and a tablespoon of dried thyme finally chopped as you add the seeds. The dried herbs work great as they are already dried and do not add any moisture to the bread as fresh herbs have the potential to do. This delicious bread is great toasted with most any Italian meal, or toasted to use as a dipping vessel for red pepper hummus. The possibilities are endless.

Seeded herb bread

A second recipe that includes rosemary is our clean vegan summer squash soup. It is delicious year round, but tend to enjoy it most early fall or in the summer months when summer squash is at its peak. The following link will take you to this light , yet hardy soup. The herb bread above is a wonderful addition to this delicious soup. Clean Vegan Summer Squash Soup I also like to melt a slice of plant based provolone cheese on the herb bread for a little extra rich taste.

Summer squash soup

Rosemary makes a great flavoring for salt as well. This is an easy way to preserve the final sprigs of rosemary of the season and make a few stocking stuffers or gifts for those who love to cook with herbs. This delicious recipe can be prepared several ways, but my favorite is simply equal parts of fresh-cut rosemary and course kosher salt. Strip the leaves from the rosemary and add salt, pulse the mix in the food processor 8-10 times or you may use a spice grinder. You may also substitute the kosher salt with course sea salt. Pink Himalayan salt can also be used, but the shelf life doesn’t seem quite as long.

Once you add the fresh rosemary with the salt and grind set it aside on a parchment lined pan for about six hours to air dry. Add to a jar with a lid. Keeps indefinitely. Another method is to use dried rosemary pulsed in the spice grinder until desired consistency is achieved and add the mix to the preferred salt. This eliminates the drying process with fresh rosemary. Using this method allows you to use the salt immediately as the rosemary is already dried. Rosemary salt is a great addition to tofu scrambles, soups, and potatoes. For those that don’t follow a plant-based diet rosemary salt is great on eggs, pork, chicken, or lamb. The possibilities are endless. The ratio of salt to rosemary can be modified to taste.

I like to hand chop the rosemary. I’m a bit old-school.
For this recipe I used 1/4 chopped rosemary.
Shake the rosemary salt before each use to ensure it is distributed evenly.

Finally, rosemary has been thought to be a nourishing herb for strengthening and thickening hair. Rosemary can also be used in a variety of ways cosmetically. However, hair care is one of our favorites. Sprigs of dried rosemary can be added to a spray bottle of filtered water for rosemary water that can be sprayed daily on hair dry or damp hair to promote thickening and shine. Using dried herbs helps prevent mold from gathering in the bottle. I also prefer to use amber glass spray bottles. The dark color helps preserve the water and protect it from sunlight while also helping to eliminate plastic. Once you add the sprigs of dried rosemary to the water, allow it to sit for at least a week to intensify the aroma and the water to absorb the nutrients from the herb. Use as a refreshing spray to your hair, scalp, or skin.

Rosemary oil can be made from dried rosemary as well. Using throughly dried rosemary, add the sprigs to a glass bottle of oil. I prefer organic fractionated coconut oil for topical use. Seal the bottle and place in a dark cabinet for at least two weeks. After two weeks, strain the oil using cheesecloth adding the oils to either an amber colored glass spray bottle or dropper bottle. The rosemary oil can be used directly on then scalp to nourish the scalp and help promote hair growth. Once the oil is applied, massage scalp evenly for five-minutes then wrap hair with a towel or shower cap. Leave the oil on the hair for at least thirty minutes. Wash and rinse hair as usual. You may also spray hair lightly throughout to help mange dry or damaged hair. Finally, you can add a few drops of the rosemary oil to your favorite shampoo and or conditioner.

These are only a few of the great ways to use this powerhouse of an herb. Because of its diversity, I think a book could be written about rosemary. Other uses of rosemary include adding it to homemade body butter, laundry detergent, sachets, teas, and more. I hope to add more rosemary recipes in upcoming days. For now, God bless and Merry Christmas from the mountains of Kentucky. Feel free to like, share, subscribe and or follow our blog. Your support is appreciated. God bless!

Merry Christmas from our home to yours.

Why We Homestead

Hello from the mountains of Kentucky. I hope August is off to great start for you. It’s been a busy one for us as we head into harvesting season, and with my mom being in the hospital for past two weeks. I’ve spent much of my time with her and let the family tend most of the harvesting. However, I have been enjoyed picking beans, canning a couple dozen jars of those, preserved some pickles, and pickle relish. In reality, the harvesting and preserving has just begun. Now, onto the topic at hand, why we homestead.

Spreading two-year old manure over the garden.

I am often asked why we homestead. I wanted to share a few of the reasons why we chose and enjoy our way of life. Homesteading was a way of life for our grandparents, and great grandparents. Our parents also raised large gardens and homesteaded to an extent. It’s a way of life that we find rewarding in many ways. It’s a lot of hard work, but it’s work that comes with great rewards.

We homestead because we are blessed with land that is rich and fertile. The soil is perfect for growing a garden. We enjoy growing corn, beans, potatoes, tomatoes, peppers of all kinds, cucumbers, onions, zucchini, squash, cantaloupes, carrots, radishes, lettuce, kale, and other seasonal vegetables. We love having fresh organically grown fruit and vegetables in the warmer months and preserved vegetables for the winter months. Either way, growing, harvesting, and preserving our own produce ensures we are eating healthy food that is free from artificial fertilizers, and or pesticides.

Early spring garden.

We love to can, freeze, and dehydrate. Canning green beans is a favorite! Canning Green Beans the Time-Tested Way (updated) our family enjoys fresh tomato juice to make soups, pasta dishes, and more. If you’ve not tried home canned tomato juice, you don’t know what you’re missing. Canning Tomato Juice the Easy Way! Updated Information! Feel free to browse my website for canning pickled tomatoes, pickles, relish and more. Preserving veggies also reduces our grocery bills, and again, allows us to have our own homegrown organic veggies at our fingertips year round.

Our family also enjoys growing our own fruit. We have blackberry, raspberry, and blueberry bushes. We also grow strawberries and various types of melons. and have apple and peach trees. We also love growing, cooking, and preserving rhubarb. We love preserving jams, jellies, and pie fillings from the fruit and we can be found picking and eating it fresh.

Drying chocolate mint for teas.
Blackberry jam made from wild blackberries our grandson picked.
Fresh strawberry jam.

Homesteading is more than growing, harvesting, and preserving our own food. It’s about working the land to help it provide for us as well as our animals. It’s about taking pride in the land that the Lord has blessed us so abundantly with. We love to share our bounties with others and we enjoy bartering. If we have an abundance of cucumbers and someone else has an abundance of peppers, we may trade produce with each other to help the other person out.

Homesteading also allows us to be more self-sufficient by growing and harvesting our fruits and vegetables, raising our own chickens and ducks for eggs and meat, and growing and tending our herb garden to make teas, spices, and medicinal oils and poultices. it’s a way of life that allows us to share our bounties with our family, friends, neighbors, and church family.

Farm fresh eggs

Homesteading is a tradition that’s been passed down from generation to generation. Our parents and grandparents shared their knowledge of working the land with us as children, young adults, and they’re still sharing their words of wisdom with us through conversations, written journals, and precious memories from the past. My grandfather taught me much about fertilizing the land with natural fertilizer such as, rabbit and horse manure, compost, egg shells, and more. He taught me how to reduce waste and turn peelings, coffee grounds, egg shells, tea leaves, and veggie and fruit scraps into rich fertilizer by creating compost from all natural food scraps, dried leaves, wood chips from the chicken and duck run, and nature. Compost creates a rich fertilizer for the garden, and fruit trees.

Herbs are another large part of our homestead. Our herb garden expands each year with new herbs that we find useful for making great tasting teas, spices, and for medicinal uses. We enjoy growing a variety of basil, mints, oregano, chives, sage, lemon balm, bee balm, hyssop, yarrow, dill, echinacea, lavender, rosemary and more. Chocolate mint and peppermint are two of our favorite herbs for making hot and cold tea. Oregano, basil, and sage are among our favorites for spices. Chives make a great addition to most meals, and fresh dried sage makes Thanksgiving stuffing even more delicious. Head over to my podcast, Homesteading in the Mountains on Apple Podcasts to learn more about growing herbs, cooking with them, and using them and discover how I use them for medicinal purposes.

A few clippings of sage to dry and add to the spice jar.

Homesteading is something we take pride in. We also love to bake all of our breads from scratch. Our daughter bakes sourdough bread, white yeast bread for sandwiches, rolls, buns, and more. I like to bake artisan breads. We both enjoy baking biscuits and cornbread. Regardless the bread, cakes, or cookies, they’re delicious and do not contain all the added preservatives as processed bread. Either bread is a healthier choice that we enjoy with soups, as toast, for sandwiches, with meals, and if there’s an end piece left when baking day rolls around, we use it to make croutons for delicious soups and salads. The grandkids all enjoy the breads and the sweet treats. Baking helps keep our family healthier by consuming less processed foods. We also like to avoid food dyes, preservatives, and enjoy using organic flours and yeast to bake with.

Fresh baked banana peach bread
Fresh baked crusty seeded yeast bread
Two loaves of fresh baked sandwich bread.

Homesteading, has health benefits through consuming less processed foods, eating primarily organic foods, decreases our grocery bills, increases our income through selling produce and eggs. Increases our health through gaining exercise working the land all while being more self-sufficient, and proud of our hard work, our land, our harvest, and the fact of taking Better care of our nutritional needs and our families. Homesteading also allows us to work independently. I am a college professor and am on campus two days a weeks. I host a podcast and maintain this website as well as being an author of various books with one in works. I am also a doTERRA essential oil dealer. My husband is retired from welding for a major coal company in our area. Our daughter who shares the homestead with us homeschools, is self-employed as a Plexus consultant, and also an author. Her husband is self-employed, which helps him have time to work the land as well. Any way you look at it, homesteading is one of the most rewarding ways of life. We give our Lord, Jesus Christ, all the glory and praise for His blessings and the land and wisdom that He provides us with.

I hope you’ve enjoyed this post. I look forward to reading your comments. Feel free to like, comment, share, and or subscribe. God bless, from the mountains of Kentucky!

Canning One Jar at a Time (Recipe links included)

Hello, from the mountains of Kentucky! It’s a dreary looking day in the mountains. It looks like rain, which would be great for our garden. The temperature has been so hot we need some rain! I am excited to share a recent amazon find with you! For all my readers who enjoy preserving, canning, and living a self-sufficient lifestyle… you’re going to love this incredible and versatile steamer/canner.

This is a stainless steamer with a basket that can double as a one quart/pint canner!
Canning a pint of leftover vegan taco soup.

With the rise in prices at the grocery store, this handy canner allows you to can leftover soup, soup beans/pinto beans, spaghetti sauce, chili and more. I like the idea of saving money and canning pints of leftover soups to have an easy one serving meal, or a quick lunch at work. Canning Homemade Vegetable Soup

Homemade veggie soup!

Our grandson recently picked me a half gallon of blackberries. I knew there wasn’t enough berries to make enough jam to fill a full size canner. I reached for the single serve canner. In just over thirty minutes I had four full pints of blackberry jam canned and ready for the pantry. Using this small canner kept me from having to make what I call “dummy” jars filled with water and pre-used lids to fill the canner space for smaller canning projects such as this one. It’s ideal for single jar projects or for canning a couple of jars. I’ll post the blackberry jam recipe as soon as possible.

Making homemade wild blackberry jam.
Four jars of wild blackberry jam.

I am also planning to use this small canner this fall when I do the majority of our canning/preserving. I will randomly have one odd jar of pickles, beans, or juice that won’t fit in my seven quart canner! The possibilities of this handy single canner/steamer are endless!

Canning Green Beans the Time-Tested Way

When I gave at least eight to ten extra cucumbers I will create pint jars of pickle relish. This canner comes in quite handy for four or five jars rather filling a full size canner with fake jars of water that often times doesn’t want to stay down in the canner. Below is a link for our favorite canned pickle relish.

Canning Our Favorite Pickle Relish

I have included the link below for your convenience. I’m anxious to hear how you use this handy kitchen gadget in your kitchen! Feel free to leave comments. As always, God bless from the mountains of Kentucky. Feel free to comment, like share, or follow.

https://a.co/d/095PN7o7

My Top Ten Herbs (Part Four Lavender)

Hello, from the mountains of Kentucky! It’s surely been a hot June in our part of the world. The heat has presented us with challenges on our small farm. We’ve been hand watering our garden a couple of times a week to prevent the plants from turning yellow. We are blessed to have a flowing creek beside our garden to ensure the plants receive fresh water free from chemicals. The 90 degree weather also presents the challenge of battling the heat while we work in the garden and other outdoor projects. But, we’re making the best of the situation and praying for some rain.

I am excited to share another favorite herb. Remember, I’m not posting my favorites in any particular order, just sharing a few of my favorite herbs, a little history of each, how I plant them, cut them, dry them, and use them both fresh and dried.

One of my small pots of lavender.

Lavender is another favorite herb in our household. Lavender has been used for centuries for various health benefits, its beautiful aroma, and its mild flavor. Lavender is a perennial herb that if planted in the ground will return each year. You might be able to weather over lavender in pots for it to return in the spring. Much of its return will depend on your zone, winter temperatures, and how you protect the pot from the elements.

Lavender is known for its beautiful purple blooms. Bees love the bloom, so it works well as a pollinator near veggies. Butterflies love the blooms as well. Lavender grows best in a sunny location and in well drained soil. Lavender is not an invasive plant, so there’s no need to worry about it over growing your garden. If you are planting lavender, Its best planted in late spring after there’s no danger of frost. Lavender grows well in pots if the location is sunny and the pot has good drainage. I have lavender in my herb bed and in a pot. I love its fragrance and enjoy having it on our porch near where sit in the mornings as it also helps repel mosquitos. The leaves, stems, and blooms smell equally as good. The fragrance is intoxicating.

Butterflies love the English lavender blooms.

There are several varieties of lavender. Spanish lavender has an open upright bloom at the tip of the purple bloom on the end of the stem. Spanish lavender is used for making essential oils and is often referred to as butterfly lavender. English lavender is the most common lavender. It is often referred to as common lavender. It is pictured above. There are other varieties of lavender including Portuguese and lavandin. The most common for our area are English and Spanish.

Lavender blooms, stems, and leaves are all edible. Dried lavender makes a nice addition to a cup of hot tea. Drying lavender is not a difficult task. I clip and dry small amounts at a time throughout the year after May. It seems easier to dry small amounts often than large amounts at once. I clip the blooms leaving a length of stem and place them on a drying rack in a spot away from direct sunlight. Sometimes I lay them on a white paper towel and let them air dry on the table or bind the stems with a rubber band and hang them to dry. The blooms of the English lavender make the best tea. Spanish lavender can be used, but it is a bit too strong for my taste. The dried leaves and stems can also be used in tea. Taste testing is the best way to determine how much dried lavender is enough for a cup of tea.

Dried lavender leaves make great sachets for closets, drawers, automobiles, or any closed in space. The scent and taste of lavender is relaxing and has the potential to relax and to lower blood pressure. I have found that a cup of lavender tea before bedtime helps me relax and sleep better. The dried leaves or blooms are a great addition to chai tea.

Lavender oil is another favorite in our household. We love essential oil but do not make it as it takes special equipment to extract the oil. I order lavender essential oil from doTERRA oils. I use it for soothing a burn, restful sleep, and bee stings. Infused oil on the other hand, is relatively easy to make. For infused oils it’s best to use dried lavender to prevent molding from fresh lavender. Dry the leaves, stems, and blooms of English lavender. Place them in an airtight jar, amber colored glass is my preferred glass. Add your choice of oil. I use coconut oil or jojoba oil for topical use and olive oil for cooking. Keep the oil away from direct sunlight and it should last for months. A few drops of the lavender oil can be added to conditioners to enhance hair growth. It can be used to moisturize dry skin. It can be used at night as a moisturizer to help you relax or used as ointment on sore joints to promote relaxation. The possibilities of lavender are endless!

We love lavender butter! Feel free to check out my recipe by following the link Vegan Lavender Butter: A Sweet Herbal Treat From the Mountains… it’s great on fresh baked bread, rolls, and delicious on toast. Lavender makes great tea cookies and scones. I’ll share those recipes soon.

Dried lavender blooms

Overall, lavender is a beautiful plant, helps repel mosquitoes, relaxes the senses, tastes great, and can fill your house with a wonderful relaxing fragrance. There are so many uses for lavender that one post cannot even scratch the surface of the many uses of lavender.

I hope you have enjoyed this post and I have enticed you to plant, grow, and harvest your own lavender. Feel free to like, follow and or comment. I would like to hear from you. How do you use lavender? For now, God bless from the mountains of Kentucky!

Vegan Peanut Butter Chocolate Chip Mookies

Hello, from the mountains of Kentucky! It’s been a busy Saturday of baking and spring cleaning! I’ve been on decluttering journey for a couple of weeks. I’m nearing the homestretch of decluttering. Baking for the week ensures I have fresh bread for breakfast toast, lunch, and for supper. It also ensures I have snacks for the week. I also enjoy sharing with others at work, family, and church. But, the biggest reward is that my bread and snacks for the week are healthy, clean, organic, and not processed!

I have baked what I call mookies for years. You might be wondering what a mookie is. It’s not quite a cookie and it’s not quite a muffin. It’s kind of somewhere in between a cookie and a muffin. It’s a mookie. I am anxious to share this recipe with you. It’s a great snack, a healthy snack, awesome with coffee in the morning or tea in the evenings. Our grandchildren love them too. They’re made with minimal ingredients and takes a total twenty minutes to mix and bake. Let’s get started!

Ingredients:

  • 1 over ripe organic banana
  • 1 cup organic all purpose flour
  • 1 tsp of vanilla
  • 1/4 cup organic pure maple syrup
  • 2 tsp non-caking baking powder
  • 2 tbs organic natural peanut butter
  • 1 tbs organic miniature unsweetened chocolate chips

Preheat oven to 350. Line a cookie sheet with parchment paper. Mash the banana and add syrup and vanilla and mix well. Add flour and baking powder and mix. Fold in peanut butter and mix. Finally food in chocolate chips.

Mookie mix

Drop mixture by tablespoons to the lined cookie sheet. Leave a little space between the mookies. Bake for fifteen minutes. I like to brown mine slightly under the broiler. Allow to cool and enjoy!

Peanut butter chocolate chip mookies

These are great without the peanut butter for more of a banana taste. They’re great with chopped walnuts for a take on banana bread flavor. They’re also great with a bit of cocoa powder for a chocolate mookie. The possibilities are limitless.

They’re airy, light, and delicious.

I hope you and your family enjoy this delicious treat as much as our family does. For now, God bless from the mountains of Kentucky.

March Porch Book Review: Before We Were Yours

My porch, one of my favorite places to read!

Good morning from the mountains of Kentucky. It’s a beautiful sunny morning in the mountains. I am loving these spring temperatures and all the colorful blooms on the trees. The mountains are beautiful this time of year. I am also loving the warm temperatures for porch reading! I am a firm believer that daily reading is a simple task that is all to often shelved as a pass time or a hobby. Reading is healthy. Reading is healthy for our brain and keeps us alert. It is also a time for relaxation, and a time of escape from daily worries and overscheduled days. Excuses is on the of the biggest factors in why people are not reading. I hear it often. The excuse of, I don’t have time. If you make time for television, browsing your phone, and playing games, you have time to read. So, when do I read? I love to read in the early morning, late afternoons, while I eat lunch, and before I retire for the night. The truth is that I love to read anytime of the day. I’ll say it again, reading is a vital part of our overall health. Plus… it’s enjoyable.

Another question I am often asked is about what I read. I like to read almost anything. I read the book of choice with our university’s book club each month. We read various books, from murder mysteries to fantasy science fiction. I read books suggested by friends and students. I read a novel per bi-term with my students. I read the bible daily and love to study the word for a closer spiritual walk and daily guidance. I love to read spiritual books about characters from the bible, past spiritual leaders, and books about hope for tomorrow. I love to read fiction books that are based on historical events, which leads me to March’s review of Before We Were Yours by Lisa Wingate. I have read several of her books that are worthy of mentioning before I review the most recent. I stumbled on one of her books at a local Good Will store while thrifting with my daughter. The title, The Prayer Box, leapt off the cover at me and I quickly tucked it in my cart with other valued treasures that I had found. This book is amazing and lead me on a path for two more books that are actually in a trilogy. The funny thing is… I read the three books backward with The Prayer Box actually being the third book in the trilogy, which I read first, then I read the first and second book, The Sea Keepers’ Daughters, and the Sea Glass Sisters. Once I finished the last book, which was the first book of the series, the suggested book Before We Were Yours intrigued me. I recalled seeing the book Good Reads, on Amazon, a d as a suggested read from a friend. I immediately ordered it. This was a purchase I found well worth paying full price.

Cover of the book!

Before We Were Yours, is a multi-plot story that takes the reader from the time of the great depression in the thirties to the 1990’s. You will travel down the Mississippi River on a shanty boat filled with love and laughter that quickly turns to desperation, deceit, and lives that will never be the same. You learn about a twelve-year old character named Rill, and her four siblings who fall victims to the fate of the Tennessee Children’s Home Society, an Orphanage in Memphis Tennessee, that was ran by Georgia Tann. Through this time travel back and forth from the time of the depression the reader is also introduced to the character of, Avery, who is is from the 90’s. Avery, accidentally stumbles onto a deep dark family secret that leads her on a mysterious journey filled with trails of adventures, love, loss, joy, and sorrow all the while uncovering mysteries that were thought to have been locked away forever. The reader also meets two elderly ladies, May and Judy, who are living in total opposite types of care facilities. Their characters will forever linger in the heart of the reader. Will the mysteries change Avery’s life? What are the connections between Rill and Avery? Where does May and Judy fit into the mystery? Read the book to discover the answers to these questions and more. The reader will meet diverse rich characters that you will come to love, mourn, and characters that you love to hate. This is was one book I could not wait to make time to read each day, as I too, was as interested in how the mystery’s were going to unfold. I couldn’t wait to travel with Avery along on the trail to solve the mystery’s that others wanted to leave buried in the past. This is one book that I will be suggesting for my students and friends to read.

As you know, our daughter, and I love to thrift for antiques, and unusual items. On our last thrifting excursion, she actually found a hard copy of Before We Were Yours, at a local Good Will for 99 cents! What a steal! Don’t forsake browsing the shelves of the books in thrift stores, your next great read might just be shelved within the numerous books that are often overlooked.

Now for my rating of this wonderful book. I rated it on Good Reads and Amazon as a five-star book. It kept me engaged, there was no foul language, it contained rich characters, developing plot(s), and also I learned a little about a part of history that occurred only one state away from me that I never knew about. It was entertaining, well-written, educational, and held my attention throughout. I recommend this book for someone who is searching for a summer read, beach read, or a book to pickup and read periodically throughout the week as being the one that you will enjoy.

For now, God bless from the Mountains of Kentucky. Enjoy this beautiful Easter weekend and reflect on what our Savior sacrificed so that we could be born again in Him and live! He is risen!

Delicious Organic Granola

Hello, from the mountains of Kentucky! It’s a rainy day in the mountains, which always puts me in the cooking and cleaning mood! So, today I decided to begin cleaning the pantry out and realized that I had an abundance of oats and nuts that I needed to do something with. I went down a rabbit hole and started planning granola! The pantry didn’t get cleaned completely, but I did make some delicious granola! I hope you and your family enjoy this recipe as much as we do.

Ingredients:

  • Three cups of organic old fashioned oats
  • 1/2 cup organic chopped walnuts
  • 1/2 cup organic chopped almonds
  • 1/2 cup organic chopped pecans
  • 3 tbs organic raw pumpkin seeds
  • 2 tbs organic sunflower seeds
  • 1 tbs organic chia seeds
  • 2 tbs organic ground flax seeds
  • 3 tbs gogi berries or raisins
  • 1/2 tsp pink Himalayan salt
  • 1/2 cup of organic pure maple syrup or honey
  • 1/2 cup smooth organic peanut butter
  • 1/2 cup organic olive oil
  • Agave or honey for drizzling not mixing.

Mix all the dry ingredients and preheat the oven to 320 for convection. Mix the remaining ingredients over low heat until it comes together smoothly. Pour the wet ingredient into the bowl of dry and gently stir with a rubber spatula. When mixed spread out on a parchment lined baking sheet. Spread evenly and bake for 20 minutes. Remove and mix the granola with a metal spatula. Return to the oven and bake 20 more minutes. Take out of the oven and drizzle your choice of honey or agave and put under the broiler for just enough time for the granola to brown up lightly. Remove from the oven and allow it to cool completely on a wire rack.

Mixing the ingredients.
Spreading the granola in a baking sheet.

Using the spatial mix the granola gently once it’s cool. Store the granola in a glass jar. Keeps for a couple of weeks if it is in an air tight container.

This is a two gallon jar! I’ve got another batch of granola to add to it.

I hope your family enjoys this tasty granola. I think it’s great alone as a snack and wonderful in a parfait. I also like it in a bowl with almond milk as a cereal.

Dinner

Just for fun! A picture of dinner this evening. Fresh beans, corn, potatoes, onions, cucumbers and tomatoes with sautéed portobello mushrooms with peppers and onions and a slice of cornbread. Nothing better than veggies from our garden!

For now, God bless from the mountains of Kentucky! Don’t forget to like, comment, and or follow! We

Vegan Italian Spinach Wraps

Good morning from the mountains of Kentucky! I hope your day is a blessed one. I am excited to bring to you my new spinach wrap recipe that I’ve been working with for a couple of weeks. Saturday’s wraps were the success that I’ve been working toward! I hope you enjoy them as much as we do!

Ingredients:

  • 3 cups fresh organic baby spinach
  • 3 cups all-purpose flour (I prefer King Arthur unbleached or wheat)
  • 1 1/2 teaspoon pink Himalayan salt
  • 3-4 tablespoons organic extra virgin olive oil
  • 1/3 cup cold filtered water (this can be modified if needed)
  • 1 teaspoon fresh ground oregano
  • 1 teaspoon fresh ground basil
  • 1 teaspoon fresh ground parsley
  • 1/2 teaspoon fresh ground black pepper
  • 1/2 teaspoon organic ground garlic

Add one cup of spinach and one cup of flour to a food processor dicing it to allow room for an additional cup of each. Dice again and add the remaining spinach and flour. Add spices, and process adding oil slowly as the mixture mixes. Add water until you have a dough consistency. Sometimes the amount of water varies. Only add what you need. If the mixture is too wet, add an additional spoon of flour and mix. You can’t go wrong on this mixture if you achieve a doughy consistency. You can play with the oil as well. If you need more, add a tiny bit.

Fresh spinach is the best!!

Preheat a cast iron skillet. I use ceramic cast iron for this and it works great. Add a tiny spray of organic extra virgin olive oil to the pan to heat. While the pan is heating spoon out a large spoon of the mixture onto a floured dough sheet or parchment paper. Using flour on your hands roll the dough into a ball and then begin rolling the dough flat.

Ball of spinach dough.
Second rolling of the wrap.

A second rolling of the wrap ensures the desired thickness of the wrap. You can sprinkle flour over the wrap to prevent it from sticking. Once you have achieved the desired thickness, lay your bread in the hot pan. It only takes about 1 1/2 minutes per side. While my bread is browning, I usually roll another piece of dough. Parchment paper, coffee filters, cheese cloth, or white paper towels between the wraps will help prevent them from sticking until they’re cooled.

Preparing the wrap!
This is the thickness that I like!

Remove the bread and place on your choice of liner. Once the wraps are completely cooled, I place mine in an airtight container and keep them in the fridge for fresheners. This recipe usually yields eight to nine wraps. They taste great warmed with fresh veggies, a smear of peanut butter, as a side for Italian dishes, and extremely good with no dairy cheese melted on them.

You may substitute seasonings for Mexican seasonings, plain with a little salt and pepper, or with curry seasonings. The possibilities are endless. I hope you enjoy these as much as we do. I look forward to posting new wraps. I am currently working on a high fiber flax wrap. I would love to hear how you eat yours! Feel free to like, share, comment and follow. For now, God bless from the mountains of Kentucky!

Garden Time

Garden Time!!!

Good morning from the mountains of Kentucky! Cold air invaded the mountains last night. It was a chilling 28 degrees when I awoke this morning. I was thankful that I had covered my ferns up last night. We have several mountain winters in March and April in Kentucky. With so many of the trees and bushes blooming early this year, it’s difficult to determine which winter it is. I’m not sure if this cold snap is redbud winter or dogwood winter. Nevertheless, hope remains as these small winters only last a day or two and then it’s mild weather again.

The smell of yesteryears lingers in the air as the garden was turned this week. The smell of fresh soil always reminds me of growing up only a few miles from where we live. Papaw plowed with a mule and plow from morning till evening. He would wipe the sweat from his brow, fan with his hat, rest a bit and return to his work. The smell of the rich dirt lingered in the air just as it does here today. The chickens are enjoying the freshly plowed ground as well. They love to scratch and search for worms in the loose dirt.

As I prepare breakfast this morning, I am reminded of eating oatmeal with my Papaw. I felt an unction to prepare a hardy bowl of oats, as he called them. I like to use a half cup organic oats, filtered water, fresh honey for the sweetening, and whatever fruit I have available. This morning I added a half of an organic banana, and some organic blueberries. I include a tablespoon of organic walnuts, a teaspoon of flaxseed, hempseed, and chia seeds. White serving I drizzle with almond milk and a tiny bit of honey. I toasted a slice of my homemade seeded bread with breakfast this morning. It’s a hard breakfast that will sustain me until late in the afternoon.

Delicious plant-based breakfast for a busy day!

I’m excited about planting this year. The manure has been spread and the first turning of the garden is complete. Seeds have been sewn in miniature green houses, and in the hydroponic garden. Fresh vegetables are a joy in the summer months. Fall is a time of harvesting and preserving for the winter months ahead. It’s not for the faint of heart, but for those who enjoy eating what they’ve grown from seed to nourish their bodies.

Spreading natural fertilizer.

Gardens can be as large or as small as you want them to be. For us, a large feeds our families all summer and sustains in the cold months. We usually have an abundance to share with neighbors, extended family, and church family. It seems the more we give to others, the more it grows.

Organic lettuce in one of the hydroponic gardens seven days after seeing the seed.

Eating healthy is a large part of being healthy. Eating organic, plant-based, and clean is a foundation for overall health. Get up and get moving! Being active helps prevent and fight many diseases that plague people across the world. Make it a point to know the ingredients in the food that you put in your body. Know the vocabulary of hidden toxic ingredients. Do your research, and start small and make changes weekly. For example, I no longer buy bread that is deemed healthy, but is it really when you can’t pronounce fourteen of the twenty seven ingredients. I choose to bake bread for my family on Saturday mornings. My recipe has four ingredients, of which one is water, and I add various organic seeds for the crunch and fiber. The following is a link to my bread recipe. It’s easy, doesn’t require an abundance of time and tastes delicious. Give Us This Day Our Daily Bread

Living a clean and holistic life is very gratifying. The rewards are great and exceeds the long days and time spent prepping, preparing, and growing, foods that nourish your body, not poisoning them a little at a time with toxic ingredients found in processed foods.

The first turning of the garden!

I would like close with a great book suggestion for young readers, as a read aloud, and great for the primary classroom. It is written by our daughter and it’s beautifully written and illustrated. Check the book out at the following link;

http://My Magic Boots https://a.co/d/bcIP0sC

Link is added above.

God bless from the mountains of Kentucky! May your day be filled with joy, hope, the love of Christ, and good nutritious foods that can help heal you from the inside out. Feel free to leave a comment, like, and or follow by blog for more posts on clean and holistic living.

First turning of the garden complete! Awaiting a second plowing and plants!