Hello from the mountains of Kentucky! I am super excited to share a new recipe that I have been experimenting with and finally perfected it last week. I love a good moist banana bread. I have tried several vegan recipes with little to no luck with the right amount of moisture and sweetness. This recipe fits the bill for both. It’s quick, easy, and requires minimal ingredients and those that you probably already have in your pantry. It’s also delicious with a cup of hot tea!
Ingredients:
One large overly ripe organic banana or two small overripe bananas
2 cups all purpose flour (I like King Arthur’s unbleached flour)
1/2 tsp pink organic Himalayan salt
1/2 tsp anti-caking organic baking soda
1/2 tsp organic all spice
3/4 cup organic cane sugar
1/2 cup almond milk
1 tsp good quality Non-GMO vanilla extract
1 tsp organic apple cider vinegar
1/2 cup unsweetened applesauce
1/2 cup chopped organic walnuts
Add in options can be; chocolate chips, pecans, raisins, or cranberries.
Process:
Preheat oven to 350 degrees. Spray or butter a glass 8×8 baking dish. Line it with parchment paper and then spray or butter the paper.
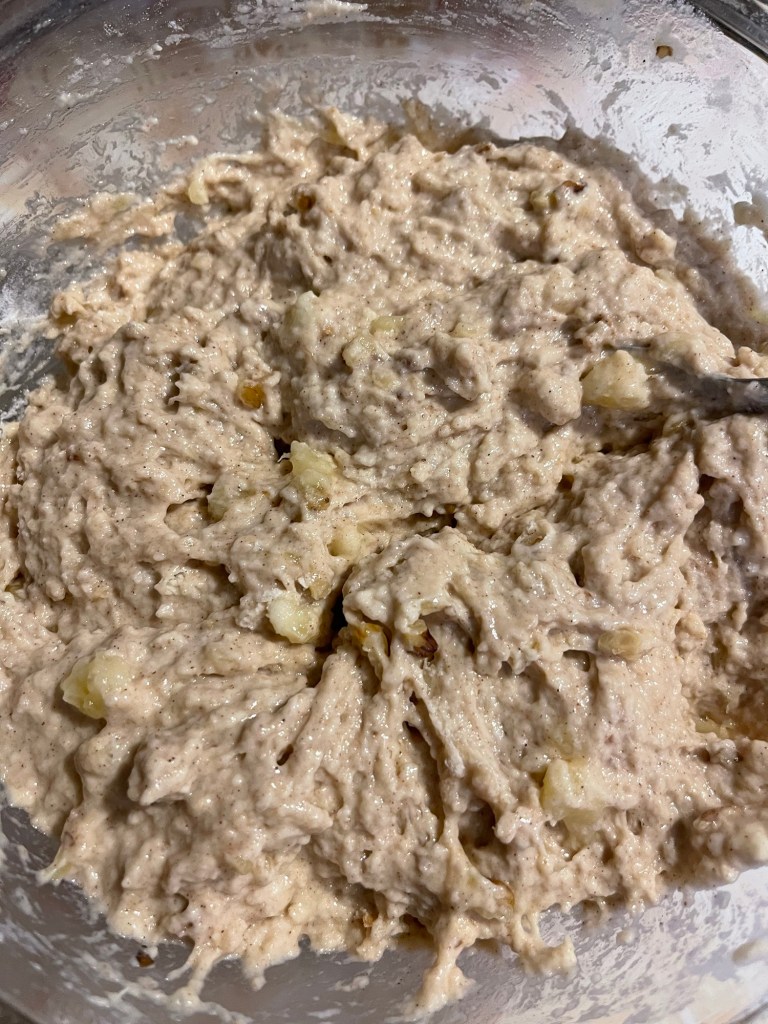
Mash the banana, vanilla, and sugar and mix well. Add salt, baking soda, flour, vinegar, and applesauce and fold the ingredients together without overmixing. Add the milk a little at a time and until the batter well. Fold in the walnuts. Add the bread mixture to the lined glass baking dish. I baked my bread for 45 minutes. I checked it at 30 minutes and determined it needed fifteen more minutes to be baked through and through.
Mixed ingredients
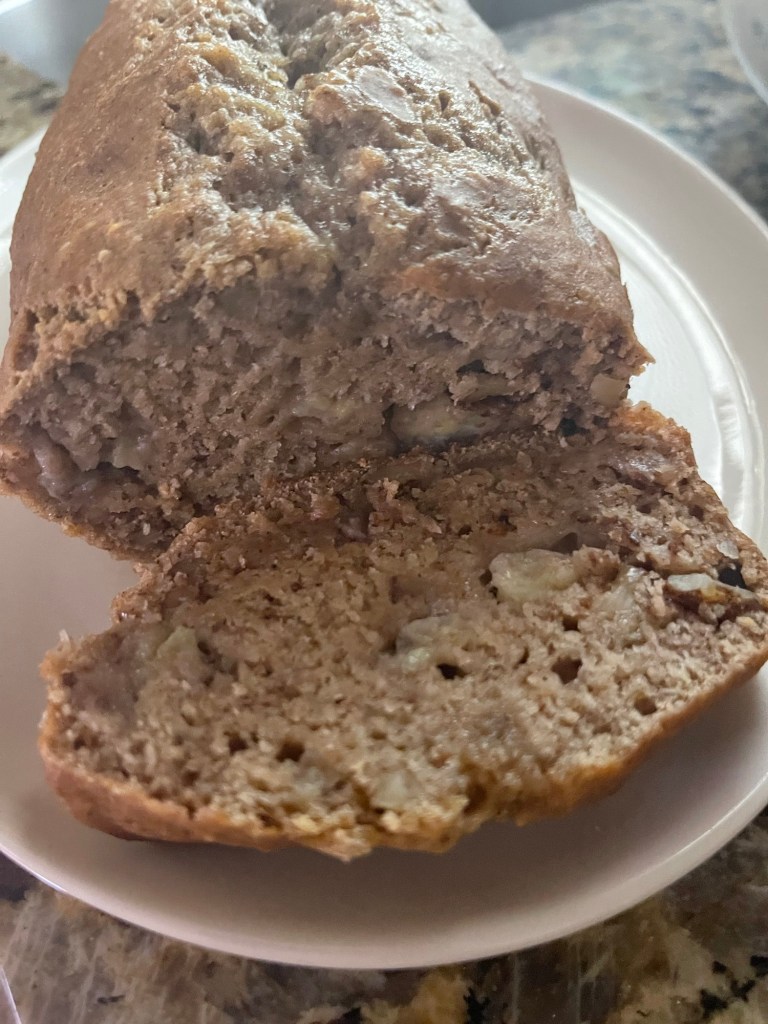
I removed my bread from the parchment paper and set it on a baking rack to cool for thirty minutes. Once the bread was cooled, I placed it in an airtight container. I have enjoyed this bread all week as a snack with my lunch, toasted for a light breakfast, and in the evenings with coffee or tea. It is tasty, moist, and not overly sweet but flavorful.
You may add more sugar or even honey for a little more sweetness. If you’re not a fan of walnuts, pecans are a great substitute. I like to toast this bread for breakfast. It’s delicious with a smear of honey or plant butter. Unsweetened dark chocolate chips are a great addition as well. Either way you eat it, as breakfast, a snack, or dessert, it’s a delicious bread.
For now, God bless from the mountains of Kentucky. Feel free to comment, like, and subscribe. I look forward to hearing from you.
Good afternoon from the mountains of Kentucky! Today feels like spring in the mountains. Easter Lillie’s are bloomed, some of the trees and bushes are budding, and I see green plants emerging through the flower bed covering. I am excited about spring as it always feels like an opportunity for new beginnings, time to plant, and time to enjoy the beautiful mountains that we are blessed with.
Summer in the mountains!
For those of you who are serious tea drinkers, and for those who enjoy a cup of tea from time time… you’ll enjoy my series, Tea Time Tuesday. It will be a reoccurring blog post that will include random topics ranging from making teas, uses of teas, to recipes that include tea in them, and occasional recipes for goodies to eat while drinking tea. I will also review books I’ve read while enjoying a cup of tea. While some posts might be simple ramblings or inspirational words. However, today’s post is about a topic that is worthy of conversation. Loose tea verses tea bags.
I’ve been an avid tea drinker for years. I like almost all flavors of teas. But, I do have a few favorites. I love a good chai tea with oat milk, and lavender. I drink peppermint tea almost every day. I like black teas and love a good chamomile tea with either honey or lavender and sometimes both. Regardless the tea I drink, I prefer loose leaf to tea bags. The tea that I grow and dry does not even compare to purchased teas, but there are times when I buy loose leaf, especially black tea and chamomile tea. So, why do I prefer loose leaf to bagged tea? Loose leaf is more flavorful, I don’t have to worry about how long it’s been shelved, I don’t have to wonder if the bags are good quality or could they be toxic. There are so many different reasons, but flavor and the ability to use a tea ball of loose leaf tea a second time, which is a great money and tea saver, especially if you purchase tea. If you don’t like a tea ball, you can always purchase organic tea bags that you can fill yourself. The organic tea bags are great for tea on the go. They store easily in my lunch bag that I carry to work.
I’m curious about your preferences. Which do you prefer bagged tea or loose leaf, and why? I would love to hear from you. For now, God bless from the mountains of Kentucky. I think I’ll enjoy a cup of tea and porch sit a little while on this beautiful spring-like day!
Good morning from the mountains of Kentucky. It’s a peaceful morning here with a slow drizzle falling softly to the greening earth. Spring is just around the corner and we are seeing glimpses of it daily. The yellow buttercups are in full bloom, spring onions are ready to be enjoyed with meals, and the peepers are alerting everyone of the presence in late evening hours. Daylight is lingering into the evening hours extending the day just a bit longer. In Kentucky we know that these wonderful signs of spring does not mean that winter will not rear it’s head until next winter. On the contrary. We will endure our season winters in upcoming weeks, but they don’t last. So, with that being said, let’s get on with food prepping for the week.
Breakfast:
Being that I follow a plant-based diet, I am preparing a tofu veggie scramble that can be enjoyed with fresh bread as toast, or on a wrap when eating on the go. If you do not follow a plant-based diet (vegan) you can simply use fresh eggs in place of the tofu. You can find my link for tofu scramble at Scrambled Tofu and Spring Daydreams This tofu scramble lasts for days in a covered dish in the refrigerator.
Tofu veggie scramble
Bread:
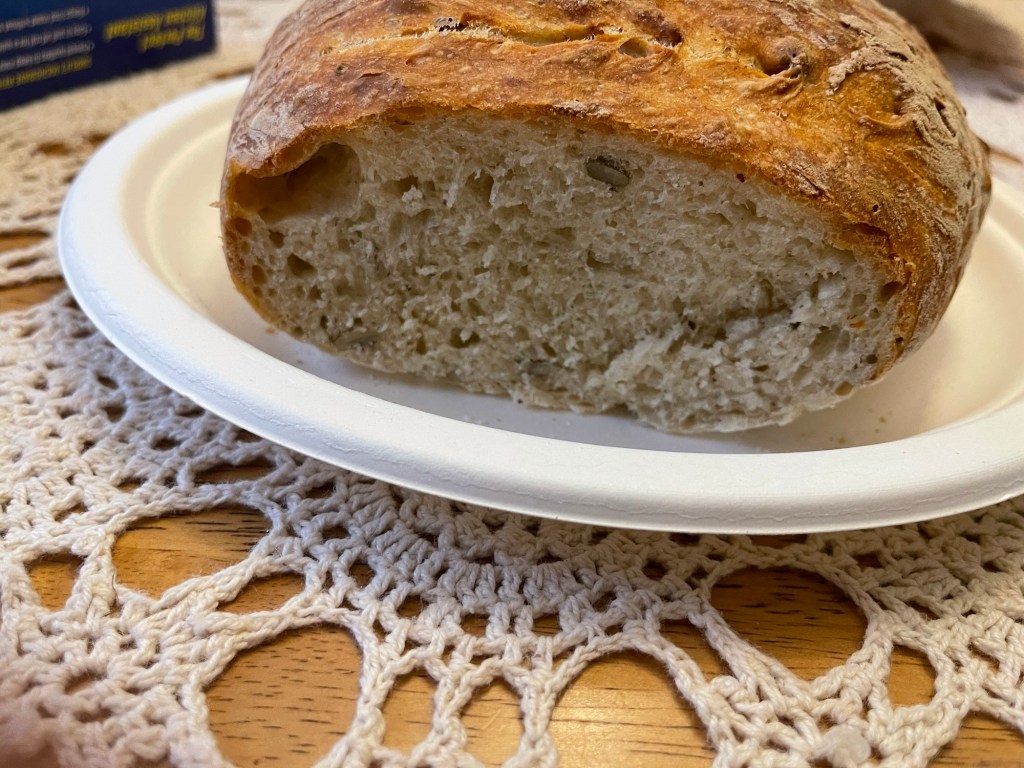
I posted a link last week for fresh bread. This loaf was enough bread for seven days of delicious eating whether it was for toast, sandwiches, as a bread with a meal, or simply bread and plant butter or with honey. You can find my bread recipe at Give Us This Day Our Daily Bread This bread is easy and delicious and contain only four to five ingredients depending on your preference. I store my bread with wax paper first, then cover the waxed paper with aluminum foil. I am searching for a good BPA bread keeper. If you know of one, feel free to drop a comment!
Fresh baked organic bread.
Taco Soup:
For an easy and convenient supper this week, I am preparing plant-based taco soup. Again, if you do not follow a vegan diet, you may substitute my recipe for chili with meat. I chose taco soup this week because of its versatility, and it mimics a good chili soup. I can have soup one night, or two, and have taco salads another night, or two, or burritos. Taco soup can become multiple dishes. As soup, I enjoy it with a plant-based grilled cheese, or with homemade bread, or even with some of my daughters homemade sour dough crackers! It stores in the fridge easy, travels to work well, and lasts for days covered in the fridge. If I have leftover soup, I use my small canner and can a jar or freeze a bag for a later time. You can find my plant-based taco soup recipe at Three Bean Plant Based Taco Soup
Plant-based taco soup
Rice as a Side:
Rice is so versatile that it can be included with breakfast, as a side, or even added to the taco soup or taco salad. I use the insta pot to make a batch of brown rice for the week. I add the measurement according to the bag, except I prepare my rice in vegetable stock. I add chop a half an onion fine, add chopped peppers of choice, and add a heaping spoon of salsa. I add a teaspoon of each of the following; garlic, pink salt, black pepper, white pepper, and paprika. I add a half teaspoon of cumin, cayenne and turmeric. Cover and pressure for ten minutes. I allow my rice to sit in the pot until the steak self-releases as this helps ensure a good texture. Fluff the rice and store in a coveted bowl in the fridge.
Snacks:
Snacks are easy to prep. Today I will be prepare vegan protein balls. The protein balls are sweet, delicious, travel well with me to work, and make a light late evening snack. You can find the recipe at the following link Vegan Chocolate Chip Coconut Protein Bites I am planning on baking zucchini bread this weekend as well. It’s a great choice as it allows me to have a second option for breakfast as well. You can fine one of my zucchini bread recipes at the following link Clean Apple Zucchini Bread
Protein balls
I have found that prepping for the week alleviates stress of trying to figure out what to eat, makes mornings much smoother when packing lunch for work, and allows me to have more time in the evenings as supper is basically prepared. But one of the greatest benefits of prepping for the week is it eliminates eating out, it ensures that I am eating healthy, and saves money on our food budget. It’s a win win situation that when carefully done can make a huge difference in your week. I also enjoy our daughter in-laws baked goods. You can access her shop and order on the following link https://bakesy.shop/b/batch-baked-goods
I hope you enjoy the recipes that are linked the post. Feel free to subscribe and share with friends and family. Also, comments are welcomed. God bless from the mountains of Kentucky! I am off to retrieve some spring onions to add to our supper.
During COVID many people rediscovered the health benefits of elderberries. I, myself, started taking a good organic elderberry supplement to enhance my immune system. Finding organic elderberry syrup was difficult or ridiculously expensive at the time, and the supplement was not inexpensive. After paying for the supplement for a few years, I decided to try my hand at making elderberry syrup. I am very pleased with the results and inspired to share my recipe with my readers.
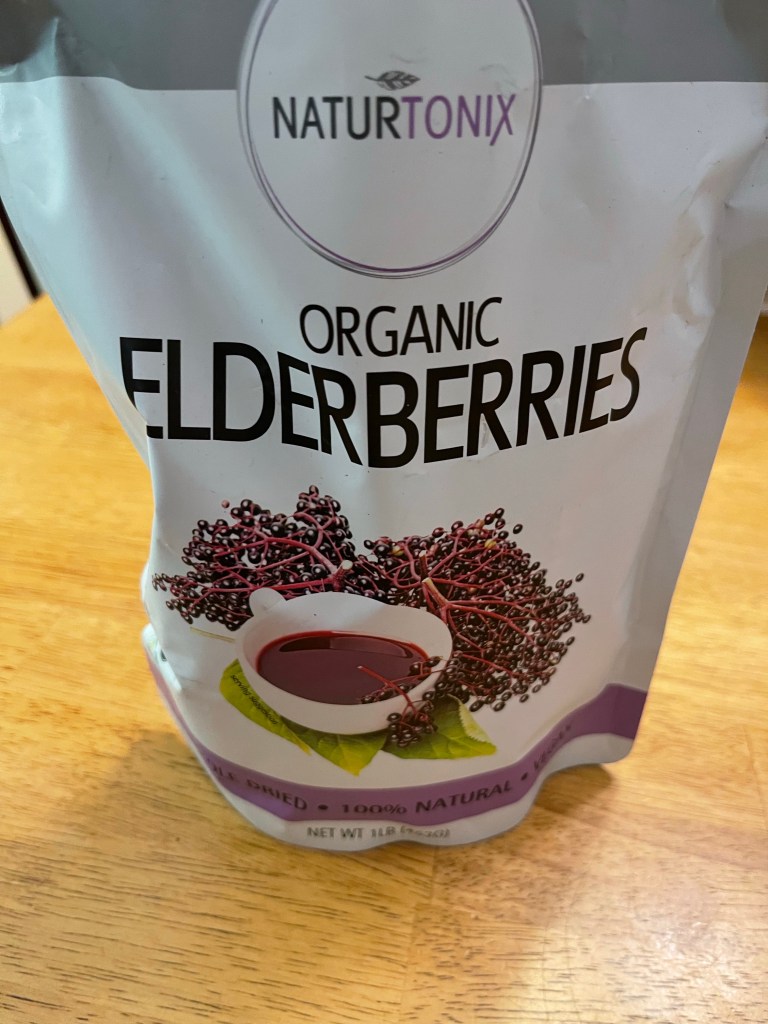
There were challenges along the way. But, with determination, I was able to overcome those. First, I wasn’t able to find someone with an elderberry tree that was willing to part with elderberries, so I did the next best thing. I looked on Amazon for organic dried elderberries. The ones pictured below had the best price, largest amount, and the best rating.
Dried organic elderberries from Amazon
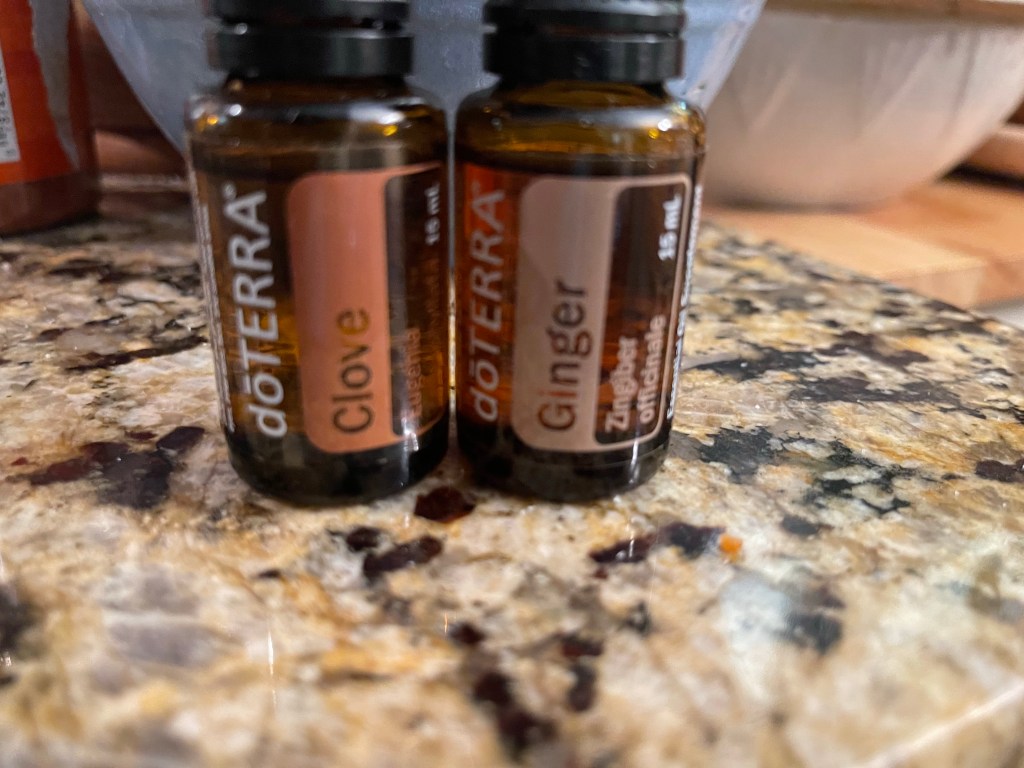
Next, I experimented with the amount of elderberries I would mix. After a bit of research and experimental tries, I decided the syrup would be tastier with some spices added. After a few batches, I decided on the addition of organic clove, organic ginger, organic cinnamon and local honey. With this in mind, I was ready to see if the taste was right. It was delicious!
Ingredients (makes a pint) 3/4 cup Dried elderberries 3 cups filtered water 1/2 tsp dried clove 1/2 tsp doTERRA clove essential oil 1/2 tsp doTERRA ginger essential oil 1/2 tsp dried ginger 1 tsp cinnamon Fresh honey to taste
Essential oils are optional. I love the benefits of them and the taste. Read the labels closely before using to ensure they’re consumable.
Process
Add the three cups of filtered water to a stainless steel saucepan. Add 3/4 cup dried elderberries. Add the remaining ingredients except the honey. Bring the ingredients to slow boil. Set a timer and boil the mixture for 45 minutes. After 45 minutes turn the burner off and cover the mixture and allow it to cool. When the mixture is completely cooled strain completely through a fine mesh strainer into a clear pint jar. Cheese cloth can be used as well. Add fresh honey to taste and stir well. Place a lid on the jar and for a better taste keep it refrigerated.
My fist jar after a couple of days of use.
I take a tablespoon a day. A pint typically lasts for two weeks. The taste is wonderful. Elderberry’s have a wide array of health benefits. I’m not sure if the elderberry syrup helps increase one’s sleep, but I have slept unusually well since I started using the syrup as a daily regimen.
I hope you enjoy this simple recipe. Feel free to comment or leave questions. For now, God bless from the mountains of Kentucky!
If you’ve shopped for groceries lately, you have felt the pain of the price of groceries when you checked out at the register. It’s ridiculous how the price of food has increased. So, what are we expected to do? Clip coupons? Use savings apps? Grow as much of our food as possible? Yes, to all the questions above and also learn to be frugal with what we have.
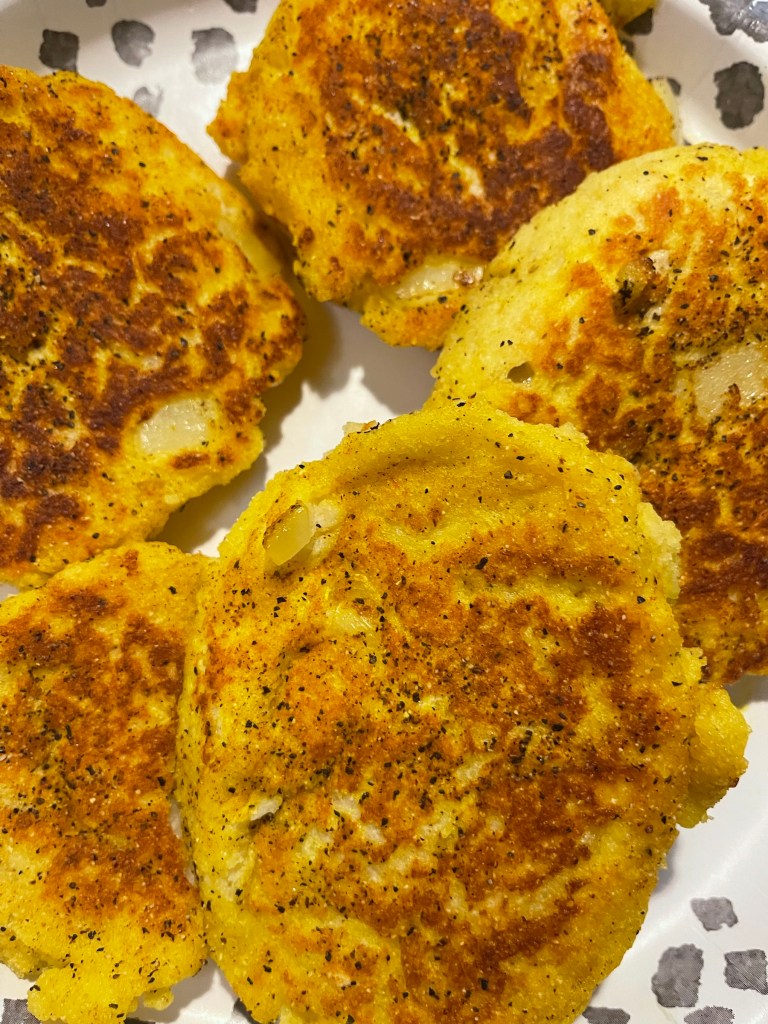
I grew up in the sixties and seventies in a single parent home with two siblings. We didn’t know it at the time, but our mom, who was also a working mom, was very frugal and could make delicious dishes from leftovers. Left over vegetables became delicious vegetable soup. Popcorn was transformed into delicious caramel corn. The list could go on and on. But, one of my favorite transformations was left over potatoes, which became scrumptious potato cakes! I am excited to share my version of my mother’s delectable potato cakes.
After our children married and left home, we have more leftovers than ever before. Leftover mashed potatoes and the dread of emptying them to the dogs, or just going to waste inspired me to make potato cakes! My mom always made what she called depression potato cakes. I remember watching her in the kitchen mix the delicious mix and then frying it to perfection! After pondering on the delectable cakes, I determined that I could make a heather version. As the mix started coming together, I was sure this transformation dish would quickly become a renewed favorite. And so, the experience had begun with cherished memories, a desire, and a little creativity. Finally, the cakes were complete. I was too eager to wait for dinner to try the golden potato cakes. Yummo! They were delicious! I am so excited to share this delicious recipe with you. I hope you enjoy these delicious plant-based or vegetarian potato cakes as much as my family.
Ingredients:
Leftover cold mashed potatoes ( I used two cups)
Two tbs diced sweet onion
1/2 cup self rising flour of choice
1 cup yellow corn meal
Either one egg white or a flax egg (flax egg is I tbs finely ground flax seed and 2 1/2 tbs water mixed)
Salt and pepper to taste
Process; mix all ingredients together. The mix will be stiff. The stiffer the better. Add a little meal and flour if your mix is not thick enough. Once mixed, set aside and add a little extra virgin olive oil to the frying pan. Allow the oil to heat, and then either form a patty or drop a large spoonful into the pan. Allow to fry on one side while adding extra pepper or salt. I like to add a sprinkle of turmeric because I love the flavor and it’s good for you! It also gives the potato cakes a nice color. Flip, season, and fry the other side until golden brown on both sides of the potato cake
This is a delicious side dish for pinto beans and green beans and also makes a great side for breakfast. My family loves them with ketchup as a side. You can add diced bell pepper to the mix for a bit of Mexican potato cake. I also like to add a little plant-based cheese for a cheesy potato cake. The possibilities are endless, and it allows you to use leftovers to make delicious food that saves money all the while.
I hope our renewed favorite will become a new favorite of yours! God bless from the mountains of Kentucky! As always feel free to leave feedback, ideas, and or comments. Have a blessed week!
Hello from the mountains of Kentucky! I hope your fall is off to a great start. Things are beginning to slow down on our small farm. All of the garden produce is either, canned, preserved, dried, or frozen. It was a lot of hard work, but very satisfying and rewarding work. We enjoy the produce year round. But my personal favorite is making soups with all the different veggies. When the cool fall winds begin to creep into the mountains, I feel the urge to cook. One of my favorite dishes is homemade vegan vegetable beef-less soup, especially on wet and drizzly day like today.
A warm bowl of soup on a fall day makes for a cozy meal!
I grew up eating vegetable beef soup. It was always a winter favorite in our house. Our children grew up eating vegetable soup with grilled cheese. Vegetable soup remains a favorite still today. Just because my vegetable soup is vegan, doesn’t mean it’s not tasty. I think you’ll find my vegetable soup to be savory, filling, and healthy.
Ingredients:
Half of a large organic yellow onion
1/4 organic red bell pepper
1/4 organic green or yellow pepper
1 tbs organic extra virgin olive oil
1 can of unsalted diced organic tomatoes
2 cups organic vegan meatless chorizo crumbles (I use Morning Star)
2 cups of meatless beef crumbles (my favorite is Simple Truth crumbles)
2 cups organic frozen sweet peas or 1 can unsalted organic sweet peas
2 cups organic frozen corn or 1 can of unsalted organic corn (I use 3-4 ears of frozen corn from our garden and cut it off the cob)
2 cups of fresh green beans cooked or one can of organic green beans (I use a half quart of beans we preserve from our garden)
2-3 medium sized potatoes
2 cups sliced carrots
1 1/2 cups organic vegetable broth
1 quart tomato juice (I use the tomato juice we can from our garden tomatoes)
I like to use good quality organic seasonings. Add salt, pepper, onion salt, garlic powder, turmeric, and paprika to taste. I usually season each layer of the soup while I’m preparing it.
One tablespoon of organic tomato paste.
In a large cast iron stock pot, heat olive oil over medium low heat. Dice onions and peppers and add to oil. Sprinkle with salt and pepper and sauté until onions and peppers are tender. Add meatless crumbles and add a small sprinkle of salt and pepper and other spices. Sauté for ten minutes and then add diced tomatoes.
Meatless crumbles are very tasty and textured very close to beef, only better!
While this is simmering peel and dice potatoes, and slice carrots. Add the potatoes and carrots to a pot of boiling water. Add a drizzle of oil and season the potatoes and carrots with salt and pepper. Cook the potatoes and carrots until they’re semi tender or a tiny bit al dent-e, which will prevent them from overcooking when added to the soup.
These are a flavor bomb! Delicious for tacos, chili, or veggie soup!
While the potatoes and carrots are cooking, begin adding the remaining ingredients one at a time. If you choose to use canned veggies, drain the vegetables and rinse well before adding. If you use frozen, allow them to thaw first. Once the vegetables have all been added, season to taste with remaining seasonings and add salt and pepper if necessary. Allow the vegetables to come up to heat and add tomato juice. Allow the mixture to begin to cook and add vegetable broth. When potatoes are the desired tenderness drain and add to the soup. I like to add a tbs of organic tomato paste at this time and add any additional seasonings. Allow the soup to simmer on low for 30 minutes. Serve with your favorite crackers or organic dairy free grilled cheese! Anyway you serve it, your family will love it!
Close up of a bowl of soup to emphasize the delicious veggies!
I hope that you and your family enjoy this savory and delicious soup as much as my family does. Feel free to leave comments or ask questions. I love to hear from my readers. If you are not already following my blog, feel free to follow and receive notifications each time I post. For now, so long from the mountains of Kentucky! God bless each of you!
Hello, from the mountains of Kentucky! I hope your July is off to a beautiful start! We’ve had a blessed week with just enough rain to water our thirsty garden and make the zucchini, summer squash, and cucumbers explode. The number of gorgeous veggies awaiting my attention caused me to wake even earlier today. After having a hot cup of coffee, relaxing with my daily devotional, prayer, and another fascinating chapter of the word, I looked at the tasks that lay ahead of me for the day. Farming looks glamorous to those who see it as all the veggies you can eat, decreased payout at the grocery store, and the many wonderful health benefits. All of these benefits are true, but the work and the labor are also very real… but satisfying. Chores are a big part of planting, growing, maintaining, and harvesting the rewards. After reading a chapter of my chosen summer read, What the Wind Knows, it was time to get up and get started checking things off my list. Yes, I am a list maker! It helps me feel organized.
The day began with watering the herbs, which needed harvesting again. It’s been a great year for all of our herbs. I quickly clipped lavender blooms to dry for flavoring teas, and clipped various types of mint. After washing and drying the herbs, I quickly tied them in bundles to hang for drying. The aroma of fresh herbs drying in the kitchen makes me happy.
Fresh mint hanging in the kitchen! This is chocolate mint. It makes great tea! Lavender Blooms for flavoring Tea
Weekly household chores were next on the agenda. One by one, I checked them off my list. But, between chores… the squash, zucchini, and cucumbers were reoccurring thoughts. So, I decided to bake a little zucchini bread. I also vacuum sealed a few bags of sliced squash and zucchini for the freezer to enjoy this winter. Next on the list, was the sink full of cucumbers. Checking my time, I decided that I would have time to make seven quarts of spicy kosher dill pickles, which are always tasty any time of the year. If you’ve not tried my recipe for spicy kosher dills, you can follow the link below to learn more. These pickles are a family favorite, as well as a favorite among many of our neighbors. Canning Spicy Kosher Dill Pickles
We’ve had an abundance of summer squash and zucchini this year!
Now to proofread. My editor is expecting the final revisions of the last chapters to be ready later this week. I am in the homestretch of finishing this nearly year long project. I’m excited for my students to have this new workbook in their hands. It is designed to accompany the textbook I wrote in 2019. Thankfully, the abundance of rain we received over the last few weeks allowed me to work ahead of schedule, but also resulted in lots of weeds. That was another thing on the list to attend to. Hoeing usually means all hands on deck! Again, lots of hard work, but very satisfying work.
The zucchini kept calling my name! I ended up grating several zucchini for the freezer for bread this winter. I use a hand-held box grater and a glass measuring cup lined with white paper towel or cheese cloth. I grate the clean zucchini into the cup until the measuring cup is full. This is perfect for breads as my recipe calls for one full cup of grated zucchini. It also works well because the paper towel or cheesecloth is already holding the zucchini, and ready to be squeezed to remove the liquid before freezing. I felt better about having used several of the beautiful green bounty.
Three hours later, seven quarts of spicy kosher pickles are cooling and waiting to be taken to the basement for good eating this winter! Zucchini bread will be cooling soon. One loaf to eat and one for the freezer. Yes, you can freeze whole loaves of homemade bread. Allow the bread to completely cool, remove from loaf pan, and wrap twice with plastic wrap, then once with aluminum foil. Once the bread isfrozen, you can vacuum seal for reassurance of no frost gathering on the bread. When you’re ready to eat the bread, allow it to thaw in the fridge. Once it’s completely thawed, remove the vacuum seal and unwrap and enjoy. It’s amazing how moist the bread is.
Spicy Kosher Pickles
I hope you’ve enjoyed spending a little time with me in the mountains of Kentucky. It’s been a busy day, but one that makes me feel accomplished. Feel free to leave comments. I love to hear from my readers. I’ll share the vegan zucchini bread recipe soon. It’s a keeper. Also, I’m excited to share my new Indian relish recipe with you! I’m hoping to have it posted later this week. Check out the picture beneath the bread photo! God bless from the mountains of Kentucky.
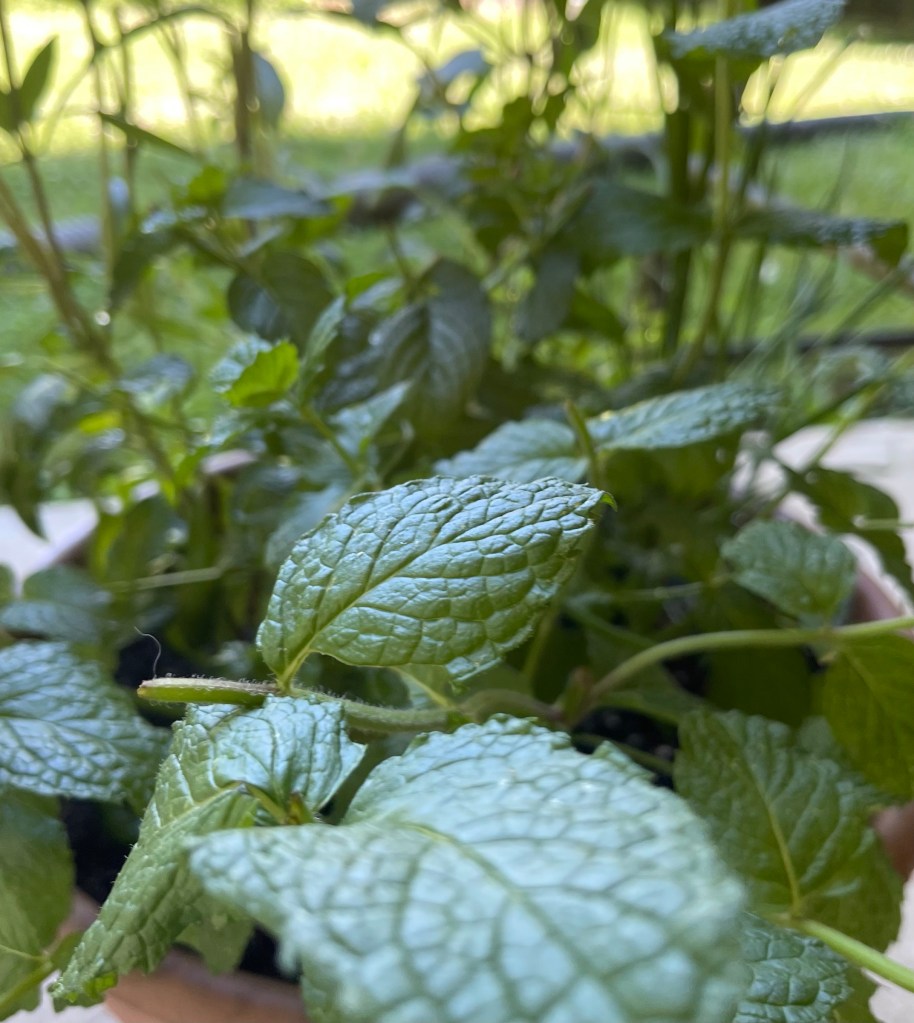
Good Morning from the mountains of Kentucky. I hope your morning is off to a great start on this beautiful Saturday. We’ve been hammered with extreme temps this week, so today’s high seventies is a welcomed relief. It’s that time of year when the garden needs to be hoed, the weeds need to be pulled, herbs are coming in like crazy, and the harvesting and drying have begun. I took advantage of the cooler temps this morning to prune my herb garden, which desperately needed a trim. I like to trim my herbs in the early morning hours while the dew is still on the ground, and clinging to the leaves. I also like the cool temperatures as it is easier on me and on the herbs.
This is about a fourth of our vegetable garden. Spearmint for teas and salads.
I have been enjoying mint-infused water this summer, and quite a bit of mint tea. I have already dried two cuttings of various types of mint, as well as other herbs. They’re carefully tucked away in my kitchen herb cabinet in glass jars in the kitchen. Glass jars with air-tight lids are the best method of storing dried herbs. I have had several questions about how I harvest mint. It’s actually quite easy. As I mentioned above, I trim herbs before they become leggy. Trimming herbs actually causes the herbs to take on a more bushy consistency.
Lemon balm for cooking, teas, and health.
As I trim the mint, I place the fresh-cut mint on large cookie sheets lined with a white paper towel or butcher paper. This allows me to keep the mints separated and labeled if necessary. I rinse the mint to ensure there are no ticks or other small pests. While the mint is draining in the sink, I inspect the mint for the best leaves. I try to pick the mint that is void of holes where insects may have nibbled, dark spots, or any other imperfections. I gently pat the leaves dry and place them on a clean, lined cookie sheet and place them where they are not in direct sunlight. It doesn’t take as long for the herbs to dry with this method.
Chocolate mint tea drying in the kitchen.
A second method I use is to follow the above steps, except do not remove leaves from stems. I pat the stems of aromatic leaves dry, gather the mint into a bunch, and wind cotton twine around the stems to tie the mint in a bunch to hang dry. I hang the mint in an area that is not directly exposed to windows or sunlight. It takes a little longer for the mint to dry by this method, but it allows you to harvest the stems as well as the leaves, while also filling the kitchen with a nice fresh mint aroma.
Once the mint in the tray is dry, you may either crumble the mint and add the mint to the mint jar or simply store the leaves in the jar. I use both methods. I like the crushed mint for baking and the whole leaves for tea. You may use either method of storing the dried bundle.
Chocolate mint leaves drying for tea.
A second question that is often asked is; what type of mint do you grow? To answer that, I respond as much as possible. Then I elaborate and explain that I grow peppermint, spearmint, chocolate mint, apple mint, lemon mint, and strawberry mint. I always reply that spearmint and chocolate mint are my favorites.
Finally, the third most asked question is; how do you make your tea? I tell them that I enjoy iced teas and also hot teas, depending on my mood and seasonal temperature at the time. For hot teas, I will typically place an organic black tea bag in my cup, put the water on to boil, choose the flavor of mint I want to have in my tea, and then add the mint to my tea ball. Once the water has reached the right temperature, I pour the water into the cup and allow the black tea and mint in the tea ball to steep for three to four minutes. I add a tiny bit of organic agave to the tea, stir and enjoy. You may add milk if you like your tea milky. I occasionally add almond milk or oat milk to mine.
Small jar of dried chocolate mint.
For cold tea, I boil enough water for a quart jar. I add two black tea bags, and if you like green tea, you can add green tea bags instead of black. I also add a larger tea ball filled with my choice of dried mint or even a mix of mints. Allow the tea bags and the tea ball to steep for forty-five minutes to an hour in the glass quart jar. Stir occasionally, and once the tea has darkened and cooled, you can pour tea over ice and add a little lemon, agave, and fresh mint leaves. This is an awesome drink, that is refreshing, full of antioxidants, and tastes great!
Tips of the week: you can pot various types of mint in flower pots to prevent the mint from taking over your garden, or if you have the room, you can isolate each type of mint in separate herb beds. Mint has a way of being intrusive and will quickly take over and can smother other herbs out. I like to do both pots and beds. My second tip is; as you know, I am a doTERRA essential oil consultant and recently I discovered that one drop of peppermint essential oil takes my peppermint tea to a totally new level. One drop of spearmint essential oil can be added to spearmint tea as well. Do not add essential oils from typical over-the-counter, or aromatherapy blends. doTERRA oils that are identified as supplemental can be added for internal use and wonderful internal benefits.
Lavender awaiting plant butter, teas, or cookies.
I hope that you’ve enjoyed learning about how I harvest mints for teas. I encourage you to grow mint, as it is probably the easiest herb to grow. It is also a very versatile herb that can be used for bee stings, headaches, bruising, as a natural pesticide, and also baking and delicious teas. Comments, ideas, and questions are welcomed. For now, God bless, from the mountains of Kentucky. Remember, God has given us an abundant supply of plants that will help sustain us.
Hello, from the mountains of Kentucky! I hope you had an adventurous and restful weekend and that your week is off to a great start. Saturday morning’s is typically time for me to catch up on housework, laundry, and also time to work in my herb garden. But, sometimes the craving for an adventure stirs within me. I love a good adventure as much as the next person! I tell my grandchildren that adventure is in the eye of the beholder and that adventures are everywhere. The mountains of Kentucky are are the perfect place for adventures. Saturday’s are typically a time of catching up on work around the house, last Saturday I felt the craving for an adventure. So, we decided to trail ride in our side by side with our family. We set off for the mountain trails to enjoy the view, recall stories, and enjoy quality family time. Who knew what kind of adventure awaited us! Remember, adventure is in the eye of the beholder! I have always loved the mountains of Kentucky. They provided countless hours of playtime for us when we were growing up. We would build forts, hike, picnic, pretend to be cowboys and Indians, and rugged pioneers surviving the elements. Sometimes, we just enjoyed sitting beneath the trees and cloud watching. Nevertheless, the mountains have always called my name.
Large rocks at the top of the mountain known as the Rat Rocks.
When we were growing up in the hills of Kentucky, we spent hours hiking to the top of the mountains behind our grandparents house. We’d walk until we arrived at the large rocks. Many days were spent enjoying a simple picnic on top of the rocks that pictured above. While we ate we would often retell the story of the man that froze to death one night when a sudden snow storm came while he was traveling. His vision was blurred by the heavy snow and he lost his way. Legend has it that the man sought shelter from the storm near one of the large rock formations. Days passed before he was found in the mountains where he had frozen to death. I’m not sure that we ever grew tired of telling stories, finding arrow heads, pretending to be pioneers, or just waking and enjoying the bounties of nature. We also loved the simple days and afternoons of sitting outside on the porch and listening to our grandparents and relatives tell the mountain stories time and time again. I miss those days and think of them often. So, enough about mountain legends! I have a new recipe that I’m super excited to share with you!
I have always loved growing, drying, and cooking with herbs. I love their smell, their health benefits, and their taste. I also love to make teas from my herbs, which is loaded with health benefits. I also love essential oils. Together they make a wonderful partnership! Recently I decided to become a doTERRA essential oil advocate. It only made sense to me since I have enjoyed diffusing the oils and using them for various other purposes for many years. Essential oils and herbs go hand in hand and are both all natural and healthy. I like to refer to them as God’s blessings. I recently learned that some of the doTERRA oils also offer even more health benefits than topical and diffusion benefits. I learned about their internal health benefits, and also that many of them can be used to flavor some of our favorite dishes. This all intrigued me as I have enjoyed a more holistic way of life with plant-based cleaning products, laundry detergent, and through following a plant-based diet for nearly four years. I edged my way forward from clean eating, to vegetarian, and from vegetarian, to vegan. The rewards and health benefits of a holistic lifestyle are amazing! So discovering even more natural health benefits of essential oils… I was all in!
Enjoying the benefits of diffusing essential oils.
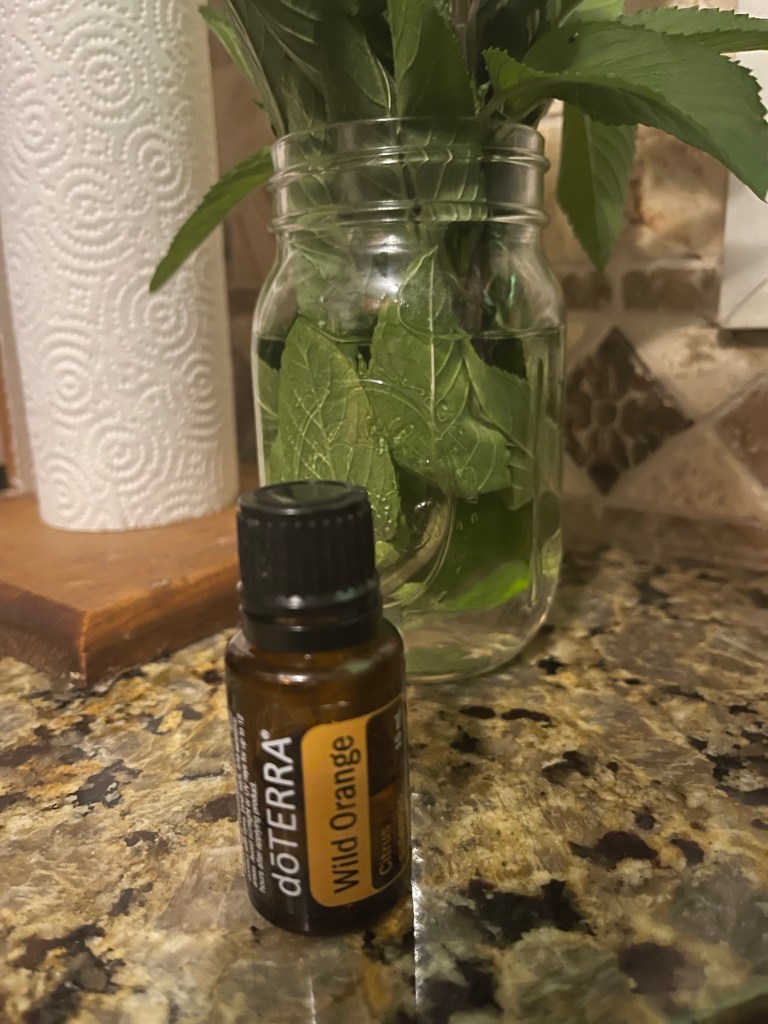
Some of you may have tried the wild orange orange essential oil. It is one of my favorite oils to diffuse in the house late evenings. It smells amazing and provides a calming and relaxing atmosphere. Wild orange is also one of the many oils that can be used in sauces, teas, smoothies, and it’s also great in homemade cleaning products. A couple of drops of wild orange on wool dryer balls provides an amazing fresh scent in your laundry as it is drying. Also, two drops in a chocolate smoothie tastes absolutely amazing! After I discovered this delicious taste, I decided to add a couple of drops to my vegan chocolate protein balls. Can I say, SCORE!!! I am so anxious for you to try this recipe. If you love those cream filled bites of chocolate goodness in flavored assorted chocolates, I think you’ll love these protein balls. However, unlike chocolate candies, protein balls are healthy, vegan, and delicious!
One of my favorites oils!
Ingredients:
• 2 scoops of chocolate plant-based chocolate protein powder (I prefer orgain)
• 1 tbs of good natural smooth organic peanut butter
• 1 tsp cinnamon
• 1 tbs finely chopped walnuts
• 1/2 cup old fashioned oats (can be ground for a finer texture, but doesn’t have to be)
• 1 tsp organic ground flax seed.
• 1 tsp of organic chia seeds. (I measure with the small scoop that came with the chia seeds.)
• 1 tbs of organic agave
• 1 tbs of vegan chocolate chips
• 4 drops of doTERRA wild orange essential oil. (aromatherapy grade oils are not suggested for internal use)
Process:
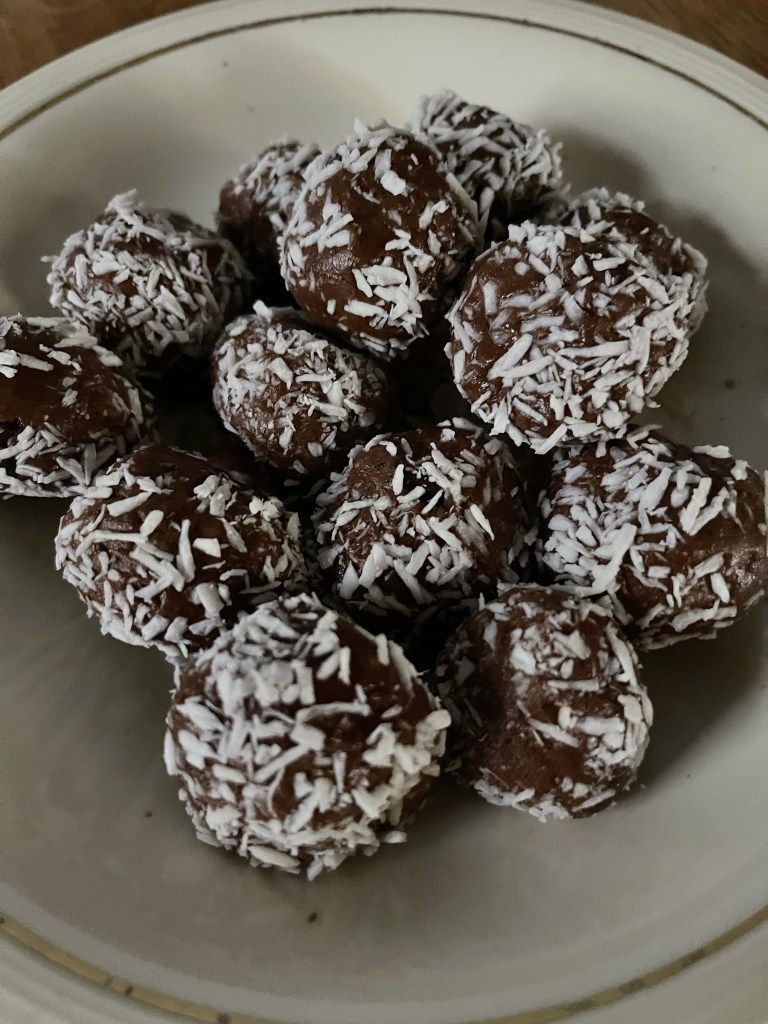
Mix dry ingredients and add moist ingredients to the mixture. Mixture will be stiff, but keep working it. You may add a tsp of agave if needed to make the mixture easier to work up. Once mixture is mixed, use a small scoop or spoon and dip the desired amount into your hands. Roll the mixture into a ball and place in a dish. Continue working the mixture up until all of the mix has been used. I typically have 12–14 protein balls. Refrigerate for two hours to allow balls to set.
You can experiment and try different toppings or coatings. You may add ground coconut to the balls for an additional burst of flavor. I like them either way! I have also tried them with dates instead of peanut butter, which are delicious too, but I’m a peanut butter-aholic, plus the peanut butter gives them a bit of candy bar taste!
Store the balls in a covered container and keep refrigerated for best texture. They will last for days and days in the fridge, if you can resist eating them in larger quantities. I try to limit myself to two per day.
I rolled this batch in fine unsweetened shredded coconut for an added flavor! Yum!!!
I hope you enjoy them as much as I do. My grandkids love them too. They think they taste like brownies. I love that they enjoy them because this allows them to avoid added sugars and butter, which are both ingredients to traditional candies, cookies, and brownies. Feel free to leave a comment. I love hearing from my readers. If you’re interested in doTERRA oils, leave a comment with your email and I’ll be happy to send you a direct link so you can explore and begin enjoying the many benefits essential oils provide. For now, I’m off to care for my herbs before the rain comes today. From the mountains of Kentucky , God bless each of you.
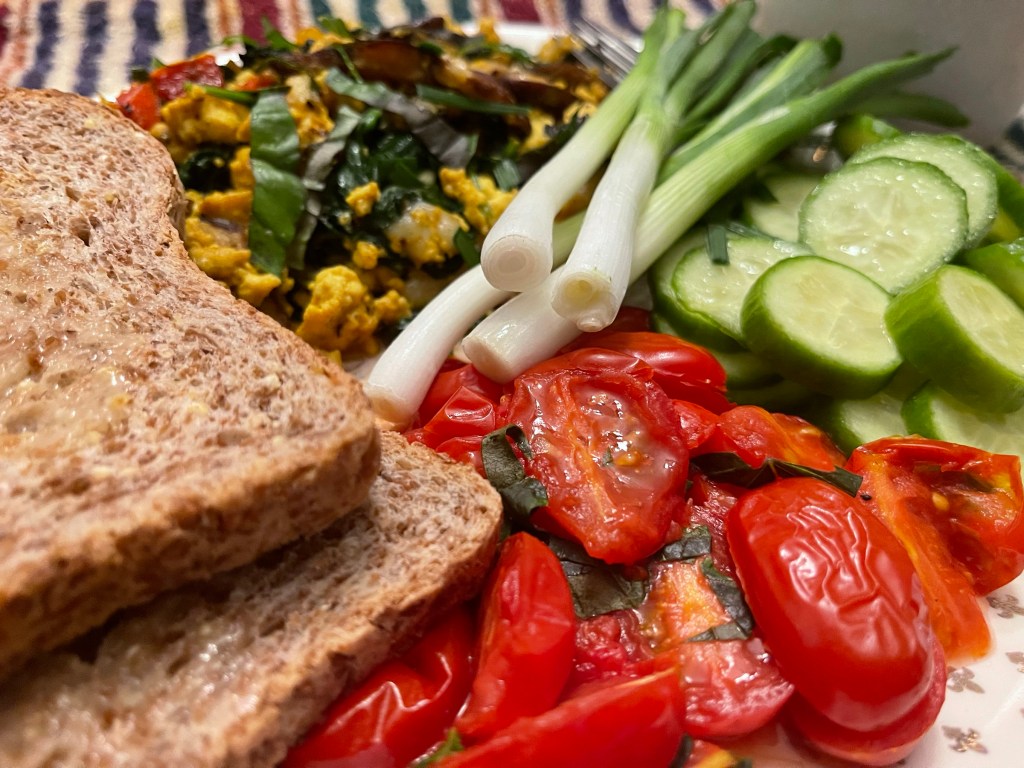
Italian tofu scramble, stewed tomatoes, fresh cucumbers and Ezekiel toast.
Following a plant based/vegan diet often leads to a variety of questions. Some questions are asked more often than others. My best answer is simply that I am eating healthy for my overall health and my life. I wanted to share some of the more common questions that I’m asked, and also how I answer them. My hopes is that after you read my answers, you may be inspired to eat clean, and healthy for your overall well being.
Why did you decide to follow a vegan diet?
It was an easy transition for me. I was never a big meat eater. I became lactose intolerant as a young adult, so I had had already omitted dairy from my diet. I battled high cholesterol for years, so I had already stopped eating eggs and processed foods. I also was a border line diabetic, which intensifies my concerns about sugars and processed foods. But one thing that helped me make my mind up was reading the research about the connections between consuming animal products and cancer. So, the decision was relatively easy for me.
How long have you ate plant-based?
I slowly transitioned over a period of four years. But, have been totally plant-based for nearly four years now. I have followed a clean diet for several years and loved eating organic foods and home grown veggies. I’ve always loved fruits and vegetables of almost all varieties.
What do you eat?
I always have to hide a giggle when I’m asked this question. I simply smile and explain that I eat from a wide variety of plants including loads of home grown and or organic vegetables and wide variety of organic fruits. I love good non gmo or organic brown rice in lots of dishes. I enjoy a lot of good organic old fashioned oats in many delicious dishes. I also add organic firm tofu to my diet at least three times a week. Tofu can become almost anything from a take on scrambled eggs to imposter fish sticks! I also really like organic veggie burgers. I eat flourless breads occasionally. And I also love soups of a wide variety. I love organic nut butters! I also enjoy almost all beans and lentils. The answer to this question could go on and on forever! Oh, I almost forgot about nuts!!! I love eating walnuts, almonds, pecans, and cashews! It’s really easier to say what I don’t eat. I don’t eat meat or meat products. And, I don’t eat dairy products. I can eat anything else that I want to eat. But, I do always try to eat as clean and organic as possible!
Our garden last year. This year’s is not quite this nature yet.
Does vegan food taste good?
The taste is unreal! I love growing and incorporating fresh herbs and spices in my dishes. My husband loves some of my dishes so good that he prefers some of my dishes to traditional dishes, such as tofu scramble instead of scrambled eggs. Taste lies within the imagination of the cook! The sky is the limit on fresh and or organic spices, molasses, and agave! Creativity is the key!
Plant-based dessert! This is my apple cinnamon tea bread.
Do you miss eating meat?
This is an easy question to answer. No, I do not miss meat at all! There’s many delusions ways to substitutemeat. Lentils are great as is tofu. The market also has many healthy and organic options for ground crumbles that honestly taste better than ground beef. There’s also veggie or soy grillers that make outstanding burgers as well as many other options available today. You may be surprised at the amount of foods that are available in your local grocery stores. I encourage you to to be a label reader and also to make wise choices. I prefer fresh foods over processed foods. When I buy processed, I always try to buy organic.
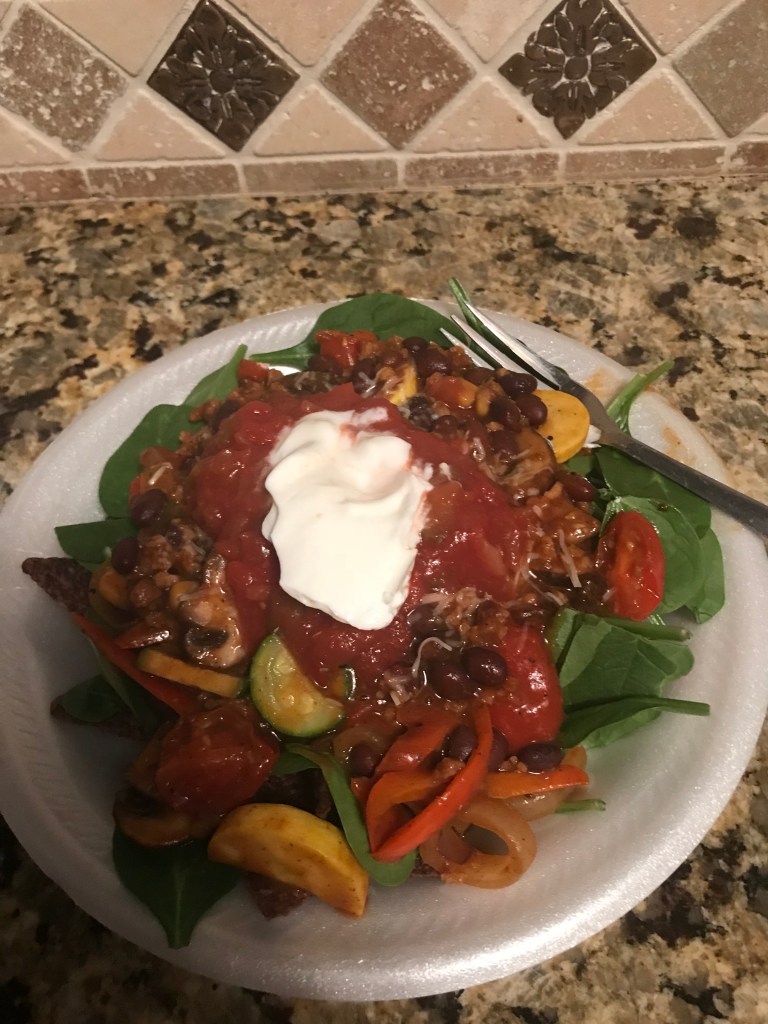
Vegan taco boat in an acorn squash.
Does your family eat the same food as you do?
Dietary choices, lifestyle changes, and healthy habits are a personal choice, which I respect. Our daughter follows a vegan lifestyle as well, which helps with creating new and creative dishes. My husband does not. He is a true meat lover, but consumes less than he did at one time due to gout. He does enjoy my vegan vegetable soup and my vegan chili soup. He also prefers tofu scramble to scrambled eggs.
What do you eat when others are eating meat-based dishes?
Many times I eat the sides that I prepare with our meal. I am also careful in planning and preparing healthy sides. I love to incorporate fresh vegetables such as green beans, corn, spades of all kinds, veggie pasta, steamed veggies, baked potatoes, and many other dishes. If I prepare burgers for my husband, I often eat a veggie burger. I love to air fry small Yukon gold potatoes as fries. My husband now prefers them to traditional French fries. I can honestly say that I never have to worry about not having something to eat!
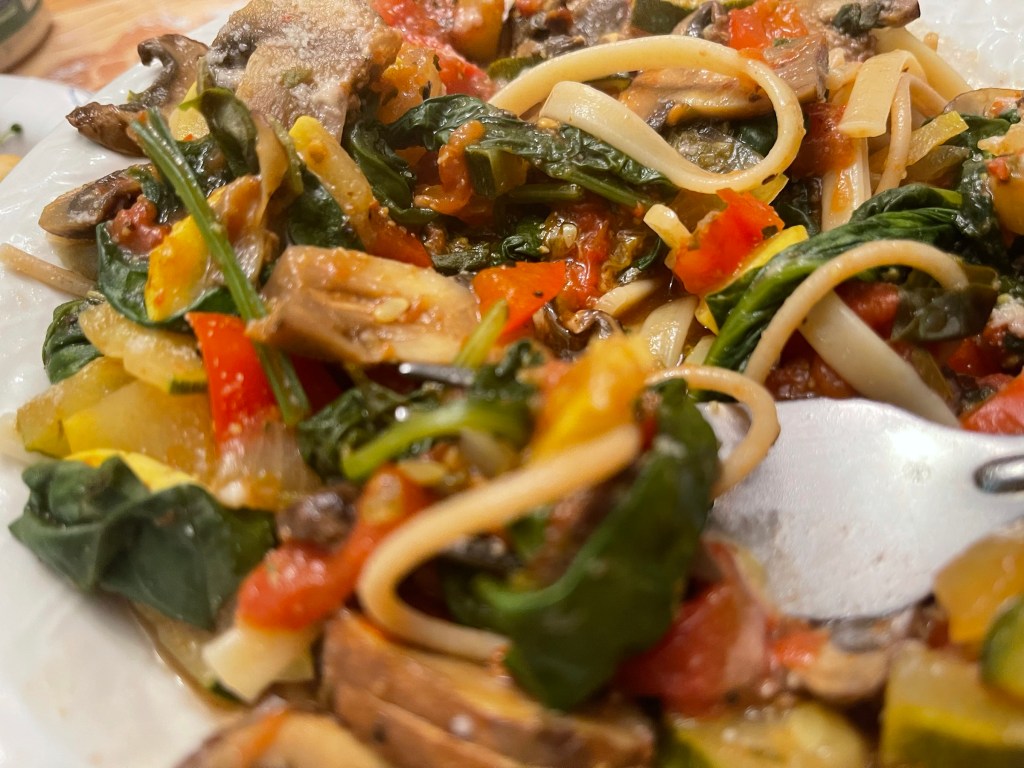
One of my favorite Italian dishes!
What do you eat when you dine out?
I’ll be honest, after eating clean for a number of years, I don’t or shall I say, we don’t eat out very much. But, when we do, I can usually make a meal on a good salad and baked potato. I have also been known to take my favorite plant-based dressing with me.
Do you miss cheese?
This is another easy question to answer. No, I do not miss cheese. There is so many organic non dairy cheese options available today. Also, raw cashews can be tuned into a delicious cheese! My favorite non-dairy cheese from the grocery is pictured below. Another plus about eating non dairy cheese is that it doesn’t mess with your bowel habits! No more constipation!
One of my favorites!
How has eating plant-based improved your health?
Wow! This is one of my favorite questions to answer. My cholesterol is now in the normal range. My blood pressure now is also normal. I no longer suffer with hemorrhoids. And, I don’t have acid reflux anymore. My joints feel better and I have less inflammation in my body. This is another answer that could go on and on.
How do you substitute eggs?
My favorite method of subbing eggs for a main dish is by using extra firm tofu. You can find my recipe for tofu scramble on my webpage. For baking, I use a flax egg.
Can you lose weight eating plant-based?
If you choose your foods carefully, you can lose weight. Like any other diet or lifestyle choice, there’s healthy options and unhealthy options. For example, Oreos are vegan, but also fattening. If you fill up on lots of raw and steamed veggies and fresh fruit, while remaining physically active, and staying hydrated, you’ll see pounds decrease and also feel better about yourself and like a new person. Remember, focusing on weight loss can lead to unhappiness and often times, failure, and weight gain. Always keep your focus on living a clean and healthy lifestyle that makes slow and steady progress, which leads to an overall difference in your well-being.
Where do you buy the food you eat?
We grow a huge garden every year. So, I eat a lot of fresh vegetables in the summer and fall. I also preserve, can, and dehydrate every year, so we enjoy our homegrown vegetables and fruit all year long. I buy things we can’t grow from Kroger as they have a good organic section and offer a wide variety of meat substitute items as well. I love visiting the local farmers markets and local farms. I also grow loads of herbs for fresh herbs. I also dry them for spices. I love to order some items that I can’t find in the local stores from Amazon. I also order from the Thrive Market as well. I love their organic teas.
Early spring garden a few years ago.
Did your hair come out?
You wouldn’t believe how many times I’m asked this question. The answer is no! If anything my hair is healthier than ever. I use a good plant based organic shampoo and conditioner, which I feel has made a huge difference.
How do you get enough protein?
There’s an amazing amount of protein in plants. Also, tofu is high in protein. I also enjoy lentils, which are loaded with protein. I like to eat at least one tablespoon of organic peanut butter each day. I’ll add it to smoothies, toast, protein balls, and sometimes just a spoon of peanut butter by itself. I enjoy incorporating organic protein powder in oatmeal, baked oats, and in smoothies. My blood work has never came back with low protein, so this has never been an issue for me.
One of my favorite protein powders!
These are only a few of the many questions that I’ve been and continue to be asked. I hope you’ve enjoyed learning more about a vegan diet/lifestyle. Feel free to leave comments. I love to hear from my readers. For now, God bless from the mountains of Kentucky!