Entertaining Angels Unaware

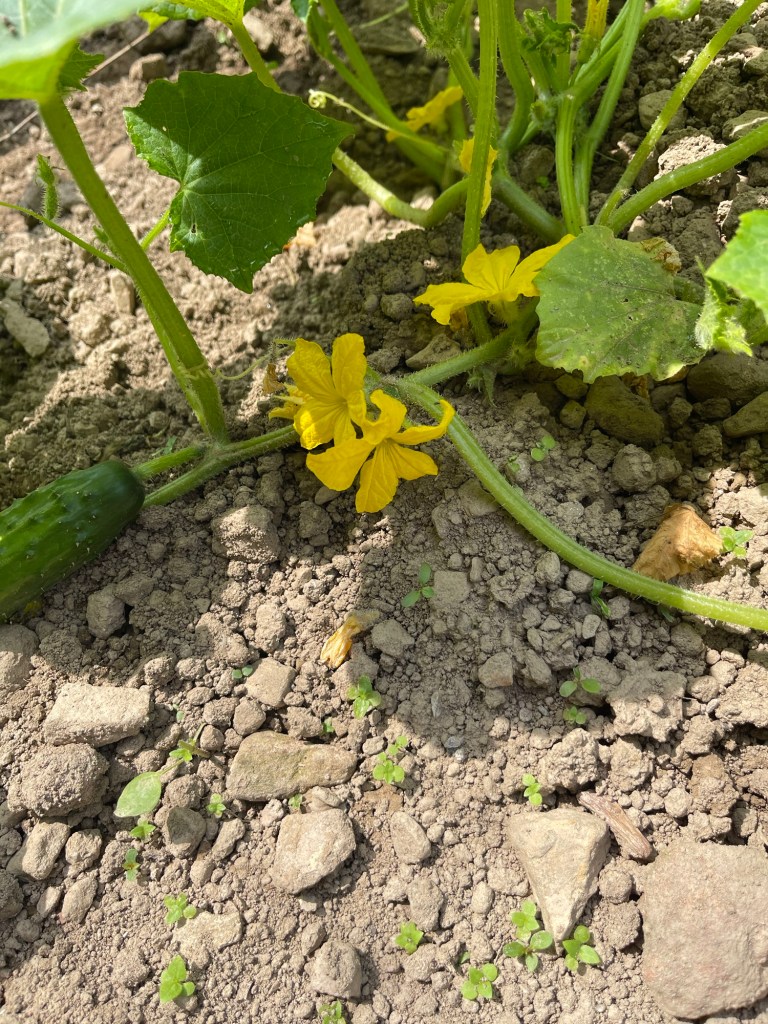
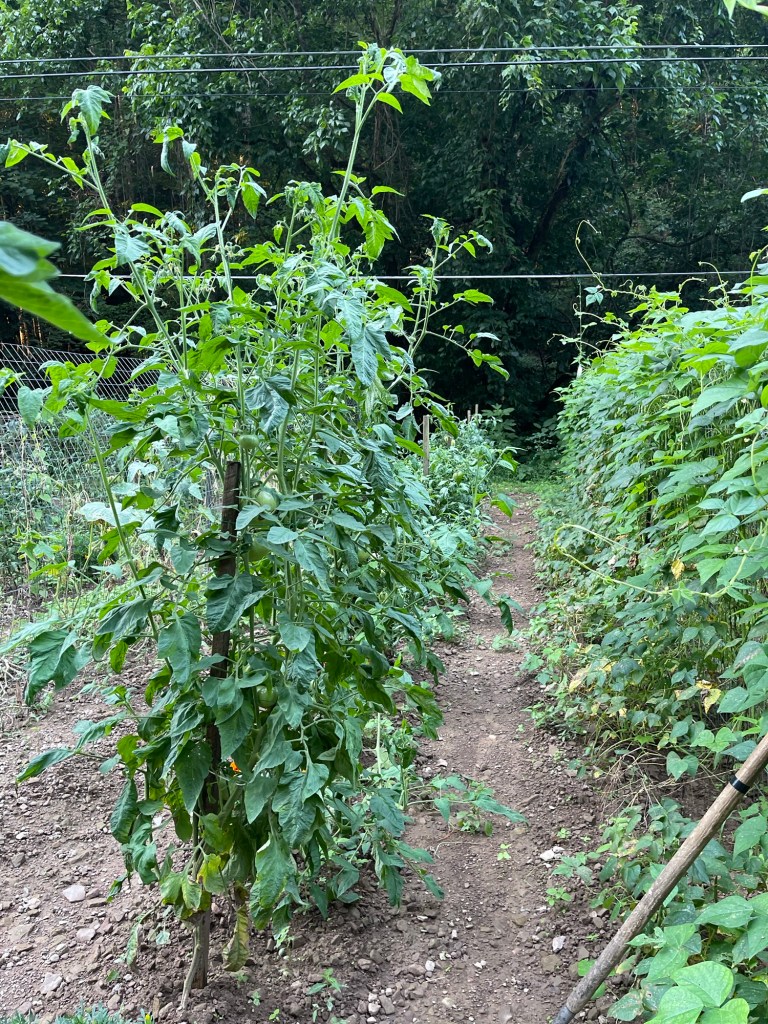
Hello, from the mountains of Kentucky! I hope the weather where you are is a bit dryer than it is here. Rain has once again returned to the mountains making it difficult for garden work, vegetables ripening, and also for picking. Uncertain weather can be challenging for homesteaders.

Tomatoes and beans from our garden. I find so much peace while working in our garden.

However, the rain has been a blessing in other ways. My eighty-six year old mother was hospitalized over a week ago, and I’ve spent the majority of my time with her. The rain falling outside the hospital window reminds me that God is aways in control of all things. Had my mom’s hospital stay have been during a hot and dry season of summer, I would have been worrying about the garden work. With the rain falling, I was reminded that I couldn’t have picked, even if I were home. This thought provided me some peace, and allowed me to focus on the most important thing, my mom. For now, the veggies can wait.

My time spent at the hospital has been nothing short of miraculous. I am amazed all over again at the diverse population of people that I have and continue to come in contact with within the hospital. I have had lengthy conversations with a few, encouraged others, have been encouraged, prayed with some and others have prayed with and for me. I have encountered beautiful and friendly smiles, have laughed with one or two, and shared my heart and warm hugs with others who were grieving. Through the encounters of others, I am reminded that God places people with us, around us, and near us, when we need them.

God’s beautiful creation. We can beauty all around us, if we have eyes to see.

One gentleman who was at the hospital with his wife who was in very serious condition, shared his testimony. He said he was worried and felt helpless. His wife wasn’t getting better. He explained, “I said, Lord, I just need a little hope.” He said, as soon as he had said those words, a nurse came into the room and introduced herself as, Hope. She explained that she would be his wife’s nurse for the day. He finished his testimony by saying, he just looked and whispered a thank you prayer to the Lord. He truly is an on time God. He’s ever-present.

I also met an older lady the other night in the waiting room. After chatting with her for a few minutes, I discovered she was there for her brother whom only had an estimated few days of life remaining. I noticed a young man who seemed to always be near her and who talked with her. I assumed he was her son or grandson. Later that night when the waiting room had emptied, other than my husband, myself, and the elder lady, I noticed the young man was gone. I asked her if he was her son or grandson. She smiled and said, “I don’t know who he is. He just kind of took a liking to me and had been hanging out with me.”

God provides friendship and companionship in different ways. He knows just what we need and when we need it.

I felt a warm feeling of comfort from the Lord. Instantly, I thought about how the Bible speaks of entertaining angels unaware. Had we entertained an angel unaware? Had He placed someone who could bring comfort in the time of need? Either way, the company of the young man was a blessing to the elderly lady. As suddenly as the young man had appeared, he was gone, just as the nurse, Hope, didn’t return after that night.

Even if he wasn’t an angel, he provided comfort for a lonely soul in the time of need just as the nurse named Hope, provided comfort for the man whose wife was so ill. God sees us where we are and meets us there with His presence or someone he temporarily places in our lives. Remember, to be kind and be thoughtful, to others. You may be their temporary angel, or you could be the one who is entertaining angels unaware. God’s ways are not our way.

Hebrews 13:2 Be not forgetful to entertain strangers: for thereby some have entertained angels unawares. KJV

I hope you have enjoyed this post, and it brought you some peace and comfort. God truly knows exactly what we need and when we need it. Remember, He is alive, and miracles still happen. As I write this post, I am encouraged. My mom has been moved from ICU to a regular room. She is making baby step improvement. The testimonies of others helped lift me up. If you have an encouraging testimony, don’t be afraid to share it. There are people all around us who need encouragement. Feel free to comment, like, and or follow. For now, God bless, from the mountains of Kentucky.

Zucchini Bread, Green-beans, and More!

Hello, from the mountains of Kentucky. I hope this post finds you well and blessed. It’s a busy time in the mountains! Homesteading is a way of life with great rewards, but also a lot of hard work! We spent most of the day Friday picking beans before the rain moved in. Our house was filled with the wonderful summer aroma of green beans simmering on the stove! While we worked to string and break beans to can. See the link below for our canning recipe. Canning Green Beans the Time-Tested Way However, it’s never too busy to take time to go to church for Friday’s hour of prayer and Bible study. Our topic was very interesting. Do you trust God? The study/conversation was filled with testimonies, scriptures, advice, and wonderful fellowship. It was a great reminder of how much we truly need to trust God, especially in the uncertain times that we are living in.

The first of what we anticipate to be many jars canned!

Friday was also a day for baking. When you have an abundance of zucchini, you flash freeze them and transfer the frozen zucchini to a bag to use for frying later, shred them for winter zucchini bread, make pancakes for the freezer, fry tasty fritters to vacuum seal, and batter fry a few to have with supper. Again, it’s a busy time in the mountains. I can’t complain. It’s one of my favorite times of the year. We are richly blessed to live in the mountains, have land that allows us to garden and have fresh vegetables to enjoy all summer, and an abundant crop to put away for winter.

I didn’t get a picture of the entire loaf before a chunk was already eaten!

Homesteading for us is a healthier way of life. Not everyone in our family follows a plant-based diet, but that doesn’t mean they do not enjoy some of the delicious plant-based dishes or work toward improving their health. A lot of people are prone to think of plant-based or vegan food as bland, dull, and tasteless. But, this zucchini bread is far from that. Our entire family loves it, even those who don’t follow a plant-based diet. I think you’ll enjoy this bread recipe as well. It is moist, sweet, and delicious.

Ingredients:

Line a mixing bowl with cheese cloth or unbleached paper towel. Shred two small or one large zucchini using a fine hand grater into the lined bowl, or two cup measuring cup. Squeeze the liquid from the zucchini. It should equal a cup or a cup and half after the liquid is squeezed out.

  • 1 to 1 & 1/2 cups of shredded zucchini
  • 1 1/2 cup of all purpose unbleached flour (I prefer King Arthur)
  • 1/2 cup organic light brown sugar
  • 1/2 cup organic white sugar
  • 1/2 tsp pink Himalayan salt
  • 1/2 tsp non-caking organic baking soda
  • 1/2 tsp organic baking powder
  • 1-2 tbs organic cinnamon (I usually use two)
  • 1/2 tsp nutmeg
  • 1 tsp ginger
  • 1 tsp pure vanilla
  • 1/2 cup unsweetened applesauce
  • 1//4 cup organic coconut oil
  • 1/4 cup extra virgin olive oil
  • 2 tbs of unsweetened almond milk
  • 1 tbs pure maple syrup
  • 1-2 tbs chopped pecans

Preheat oven to 350. Line loaf pan with unbleached parchment paper. I like to use a cast iron loaf pan. Give the parchment paper a quick spray with organic cooking spray. Mix dry ingredients, other than pecans, add wet ingredients including the shredded zucchini. Do not add the maple syrup or the milk yet. Mix gently. The batter will be thick. Add milk to create a smoother mix that will pour into the pan. You can use more milk if needed. Pour mixture in lined pan, sprinkle the chopped pecans or nut of choice over the top of the mix then drizzle the maple syrup over the top. I like to bake my bread on the middle rack to prevent the bottom from becoming too brown. Set the timer and bake for 50-55 minutes. Ovens will vary and the thickness of your pan can also determine the baking time. For the cast iron loaf pan, 55 minutes is required.

Remove the bread from the oven. I test the bread for doneness with a wooden screwer. If the tester comes out clean, the bread is baked through. Place the pan of bread on a cooling rack. Allow to cool for at least ten to fifteen minutes and lift the loaf out by the parchment paper and place back on the rack to cool. I allow mine to cool about fifteen more minutes and then cover with a clean dish towel to cool an additional thirty minutes before slicing. A bread knife works best for slicing.

This bread is great as a moist treat, or toasted and lightly buttered. For vegetarians, this bread is great dipped in whipped milk and eggs or egg whites, then fried on the griddle for a tasty French toast served with maple syrup. I like to slice the bread and vacuum seal individual slices to go in the freezer for a sweet treat when you don’t have time or don’t want to bake an entire loaf. The possibilities are endless. I hope your family enjoys this bread as much as our family does.

Monday was spent rescuing our corn after rain and wind damage. While one held the corn and the other hoed and heaped fresh mounds of dirt around the base of the stalks. It was a laboring job, but one that had to be done. Fourteen rows of corn was wearing to the ground from excess rain and wind. A lot of hard work, but after a day of two of some sunshine, it is now standing tall. I think we may have lost four stalks. God is good.

I am also excited to bring to you a new recipe for banana-peach bread! Oh my, it is delicious! If you love a good peach cobbler, I think you’ll like this bread! Stay tuned, and watch for this delicious recipe!

I will add this recipe soon! Banana – peach bread!

I hope you and your family enjoy this recipe as much as our family does. For now, God bless from the mountains of Kentucky where homesteading is a way of life. Feel free to comment, like, share, subscribe, and or follow.

My Top Ten Herbs (part five-oregano)

Hello from the mountains of Kentucky! I am excited to share another of my favorite herbs with you. In this post I’ll share my thoughts and ideas about oregano as well as some of my favorite uses, how I dry it for spices, use it as a natural antibiotic, and more. So, let’s get started.

Oregano is member of the mint family. Oregano is perennial that is typically hardy in warmer zones. It prefers relatively hot dry climate. It grows well in beds and pots. However, to ensure it returns in the spring, it should be planted in the ground. It is best to plant oregano in the spring, but it can be planted later in the season. There are several types of oregano including Spanish, Turkish, and Greek, which is the most common and my preferred.

One of our pots of oregano. The painted rock was a gift from our grandson.

Oregano grows well in a sunny area in well-drained soil. I water oregano that I have planted in pots daily, primarily because it is planted in terracotta pots, which drains and dries out easily. I water the oregano in the herb garden every other day, or as needed. I watered it daily during this 92-94 temperatures we’ve been having lately. I like to fertilize my herbs with banana water or a weak tea mixture at least once a week. Banana water is simply water that I soak organic banana peels in over night. This process adds potassium to the soil. The weak tea is made from leftover organic tea bags or leaves infused in a gallon of water. This type of natural fertilizer adds antioxidants to the soil and plants much like tea provides for our bodies.

Our newest addition of oregano in our raised bed.

Oregano is typically thought of as an Italian spice, but it is also a great spice for eggs, tofu scrambles, and it makes a nice addition of flavor to soups, baked potatoes and of course spaghetti, and lasagna. I like my dried oregano use in my homemade spinach tortillas. I have included the link for Vegan Italian Spinach Wraps These delicious wraps take a small amount of time to prepare, they’re easy to make, and they’re healthy. They make a great snack as well as a tasty wrap.

I typically use the oregano plants that I grow in pots for cooking and the oregano in the garden for medicinal purposes, and for harvesting to dry for spices. Pruning the oregano creates a fuller mor bushy plant. I trim and prune it as needed throughout the summer. I like to clip stems to use fresh when I am cooking. When I am ready to harvest, I cut the oregano in the early to mid morning hours before the sun hits the herbs. I clean the herbs by giving them a gentle rinse and patting them dry. A salad spinner can be used to remove any additional moisture. I like to hang bundles of the cut oregano stems beneath the upper kitchen cabinets to dry. Make sure the herbs are completely dry before bundling to prevent mold from forming in the middle of the bundle.

My cooking oregano plant.

I love the aroma that fills the house while it’s drying. When I have a larger harvest, I dry it by adding the cut herbs to the drying rack. Keep the herbs away from direct sunlight when drying. Allow the oregano to air dry until it becomes crunchy. Once the herbs are dry, I like to run them through the spice grinder a few times to create a nice spice to cook with. I also rough grind some of the dried oregano for a more textured spice. I store the herbs in a glass container with a lid and keep them in a cabinet away from direct sunlight. Herbs can be dried in the oven or in a dehydrator. However, air drying is my preferred method. I feel that the herbs are more potent when air dried.

I also like to infuse dried oregano in organic extra virgin olive oil and use it as a rub for aching joints, to sooth minor cuts, and bruises. Many have used oregano oil for centuries as an antibiotic by taking one to two drops of oil daily. To make an internal oil, add dried oregano to oil and place in a dark area for four to six weeks. Next, strain the oil into a small glass bottle with a dropper. Keep the oil stored in a dry and dark area. I typically keep my bottoms of oil in an apothecary chest for easy access and better organization. Oregano oil has been used for parasite infections, digestion, and others have used it for coughs and congestion. However, there is not medical/scientific evidence of the medicinal benefits of oregano oil.

Antique apothecary chest found in Tennessee at an estate sale.

I prefer to use dried oregano in oil in what is called a cold infusion. This type of infusion has been used for centuries. It is less likely to become rancid or gather mold than fresh herbs will. To make an infusion, fill half of a clean glass jar with dried oregano leaves and the remainder of the jar with a good quality organic olive oil. Label and date your jar so you will recognize it with ease. Seal the jar and set aside away from direct sunlight. I typically store my infused jars of oil in the pantry. Allow the oil to infuse the oregano for at least four weeks. The oil maintains its potency better in a cool dry place. I like to add some of the oil in a small glass dropper bottle for internal use. The shelf-life infused oils is typically two years, if the oil is stored correctly. I recently read where some people add a drop of organic vitamin E oil to their infused oil to help increase the shelf life. I personally have not tried this. doTERRA oregano oil is an essential in my medicine cabinet as well. Essential oil is different than infused oil. It is more concentrated and potent. I would love to make essential oils, but the equipment to extract the oils is a bit too pricy for me. So, I buy top-grade essential oils from doTERRA. If you are interested in ordering, selling, or becoming a member of doTerra, simply follow the link https://referral.doterra.me/12640050

I find it interesting that oregano is one of the herbs that many herbalists keep in their survival kit, take camping, and have conveniently located in their medicine cabinets, as well as their spice racks. It’s a great addition of flavor to many dishes, breads, and soups, and a natural healing herb that is very versatile. It is easy to grow, maintain, harvest, and easy to create spices, teas, and oils. I am anxious to hear how you incorporate the pungent beautiful herb of oregano in your daily life.

Head over to the Apple podcast, and search for, Homesteading in the Mountains, to listen my latest episode about oregano.

Feel free to comment, like, and or follow my blog for more posts about how I incorporate herbs, essential oil, plant-based recipes, and homesteading in the mountains. Be sure to check back soon, as I will be posting my new zucchini fritter recipe. It’s a new favorite in our family. God bless from the mountains of Kentucky.

Homesteading in the Mountains

Hello, from the mountains of Kentucky! It’s been a dry hot month in our area of the world. With May being extremely wet, we anticipated June to be dry, but not this dry. The lack of rain has presented challenges for our vegetable garden. We’ve hand watered a couple of times a week and babied all the veggies with hopes and prayers for a good harvest. How’s the weather been in your area?

Foggy morning in the mountains.

We are often asked what it means to homestead. Homesteading was our grandparents way of life, their parents, and even their grandparents. We grew up learning how to farm. So, to our family, homesteading means that we can be self sufficient. Self sufficient means growing, harvesting, and preserving our own fruits and vegetables. We eat from our garden throughout the year. We enjoy fresh vegetables in the summer and fall, and preserve vegetables, soups, and vegetable juices for the winter and early spring months. We make use of hydroponic gardens year round. I like to grow salad lettuce year round in the hydroponic garden. It’s easy, clean, and ensures fresh lettuce at your fingertips. The staples we cannot grow are bought in organic bulk supplies.

Early summer vegetable garden.
Small hydroponic lettuce garden.

Homesteading also means we eat cleaner and healthier. We accomplish this through bypassing as many store bought prepackaged foods as possible. We enjoy baking our families breads, cakes, pies, and cookies, instead of buying unhealthy food that is filled with an abundance of sugars and unhealthy preservatives. One of our favorite homemade bread recipes can be found in the following link. Give Us This Day Our Daily Bread: Homemade Crusty Vegan Bread We also preserve fresh fruits to ensure we have jams and jellies for toast and biscuits. We enjoy foraging berries for dishes and jellies. There’s nothing much better than homemade jam spread on homemade bread for breakfast. Canning My Favorite Peaches

Homemade crusty seeded yeast bread
Canned strawberry preserves

Fresh eggs are gathered daily for breakfast and for baking. Fishing, to us is more than a pastime. Fish is caught from the lakes and rivers for the freezer to use later for fish dinners. The mountains provide an abundance of squirrels, rabbits, and deer for meat that is frozen for roasts, chili, and others dishes. We do not raise cattle, but buy fresh beef and hog meat yearly from friends that provides for the year.

Farm fresh eggs
Canning and preserving peaches.

One part of homesteading that I enjoy immensely is growing our own herbs. The herbs ensure we have spices, teas, tasty leaves for salads, and herbs for medicinal remedies. The herbs provide beautiful blooms that bring in an abundance of pollinators for our garden. The diverse mint that we grow makes great hot or cold tea, is a wonderful additive to cookies and hot chocolates, and can help sooth a bee sting.

Potted peppermint grown for tea.

Essential Oils, Tea Bags, and Bee Stings

Foraging mullein.
Drying mullein for tea.

We enjoy foraging for various plants to use for food, teas, and medicinal purposes. We harvest mullein, pictured above as tea to help alleviate coughing and congestion. We also enjoy bartering with friends and neighbors. If we have an abundance of corn or beans we may barter with friends for a vegetable or fruit that we don’t have.

One post cannot cover it all! This is a brief glimpse into our lives as homesteaders. I guess the best description is that we enjoy being self-sufficient, and being able to sustain our farm that provides for our family. We enjoy the simple things in life, family, friends, gardening, preserving, and nature. We enjoy church and our church families. We love the Lord, His ways, and serving Him. We believe in working for what we have, enjoy thrifting for antiques, repurposing things from the past, reading, and writing. We enjoy holistic living, cooking, baking, and taking care of our animals, and sharing God’s love and His goodness with others. Head on over to Apple Podcasts to listen to my podcast, Homesteading in the Mountains, to learn more about our homestead and homesteading projects.

For now, God bless from the mountains of Kentucky. Feel free to like, comment, and or follow. I enjoy hearing from my readers. Let me know if you would like to read more about our life homesteading in the mountains.

My Favorite Top Ten Herbs (Chocolate Mint part 3)

Hello from the mountains of Kentucky. I hope your week has been filled with blessings and sunshine. Life’s been busy in our neck of the woods! We finally have all our garden planted. The squash and zucchini are blooming and beginning to produce. We harvested our first two this week. The cucumber vines are running and blooming! We have our fence up and have a lot of small cucumbers on the vines. Now comes all the tilling and hoeing! But great rewards will follow!

Zucchini blooms
First cucumber of the season almost ready to pick!

This is the third part of my ten favorite herbs. I want to share my love and experience with chocolate mint, which is my third favorite herb post. Remember, I’m not posting in any particular order.

My chocolate mint bed.

I discovered chocolate mint about ten years ago when a friend gave me a small section she had propagated. I maintained it in a large pot in hopes it would come back the next spring. I was disappointed when it didn’t return. I could not find it at the local nurseries, so I ordered a small plant from Amazon and chose to plant it in one of my herb beds. It has thrived since then. Chocolate mint is in the peppermint family. The leaves of this wonderful mint is a deeper green than peppermint and the underside of the plant and stem is a purplish color. It is hardy in zones 3-9. The aroma is amazing!

Chocolate mint can quickly become invasive. The more it’s pruned, the thicker and bushier the plants become. If left unpruned the plants become leggy. I have had mint spring up outside the bed, in nearby pots, and even random places in the yard. If you are pruning but not harvesting, be careful with the clippings. They will sometimes take root where you discard them.

Chocolate mint makes a refreshing cold tea, by simply washing the leaves and adding them to glass of cold water. You can infuse them with an infuser or as whole leaves. It also makes excellent hot tea, especially in the winter months. Feel free to mix mints for a more bold flavor, add cinnamon for a festive tea, or just enjoy the flavor alone. It’s very refreshing.

I dry my mint by clipping the plants and pruning any damaged leaves. I then wash the mint and gently pat it dry with a clean towel or unbleached paper towel. I like to hang herbs in bundles to dry. Once the mint is dry to the point of crumbling, I give it a rough grind with the mortal pestle, and add to a glass jar and place it in the cabinet away from the light. I add the dried tea leaves to a tea ball or infuser for hot and cold tea.

Chocolate mint drying in the kitchen.

The dried mint can also be ground in a spice grinder for a powdery type spice to use when making brownies, cakes, and as a fun additive to a cup of hot chocolate. The uses for this tasty mint are endless.

I just chocolate mint tea to help sooth an upset stomach, help digestion, and ease indigestion. It is also beneficial in soothing oral mouth pain, and to add antioxidants in my body. It and versatile herb that has been used for centuries. Chocolate mint has a multitude of benefits with great taste whether you enjoy it as a hot or cold tea, or as a spice.

I hope you’ve enjoyed this post. Feel free to ask a question, or leave a comment. You may follow my blog for more recipes, posts about mountain living, herbs, and gardening tips. Homesteading is a wonderful way of life that helps us to be independent, sustainable, and a way of life. God bless from the mountains of Kentucky.

My Top Ten Herbs ( Part Two Basil)

Hello, from the mountains of Kentucky. It’s a beautiful day in the mountains today. The sky is clear, which I’m so thankful for. It’s been a very rainy May in our part of the world. Hard storms wreaked havoc on our mountains Sunday. Many are still without power, cable, telephone, and Internet. Ours was restored yesterday. One thing about loss of Internet… is it’s a great time to catch up on reading, writing, housework, and yard work. Today’s post is the second post of my top ten herbs. Keep in mind that these posts are not in any particular order. Check out my first post My Favorite Top Ten Herbs (part one – mint)

Pictured above is Italian basil

Basil is a must have for our pantry and spice cabinet. It is low maintenance, easy to grow, tastes great fresh, easy to dry for spices to use when cooking, fresh it adds wonderful flavor to dishes, makes great tortillas, makes great aioli, delicious pesto, it helps repel mosquitos, it tastes great in salads and so much more. Let’s get started!

Basil is a spicy herb that is commonly found in Italian dishes. It is actually a member of the mint family. It is a native plant of Africa and Asia. It loves plenty of sunshine, rich soil, moderate watering, and it loves to be pruned! It can tolerate some shade as well. Its wonderful taste can be identified in spaghetti sauces, pesto’s, on pizza, and in lasagna and many more delicious cuisines such as Italian tortillas. Vegan Italian Spinach Wraps. There are many types of basil. Believe it or not there are over one hundred types of basil. However, my two favorite types of basil are Genovese also known as, Italian basil it is often confused with common basil. The leaves of common basil is typically lighter than Italian basil. Another favorite of ours is lemon basil. I will address them in this post and might make a post about other types of basil at a later date.

Basil of all kinds is fairly easy to grow. It is an annual plant, which means it will need to be replanted each year if you live in a zone that has cold winters. In Kentucky, I plant basil each spring after the last frost. Don’t worry about expense. A good quality organic basil plant is only a couple of dollars. I typically purchase three to four plants per year, which is still more economical than buying fresh basil at the grocery store. One small packet of fresh basil, that may or may not be fresh, can cost nearly five dollars. I would prefer to have enough basil to enjoy fresh from spring until fall, and then harvest it for the winter.

I harvest and use it throughout the year and harvest the remaining plant before the hard frosts come to the mountains. Basil grows well in the ground, or in large pots. I prefer to plant mine in large pots within my herb garden. I also keep a pot of basil on my back porch for easy access for fresh basil. And again, it also helps deter mosquitos. Your basil will require good drainage, if you grow it in pots. I water my basil when the soil feels dry. I typically water daily when the temperatures are high. If the soil is damp, skip the watering. Over watering can be detrimental for basil. I like to add a looser potting mixture in the bottom of the pots. I enjoy caring for and growing orchids. So, I normally have an extra bag of the orchid potting mid on hand. It is a great addition to the bottom of the pot, and it helps the soil drain. I prefer to use a good quality organic potting soil for my potted herbs. If I’m going to eat them, I don’t want toxins from additives in the soil. Both lemon and Italian basil love and thrive in sunshine! I give my herbs an occasional spritz of Neem oil to prevent insects from building nests, primarily spiders, in the herbs. I also feed my herbs an occasional drink of weakened herb tea. The antioxidants are a great fertilizer. I do not add traditional fertilizer due to the additives in the fertilizer. Natural is always best!

Italian basil.
Close up of lemon basil.

Again, basil likes to be pruned. Trimming your basil on a regular basis allows the basil to become fuller and less leggy and promotes lots of new growth. I also keep the blooms pinched back on my basil to help promote growth and prevent a bitter taste in the herb. If you are not harvesting to eat, basil blooms a pretty white flower that is a nice addition to a flower garden. I harvest basil throughout the season by clipping stems of leaves to add to a glass of water, much like you would flowers, for fresh basil for cooking. I usually only do this if I do not want to harvest to dry but want to prune the basil. For dying, I prune the stems, rinse well, and pat dry, then pick the leaves from the stems, and allow them to air dry on cookie sheets that are lined with white or unbleached paper towels. If i want to dry the basil by hanging it, I prune the stems, rinse, pat dry, and tie small bunches of the herbs together and hang from a drying rack or hook in my kitchen. Either way that you choose to dry basil, the aroma will fill your house. Herbs can be dried in a dehydrator, the oven, or even in an air fryer. It’s quicker, but I find that it lowers the quality of taste. Air drying is my personal preference.

Basil typically takes at least two or three weeks to completely dry. Once the basil is dry, I add the whole dried leaves, which will be much smaller than fresh leaves, to a glass jar. I prefer amber jars, but clear will work. The jars are then added to a dark corner of my spice cabinet. I add the dried basil to dishes by using a mortar and pestle to grind it as I need it. I also grind some of the leaves into a finer powder using a coffee grinder. This method of storage eliminates a step in the cooking process, but still packs great flavor. The shelf life of fresh dried basil is one to two years. I usually have almost completely eliminated my dried basil from spring to spring, especially if I make many of the spinach Italian tortillas. See the link above.

A few clippings for cooking. I’ll add them to a glass of water after removing any damaged leaves.

Both Italian and lemon basil are great for pesto’s, aioli’s, makes a nice additions to salads, great on pizza, and delicious fried for a crispy bite of deliciousness for any Italian dish, or a salad topper. I also like to add fresh basil to omelets or tofu scrambles, spaghetti, and lasagna. I find that it adds an interesting taste to fresh baked bread, especially with the addition of garlic. Lemon basil is also a great addition to Asian dishes. I will try to add the recipe that is pictured below soon.

Vegetable stir fry with basil and garden veggies.

Basil not only helps deter mosquitoes and other unwanted pests on or near the porch, but it makes a great companion in the vegetable garden to help deter pests from tomatoes, and other plants. Crushing the leaves can also act as soothing compress for bee stings.

These are only a few ways that I use basil at our house. I could write a book on basil alone. I hope to include a post soon about the other types of basil that we use on frequent basis. The smell of fresh basil is intoxicating. I love to brush my hands over the basil and enjoy the vibrant invigorating aroma.

Feel free to leave a comment or question. Check back next in upcoming days for my third herb post. Also, feel free to subscribe or follow. For now, God bless from the mountains of Kentucky!

Living Holistically in the Mountains

Good afternoon, from the mountains of Kentucky. I hope your week is going well. It’s been a busy one this week in our neck of the woods. Spring is usually busy with planting, foraging, preserving, harvesting and drying. We’ve managed between long bouts of rain to plant our squash and zucchini, tomatoes, kale, cucumbers, and peppers. The garden is taking shape. Yet, there’s a lot more to plant. A lot of work with great rewards.

We’ve planted and foraged mullein to dry for tea. We’ve found mullein tea good for our respiratory problems, common colds, flu, and bronchitis. It’s a staple in our household. The tea can be made a few different ways. The leaves can be cleaned and dried for steeping hot tea, or the leaves can be cleaned and added to filtered water and placed in a covered glass container in the fridge for cold tea. A little honey in either and we’ve found it to be a tasty bit of nature that has wonderful results. (More to come about the use of mullein.)

Harvesting the bottom mullein leaves.
Iris blooms are my favorite!

Our flowers and herb garden is flourishing this year. I’ve harvested chocolate mint, peppermint, and strawberry mint twice already. We keep fresh mint for cooking, be stings, and for baking. Dried mint is used for steeping delicious teas. Peppermint tea has great medicinal qualities for digestion issues. It’s a great addition to green tea as well, and is tasty in a cool glass of water from our Berkey. Yesterday, was a day for clipping basil, more mint, and chive blooms for seeds. I also harvested tarragon and bit of lemon basil. Our herbs are doing exceptionally well this year. I am a believer that when nature produces an abundance of something, it will be needed in weeks or even months ahead. We enjoy sharing our harvest with the elderly who can no longer garden and those who do not have land for gardens. We are believers of tithing our blessings with others. It seems the more we give, the more our gardens grow and produce.

The basil is thriving!
Fresh strawberry jam!

Yesterday was spent preserving strawberry jam. It’s easy to make and delicious to eat! I will post this recipe soon. I couldn’t wait for weeks to eat the jam! So, I opened a jar this morning and had it on fresh-baked bread for breakfast.

Freshly toasted baked bread and homemade jam!
Home baked seeded yeast bread.

Our kitchen today is an aroma of drying herbs, yeast bread cooking, and banana bread baking. Oh, and lemon essential oil diffusing in the diffuser. Lemon essential oil is great for focus, clarity, and helps deter ants, while making the air smell clean and fresh. Essential oils are part of our daily life. We use them for medicinal purposes, to make cleaning products, to add to recipes, and to help us relax at night. We are firm believers that God created nature for mankind to enjoy and along with the enjoyment, to use for the physical, medical, and even for spiritual needs.

Chocolate mint hanging to dry.

For now, God bless, from the mountains of Kentucky. Happy foraging, planting, and preserving! Feel free to follow and or leave comments or questions. Have a wonderful Thursday!

Our roses are beautiful this year!

Vegan Peanut Butter Chocolate Chip Mookies

Hello, from the mountains of Kentucky! It’s been a busy Saturday of baking and spring cleaning! I’ve been on decluttering journey for a couple of weeks. I’m nearing the homestretch of decluttering. Baking for the week ensures I have fresh bread for breakfast toast, lunch, and for supper. It also ensures I have snacks for the week. I also enjoy sharing with others at work, family, and church. But, the biggest reward is that my bread and snacks for the week are healthy, clean, organic, and not processed!

I have baked what I call mookies for years. You might be wondering what a mookie is. It’s not quite a cookie and it’s not quite a muffin. It’s kind of somewhere in between a cookie and a muffin. It’s a mookie. I am anxious to share this recipe with you. It’s a great snack, a healthy snack, awesome with coffee in the morning or tea in the evenings. Our grandchildren love them too. They’re made with minimal ingredients and takes a total twenty minutes to mix and bake. Let’s get started!

Ingredients:

  • 1 over ripe organic banana
  • 1 cup organic all purpose flour
  • 1 tsp of vanilla
  • 1/4 cup organic pure maple syrup
  • 2 tsp non-caking baking powder
  • 2 tbs organic natural peanut butter
  • 1 tbs organic miniature unsweetened chocolate chips

Preheat oven to 350. Line a cookie sheet with parchment paper. Mash the banana and add syrup and vanilla and mix well. Add flour and baking powder and mix. Fold in peanut butter and mix. Finally food in chocolate chips.

Mookie mix

Drop mixture by tablespoons to the lined cookie sheet. Leave a little space between the mookies. Bake for fifteen minutes. I like to brown mine slightly under the broiler. Allow to cool and enjoy!

Peanut butter chocolate chip mookies

These are great without the peanut butter for more of a banana taste. They’re great with chopped walnuts for a take on banana bread flavor. They’re also great with a bit of cocoa powder for a chocolate mookie. The possibilities are limitless.

They’re airy, light, and delicious.

I hope you and your family enjoy this delicious treat as much as our family does. For now, God bless from the mountains of Kentucky.

March Porch Book Review: Before We Were Yours

My porch, one of my favorite places to read!

Good morning from the mountains of Kentucky. It’s a beautiful sunny morning in the mountains. I am loving these spring temperatures and all the colorful blooms on the trees. The mountains are beautiful this time of year. I am also loving the warm temperatures for porch reading! I am a firm believer that daily reading is a simple task that is all to often shelved as a pass time or a hobby. Reading is healthy. Reading is healthy for our brain and keeps us alert. It is also a time for relaxation, and a time of escape from daily worries and overscheduled days. Excuses is on the of the biggest factors in why people are not reading. I hear it often. The excuse of, I don’t have time. If you make time for television, browsing your phone, and playing games, you have time to read. So, when do I read? I love to read in the early morning, late afternoons, while I eat lunch, and before I retire for the night. The truth is that I love to read anytime of the day. I’ll say it again, reading is a vital part of our overall health. Plus… it’s enjoyable.

Another question I am often asked is about what I read. I like to read almost anything. I read the book of choice with our university’s book club each month. We read various books, from murder mysteries to fantasy science fiction. I read books suggested by friends and students. I read a novel per bi-term with my students. I read the bible daily and love to study the word for a closer spiritual walk and daily guidance. I love to read spiritual books about characters from the bible, past spiritual leaders, and books about hope for tomorrow. I love to read fiction books that are based on historical events, which leads me to March’s review of Before We Were Yours by Lisa Wingate. I have read several of her books that are worthy of mentioning before I review the most recent. I stumbled on one of her books at a local Good Will store while thrifting with my daughter. The title, The Prayer Box, leapt off the cover at me and I quickly tucked it in my cart with other valued treasures that I had found. This book is amazing and lead me on a path for two more books that are actually in a trilogy. The funny thing is… I read the three books backward with The Prayer Box actually being the third book in the trilogy, which I read first, then I read the first and second book, The Sea Keepers’ Daughters, and the Sea Glass Sisters. Once I finished the last book, which was the first book of the series, the suggested book Before We Were Yours intrigued me. I recalled seeing the book Good Reads, on Amazon, a d as a suggested read from a friend. I immediately ordered it. This was a purchase I found well worth paying full price.

Cover of the book!

Before We Were Yours, is a multi-plot story that takes the reader from the time of the great depression in the thirties to the 1990’s. You will travel down the Mississippi River on a shanty boat filled with love and laughter that quickly turns to desperation, deceit, and lives that will never be the same. You learn about a twelve-year old character named Rill, and her four siblings who fall victims to the fate of the Tennessee Children’s Home Society, an Orphanage in Memphis Tennessee, that was ran by Georgia Tann. Through this time travel back and forth from the time of the depression the reader is also introduced to the character of, Avery, who is is from the 90’s. Avery, accidentally stumbles onto a deep dark family secret that leads her on a mysterious journey filled with trails of adventures, love, loss, joy, and sorrow all the while uncovering mysteries that were thought to have been locked away forever. The reader also meets two elderly ladies, May and Judy, who are living in total opposite types of care facilities. Their characters will forever linger in the heart of the reader. Will the mysteries change Avery’s life? What are the connections between Rill and Avery? Where does May and Judy fit into the mystery? Read the book to discover the answers to these questions and more. The reader will meet diverse rich characters that you will come to love, mourn, and characters that you love to hate. This is was one book I could not wait to make time to read each day, as I too, was as interested in how the mystery’s were going to unfold. I couldn’t wait to travel with Avery along on the trail to solve the mystery’s that others wanted to leave buried in the past. This is one book that I will be suggesting for my students and friends to read.

As you know, our daughter, and I love to thrift for antiques, and unusual items. On our last thrifting excursion, she actually found a hard copy of Before We Were Yours, at a local Good Will for 99 cents! What a steal! Don’t forsake browsing the shelves of the books in thrift stores, your next great read might just be shelved within the numerous books that are often overlooked.

Now for my rating of this wonderful book. I rated it on Good Reads and Amazon as a five-star book. It kept me engaged, there was no foul language, it contained rich characters, developing plot(s), and also I learned a little about a part of history that occurred only one state away from me that I never knew about. It was entertaining, well-written, educational, and held my attention throughout. I recommend this book for someone who is searching for a summer read, beach read, or a book to pickup and read periodically throughout the week as being the one that you will enjoy.

For now, God bless from the Mountains of Kentucky. Enjoy this beautiful Easter weekend and reflect on what our Savior sacrificed so that we could be born again in Him and live! He is risen!

Delicious Organic Granola

Hello, from the mountains of Kentucky! It’s a rainy day in the mountains, which always puts me in the cooking and cleaning mood! So, today I decided to begin cleaning the pantry out and realized that I had an abundance of oats and nuts that I needed to do something with. I went down a rabbit hole and started planning granola! The pantry didn’t get cleaned completely, but I did make some delicious granola! I hope you and your family enjoy this recipe as much as we do.

Ingredients:

  • Three cups of organic old fashioned oats
  • 1/2 cup organic chopped walnuts
  • 1/2 cup organic chopped almonds
  • 1/2 cup organic chopped pecans
  • 3 tbs organic raw pumpkin seeds
  • 2 tbs organic sunflower seeds
  • 1 tbs organic chia seeds
  • 2 tbs organic ground flax seeds
  • 3 tbs gogi berries or raisins
  • 1/2 tsp pink Himalayan salt
  • 1/2 cup of organic pure maple syrup or honey
  • 1/2 cup smooth organic peanut butter
  • 1/2 cup organic olive oil
  • Agave or honey for drizzling not mixing.

Mix all the dry ingredients and preheat the oven to 320 for convection. Mix the remaining ingredients over low heat until it comes together smoothly. Pour the wet ingredient into the bowl of dry and gently stir with a rubber spatula. When mixed spread out on a parchment lined baking sheet. Spread evenly and bake for 20 minutes. Remove and mix the granola with a metal spatula. Return to the oven and bake 20 more minutes. Take out of the oven and drizzle your choice of honey or agave and put under the broiler for just enough time for the granola to brown up lightly. Remove from the oven and allow it to cool completely on a wire rack.

Mixing the ingredients.
Spreading the granola in a baking sheet.

Using the spatial mix the granola gently once it’s cool. Store the granola in a glass jar. Keeps for a couple of weeks if it is in an air tight container.

This is a two gallon jar! I’ve got another batch of granola to add to it.

I hope your family enjoys this tasty granola. I think it’s great alone as a snack and wonderful in a parfait. I also like it in a bowl with almond milk as a cereal.

Dinner

Just for fun! A picture of dinner this evening. Fresh beans, corn, potatoes, onions, cucumbers and tomatoes with sautéed portobello mushrooms with peppers and onions and a slice of cornbread. Nothing better than veggies from our garden!

For now, God bless from the mountains of Kentucky! Don’t forget to like, comment, and or follow! We