My Top Ten Herbs (Part Six; Rosemary Recipes included)

Hello from the mountains of Kentucky! I hope your Thanksgiving was amazing and your Christmas will be even better. It’s been busy in our little part of the world as we finish our Christmas shopping, and decorating for our family celebration as Christmas is only days away. With preparing for the festivities I decided to bake some rustic herb bread using two of my top ten herbs, rosemary and thyme. I love experimenting and trying new flavors, new breads, and new recipes. I am excited to share a few of my favorite recipes and uses for my sixth favorite herb in my top ten posts, Rosemary. But first a little information about Rosemary.

One of our smaller pots of rosemary .

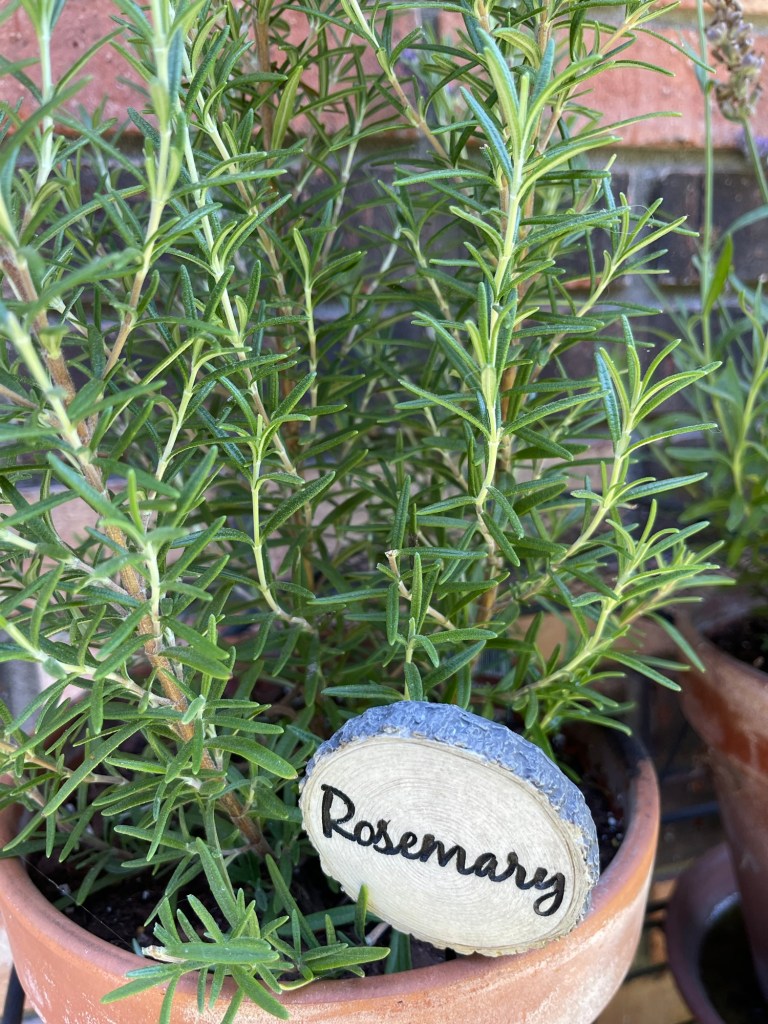
Rosemary is an evergreen type of perennial herb that derives from the Mediterranean region. It is reasonably hardy in cooler temperatures as well. I usually pot some each year for quick access for recipes. I also grow several plants in our raised bed that winters over very well as we cover our bed during the winter months. It is easier to start the plant a plant than from a seedling. Rosemary is difficult to start from seed, but not impossible. This aromatic plant also withstands drought quite well. Keeping the rosemary pruned prevents the plant from becoming woody and stiff. Pruning will also help the plant to become more bushy and promote new growth.

Rosemary is a member of the sage family. It has a wonderful aroma that unique and pleasant. It flowers in the summer, but can flower more often in warmer climates. The flowers are small and light pinkish or white blooms. The height of this woodsy plant can vary in size, depending on the location and the amount of pruning. It’s fairly easy to grow, dry, and store. Its aromatic needles have many culinary and medicinal uses as well as uses for personal hygiene. Let’s get started with a few ways that we use rosemary on the homestead.

Rosemary can be used fresh or dried. I dry my rosemary by pruning the plant and washing the sprigs well to remove soil and possible insects that might be hiding. Gently pat to dry and place the herb on a white cloth in a shallow pan. If I have a larger amount, I add the herbs to my hanging rack, which hold much more. Place the herb away from direct sunlight and leave to dry until the sprigs are crisp. I store my dried rosemary on the stems in quart jars and strip the leaves as I need them.

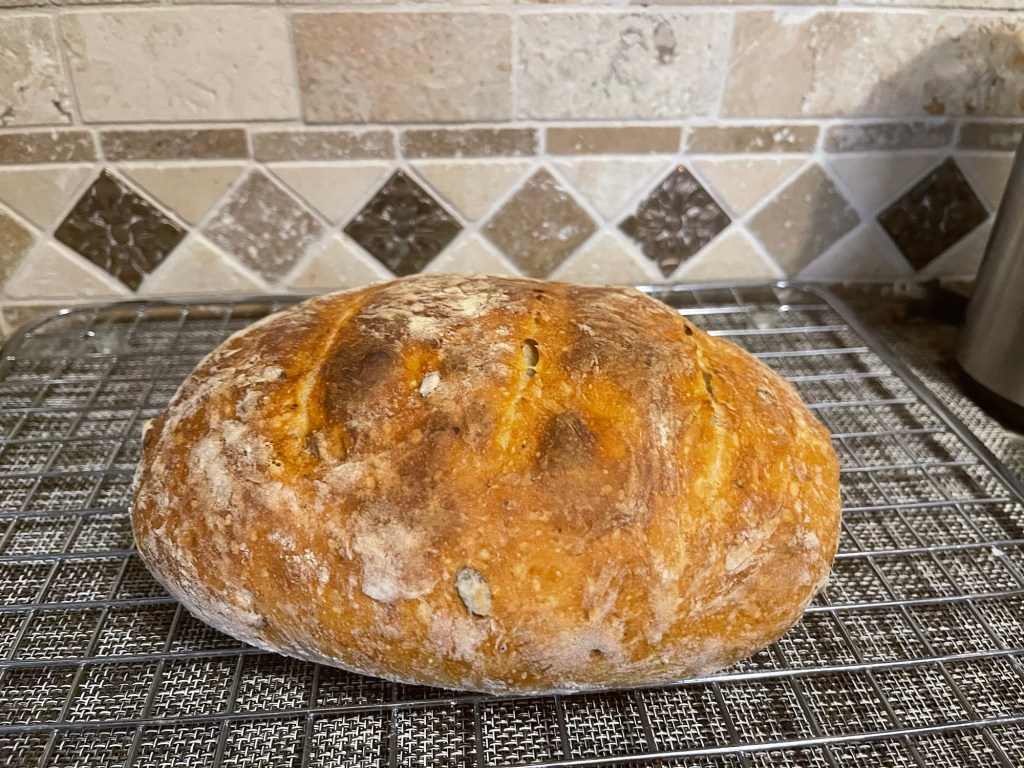
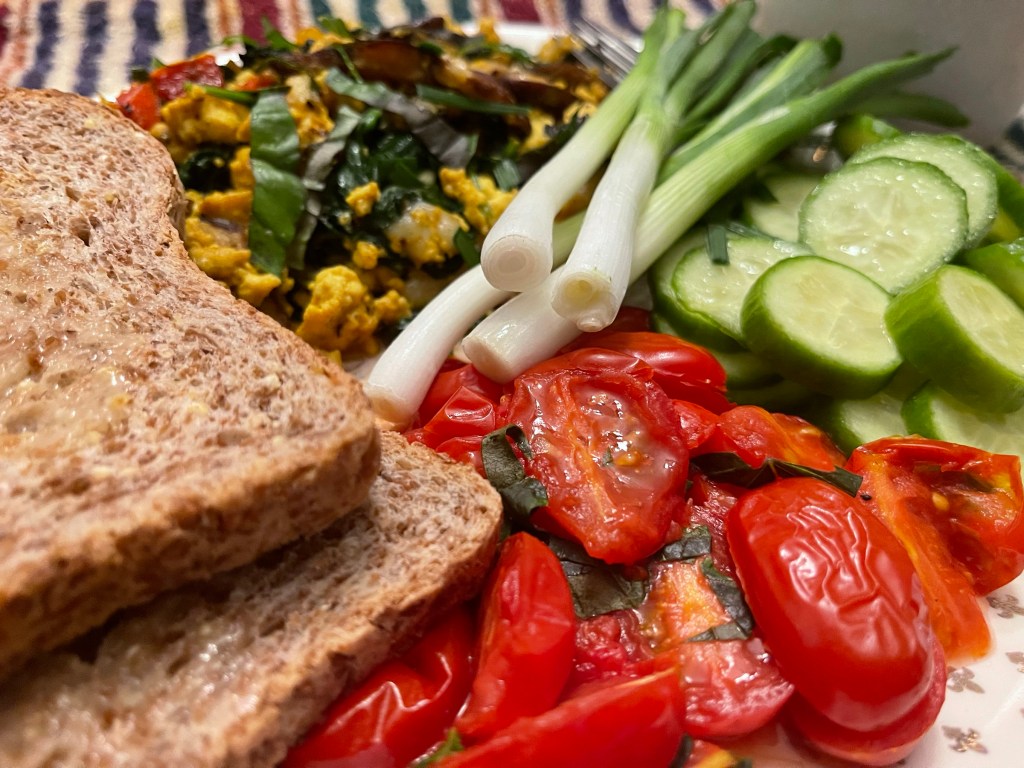
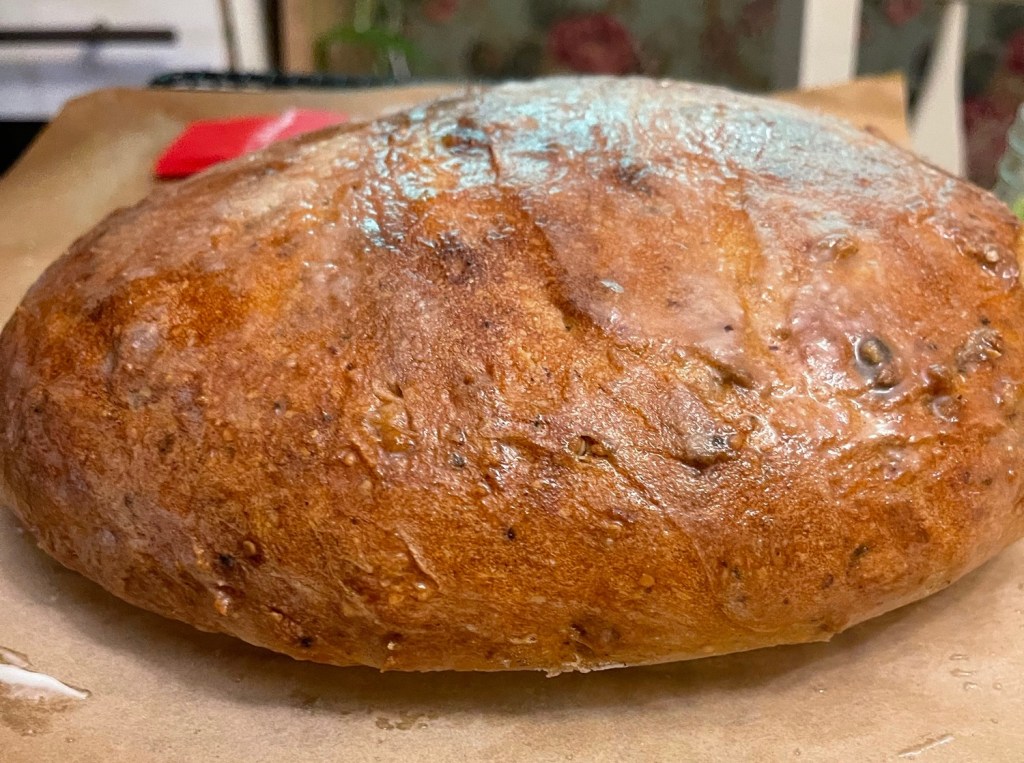
One of my favorite recipes for dried rosemary is my crusty herb bread. A small amount of this delicious crusty bread packs a punch of flavor. I use the following basic bread recipe Give Us This Day Our Daily Bread: Homemade Crusty Vegan Bread and add a tablespoon and a half of finely chopped rosemary and a tablespoon of dried thyme finally chopped as you add the seeds. The dried herbs work great as they are already dried and do not add any moisture to the bread as fresh herbs have the potential to do. This delicious bread is great toasted with most any Italian meal, or toasted to use as a dipping vessel for red pepper hummus. The possibilities are endless.

Seeded herb bread

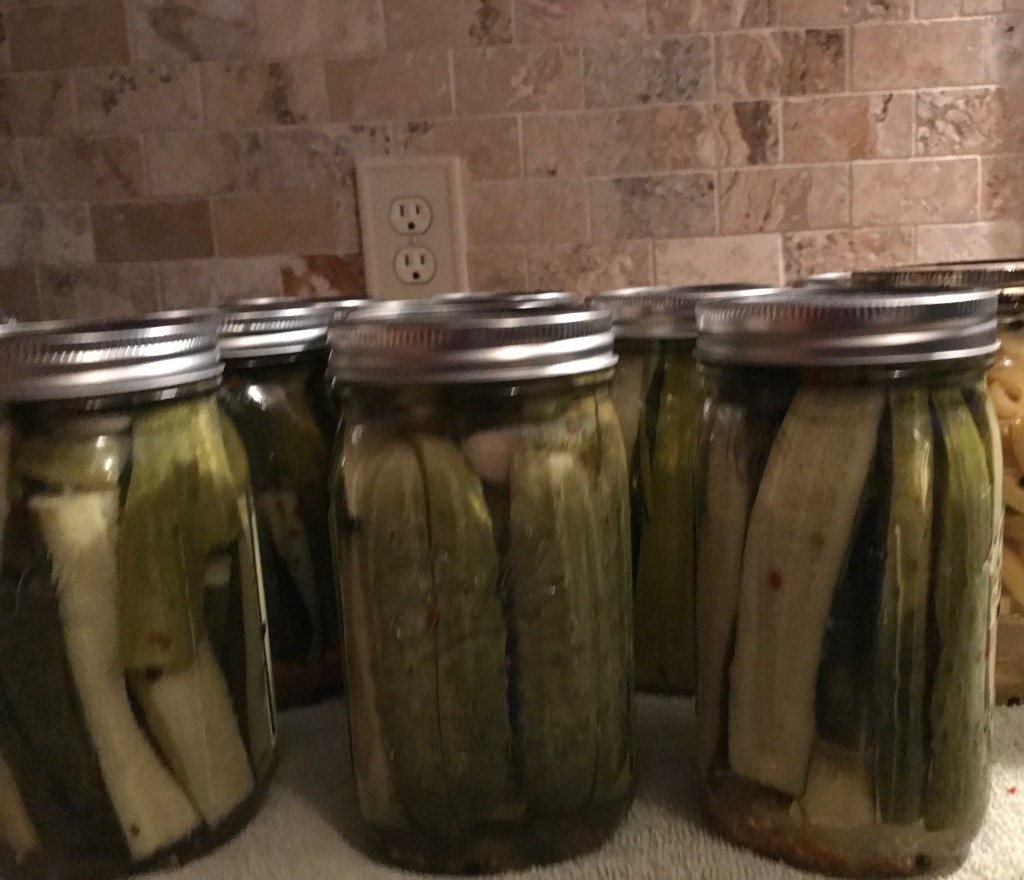
A second recipe that includes rosemary is our clean vegan summer squash soup. It is delicious year round, but tend to enjoy it most early fall or in the summer months when summer squash is at its peak. The following link will take you to this light , yet hardy soup. The herb bread above is a wonderful addition to this delicious soup. Clean Vegan Summer Squash Soup I also like to melt a slice of plant based provolone cheese on the herb bread for a little extra rich taste.

Summer squash soup

Rosemary makes a great flavoring for salt as well. This is an easy way to preserve the final sprigs of rosemary of the season and make a few stocking stuffers or gifts for those who love to cook with herbs. This delicious recipe can be prepared several ways, but my favorite is simply equal parts of fresh-cut rosemary and course kosher salt. Strip the leaves from the rosemary and add salt, pulse the mix in the food processor 8-10 times or you may use a spice grinder. You may also substitute the kosher salt with course sea salt. Pink Himalayan salt can also be used, but the shelf life doesn’t seem quite as long.

Once you add the fresh rosemary with the salt and grind set it aside on a parchment lined pan for about six hours to air dry. Add to a jar with a lid. Keeps indefinitely. Another method is to use dried rosemary pulsed in the spice grinder until desired consistency is achieved and add the mix to the preferred salt. This eliminates the drying process with fresh rosemary. Using this method allows you to use the salt immediately as the rosemary is already dried. Rosemary salt is a great addition to tofu scrambles, soups, and potatoes. For those that don’t follow a plant-based diet rosemary salt is great on eggs, pork, chicken, or lamb. The possibilities are endless. The ratio of salt to rosemary can be modified to taste.

I like to hand chop the rosemary. I’m a bit old-school.
For this recipe I used 1/4 chopped rosemary.
Shake the rosemary salt before each use to ensure it is distributed evenly.

Finally, rosemary has been thought to be a nourishing herb for strengthening and thickening hair. Rosemary can also be used in a variety of ways cosmetically. However, hair care is one of our favorites. Sprigs of dried rosemary can be added to a spray bottle of filtered water for rosemary water that can be sprayed daily on hair dry or damp hair to promote thickening and shine. Using dried herbs helps prevent mold from gathering in the bottle. I also prefer to use amber glass spray bottles. The dark color helps preserve the water and protect it from sunlight while also helping to eliminate plastic. Once you add the sprigs of dried rosemary to the water, allow it to sit for at least a week to intensify the aroma and the water to absorb the nutrients from the herb. Use as a refreshing spray to your hair, scalp, or skin.

Rosemary oil can be made from dried rosemary as well. Using throughly dried rosemary, add the sprigs to a glass bottle of oil. I prefer organic fractionated coconut oil for topical use. Seal the bottle and place in a dark cabinet for at least two weeks. After two weeks, strain the oil using cheesecloth adding the oils to either an amber colored glass spray bottle or dropper bottle. The rosemary oil can be used directly on then scalp to nourish the scalp and help promote hair growth. Once the oil is applied, massage scalp evenly for five-minutes then wrap hair with a towel or shower cap. Leave the oil on the hair for at least thirty minutes. Wash and rinse hair as usual. You may also spray hair lightly throughout to help mange dry or damaged hair. Finally, you can add a few drops of the rosemary oil to your favorite shampoo and or conditioner.

These are only a few of the great ways to use this powerhouse of an herb. Because of its diversity, I think a book could be written about rosemary. Other uses of rosemary include adding it to homemade body butter, laundry detergent, sachets, teas, and more. I hope to add more rosemary recipes in upcoming days. For now, God bless and Merry Christmas from the mountains of Kentucky. Feel free to like, share, subscribe and or follow our blog. Your support is appreciated. God bless!

Merry Christmas from our home to yours.

Canning Carrots

Hello, from the mountains of Kentucky! It’s a beautiful time of the year in the mountains. The trees are alive with beauty! I try to savor the gorgeous leaves as long as they cling to the trees before the freezing temperatures bring them down. Every season in the mountains brings unexplainable beauty, but I think spring and fall are my favorite seasons. Enough about the beautiful bounty and onto the topic at hand, canning carrots.

The beauty of the mountains! It never gets old.

Carrots are versatile and can be prepared in many ways. We love them raw, glazed, in stews, breads, soups, and as carrot soup. We grow enough carrots to enjoy, but not always enough to preserve. With the prices of groceries soaring, that will change in upcoming seasons. We were recently gifted with an abundance of carrots that would be nigh to impossible to eat raw, so we decided to can them! It was too easy not to do! we had several large bags of carrots. I’m not sure on the weight or amount.

Ingredients:

  • Carrots (we had several large bags)
  • Kosher salt or sea salt (do not use table salt as it may cause cloudy water to form in the jars.
  • Filtered water.
  • White vinegar

Preparation:

  • Remove leaves and tips from the carrots.
  • Scrape and rinse carrots.
  • Slice carrots however you desire. We sliced ours for soups and stews.
  • Add the carrot slices to a large bowl of filtered water.
  • Cover and refrigerate over night.
  • Remove the next morning and rinse the carrots.
  • Add carrots to filtered water in a large stock pot. Bring to a slow boil. Boil for five minutes.
  • While carrots are boiling wash and sterilize jars, rings and flats. We used pints.
  • Add water to canner and allow it to begin warming. We used a water bath canner. You can use the method of pressure canning.

Process:

  • Using a funnel in the top of the jar, add hot carrots and hot water from the stock pot to jars. Add 1/2 tsp of salt.
  • Wipe the rims of jars and rings with a white towel soaked in vinegar.
  • Add seal and ring.
  • Place hot jars in the warm water in the canner.
  • For water bath canning, allow jars to come to a slow boil and process for two hours. Allow jars to sit in the water when the stove is turned off for at least thirty minutes. Pressure canning time would be much less than water bath. Someone told me for pressure canning carrots they allowed theirs to process for thirty minutes.
  • Remove the jars with a jar lifter and set the carrots aside on a towel to protect the surface of the cabinet or table.
  • Once cooling process begins you should hear the coveted ping of the jars sealing.
  • Add dates to the lids or labels. Allow to cool and store with your other canned goods.
Canned carrots

The rabbits enjoyed the tips and pieces of carrots that we removed. The chickens enjoying the remains that were scraped away from the carrots. Everyone enjoyed some raw carrots and we will enjoy the canned carrots in many ways. I hope your family enjoys your canned carrots as much as we enjoy ours. Remember, when you find a sale on carrots, stock up and can them for the future! Thank you for stopping by! Remember to like, comment, and or subscribe! I am headed back to the kitchen to work up and preserve three large bags of kale! Recipe coming soon. Before you go, check out the following canning recipes that are time-tested! Canning Green Beans the Time-Tested Way (updated). We have canned beans like this for more than thirty years. Canning Savory Indian Relish this is a family favorite!! More recipes coming soon. Feel free to like, comment, subscribe or follow. God bless from our homestead in mountains of Kentucky!

Zucchini Bread, Green-beans, and More!

Hello, from the mountains of Kentucky. I hope this post finds you well and blessed. It’s a busy time in the mountains! Homesteading is a way of life with great rewards, but also a lot of hard work! We spent most of the day Friday picking beans before the rain moved in. Our house was filled with the wonderful summer aroma of green beans simmering on the stove! While we worked to string and break beans to can. See the link below for our canning recipe. Canning Green Beans the Time-Tested Way However, it’s never too busy to take time to go to church for Friday’s hour of prayer and Bible study. Our topic was very interesting. Do you trust God? The study/conversation was filled with testimonies, scriptures, advice, and wonderful fellowship. It was a great reminder of how much we truly need to trust God, especially in the uncertain times that we are living in.

The first of what we anticipate to be many jars canned!

Friday was also a day for baking. When you have an abundance of zucchini, you flash freeze them and transfer the frozen zucchini to a bag to use for frying later, shred them for winter zucchini bread, make pancakes for the freezer, fry tasty fritters to vacuum seal, and batter fry a few to have with supper. Again, it’s a busy time in the mountains. I can’t complain. It’s one of my favorite times of the year. We are richly blessed to live in the mountains, have land that allows us to garden and have fresh vegetables to enjoy all summer, and an abundant crop to put away for winter.

I didn’t get a picture of the entire loaf before a chunk was already eaten!

Homesteading for us is a healthier way of life. Not everyone in our family follows a plant-based diet, but that doesn’t mean they do not enjoy some of the delicious plant-based dishes or work toward improving their health. A lot of people are prone to think of plant-based or vegan food as bland, dull, and tasteless. But, this zucchini bread is far from that. Our entire family loves it, even those who don’t follow a plant-based diet. I think you’ll enjoy this bread recipe as well. It is moist, sweet, and delicious.

Ingredients:

Line a mixing bowl with cheese cloth or unbleached paper towel. Shred two small or one large zucchini using a fine hand grater into the lined bowl, or two cup measuring cup. Squeeze the liquid from the zucchini. It should equal a cup or a cup and half after the liquid is squeezed out.

  • 1 to 1 & 1/2 cups of shredded zucchini
  • 1 1/2 cup of all purpose unbleached flour (I prefer King Arthur)
  • 1/2 cup organic light brown sugar
  • 1/2 cup organic white sugar
  • 1/2 tsp pink Himalayan salt
  • 1/2 tsp non-caking organic baking soda
  • 1/2 tsp organic baking powder
  • 1-2 tbs organic cinnamon (I usually use two)
  • 1/2 tsp nutmeg
  • 1 tsp ginger
  • 1 tsp pure vanilla
  • 1/2 cup unsweetened applesauce
  • 1//4 cup organic coconut oil
  • 1/4 cup extra virgin olive oil
  • 2 tbs of unsweetened almond milk
  • 1 tbs pure maple syrup
  • 1-2 tbs chopped pecans

Preheat oven to 350. Line loaf pan with unbleached parchment paper. I like to use a cast iron loaf pan. Give the parchment paper a quick spray with organic cooking spray. Mix dry ingredients, other than pecans, add wet ingredients including the shredded zucchini. Do not add the maple syrup or the milk yet. Mix gently. The batter will be thick. Add milk to create a smoother mix that will pour into the pan. You can use more milk if needed. Pour mixture in lined pan, sprinkle the chopped pecans or nut of choice over the top of the mix then drizzle the maple syrup over the top. I like to bake my bread on the middle rack to prevent the bottom from becoming too brown. Set the timer and bake for 50-55 minutes. Ovens will vary and the thickness of your pan can also determine the baking time. For the cast iron loaf pan, 55 minutes is required.

Remove the bread from the oven. I test the bread for doneness with a wooden screwer. If the tester comes out clean, the bread is baked through. Place the pan of bread on a cooling rack. Allow to cool for at least ten to fifteen minutes and lift the loaf out by the parchment paper and place back on the rack to cool. I allow mine to cool about fifteen more minutes and then cover with a clean dish towel to cool an additional thirty minutes before slicing. A bread knife works best for slicing.

This bread is great as a moist treat, or toasted and lightly buttered. For vegetarians, this bread is great dipped in whipped milk and eggs or egg whites, then fried on the griddle for a tasty French toast served with maple syrup. I like to slice the bread and vacuum seal individual slices to go in the freezer for a sweet treat when you don’t have time or don’t want to bake an entire loaf. The possibilities are endless. I hope your family enjoys this bread as much as our family does.

Monday was spent rescuing our corn after rain and wind damage. While one held the corn and the other hoed and heaped fresh mounds of dirt around the base of the stalks. It was a laboring job, but one that had to be done. Fourteen rows of corn was wearing to the ground from excess rain and wind. A lot of hard work, but after a day of two of some sunshine, it is now standing tall. I think we may have lost four stalks. God is good.

I am also excited to bring to you a new recipe for banana-peach bread! Oh my, it is delicious! If you love a good peach cobbler, I think you’ll like this bread! Stay tuned, and watch for this delicious recipe!

I will add this recipe soon! Banana – peach bread!

I hope you and your family enjoy this recipe as much as our family does. For now, God bless from the mountains of Kentucky where homesteading is a way of life. Feel free to comment, like, share, subscribe, and or follow.

Homesteading in the Mountains

Hello, from the mountains of Kentucky! It’s been a dry hot month in our area of the world. With May being extremely wet, we anticipated June to be dry, but not this dry. The lack of rain has presented challenges for our vegetable garden. We’ve hand watered a couple of times a week and babied all the veggies with hopes and prayers for a good harvest. How’s the weather been in your area?

Foggy morning in the mountains.

We are often asked what it means to homestead. Homesteading was our grandparents way of life, their parents, and even their grandparents. We grew up learning how to farm. So, to our family, homesteading means that we can be self sufficient. Self sufficient means growing, harvesting, and preserving our own fruits and vegetables. We eat from our garden throughout the year. We enjoy fresh vegetables in the summer and fall, and preserve vegetables, soups, and vegetable juices for the winter and early spring months. We make use of hydroponic gardens year round. I like to grow salad lettuce year round in the hydroponic garden. It’s easy, clean, and ensures fresh lettuce at your fingertips. The staples we cannot grow are bought in organic bulk supplies.

Early summer vegetable garden.
Small hydroponic lettuce garden.

Homesteading also means we eat cleaner and healthier. We accomplish this through bypassing as many store bought prepackaged foods as possible. We enjoy baking our families breads, cakes, pies, and cookies, instead of buying unhealthy food that is filled with an abundance of sugars and unhealthy preservatives. One of our favorite homemade bread recipes can be found in the following link. Give Us This Day Our Daily Bread: Homemade Crusty Vegan Bread We also preserve fresh fruits to ensure we have jams and jellies for toast and biscuits. We enjoy foraging berries for dishes and jellies. There’s nothing much better than homemade jam spread on homemade bread for breakfast. Canning My Favorite Peaches

Homemade crusty seeded yeast bread
Canned strawberry preserves

Fresh eggs are gathered daily for breakfast and for baking. Fishing, to us is more than a pastime. Fish is caught from the lakes and rivers for the freezer to use later for fish dinners. The mountains provide an abundance of squirrels, rabbits, and deer for meat that is frozen for roasts, chili, and others dishes. We do not raise cattle, but buy fresh beef and hog meat yearly from friends that provides for the year.

Farm fresh eggs
Canning and preserving peaches.

One part of homesteading that I enjoy immensely is growing our own herbs. The herbs ensure we have spices, teas, tasty leaves for salads, and herbs for medicinal remedies. The herbs provide beautiful blooms that bring in an abundance of pollinators for our garden. The diverse mint that we grow makes great hot or cold tea, is a wonderful additive to cookies and hot chocolates, and can help sooth a bee sting.

Potted peppermint grown for tea.

Essential Oils, Tea Bags, and Bee Stings

Foraging mullein.
Drying mullein for tea.

We enjoy foraging for various plants to use for food, teas, and medicinal purposes. We harvest mullein, pictured above as tea to help alleviate coughing and congestion. We also enjoy bartering with friends and neighbors. If we have an abundance of corn or beans we may barter with friends for a vegetable or fruit that we don’t have.

One post cannot cover it all! This is a brief glimpse into our lives as homesteaders. I guess the best description is that we enjoy being self-sufficient, and being able to sustain our farm that provides for our family. We enjoy the simple things in life, family, friends, gardening, preserving, and nature. We enjoy church and our church families. We love the Lord, His ways, and serving Him. We believe in working for what we have, enjoy thrifting for antiques, repurposing things from the past, reading, and writing. We enjoy holistic living, cooking, baking, and taking care of our animals, and sharing God’s love and His goodness with others. Head on over to Apple Podcasts to listen to my podcast, Homesteading in the Mountains, to learn more about our homestead and homesteading projects.

For now, God bless from the mountains of Kentucky. Feel free to like, comment, and or follow. I enjoy hearing from my readers. Let me know if you would like to read more about our life homesteading in the mountains.

When Fall Comes to the Mountains

The leaves are beginning to turn in the mountains!

Hello, from the mountains of Kentucky. Can you feel fall in the air? Fall is one of my favorite seasons. When fall comes to the mountains, something magical happens. A carpet of beautiful foliage slowly emerges throughout the mountains. The colors are brilliant yellows, crisp oranges, and fiery reds, all mixed with hints of green lingering for a few more weeks. The foliage reminds me of my sister’s handmade quilts. My sister is a brilliant artist who creates gorgeous quilts from scrap materials of diverse colors. She is legally blind but still creates unique quilts by hand with tiny stitches. Not only is she legally blind, she is also totally colorblind. My children used to ask me if she saw things in color, just like a child to wonder. Yes, I would answer she sees in colors; she just can’t distinguish which color is which. So, her quilts come together in a stunning color scheme… just like the foliage in our mountains does in the fall.

A postage stamp quilt gifted to me by my sister. Each block is the size of an actual postage stamp!

When fall comes to the mountains, preserving and canning is usually near completion. Autumn, or fall, as we call it, is the time to go to the apple orchard to pick apples for tasty recipes, preserving, drying, and munching. We enjoyed the orchard this year as the temperature was comfortable; the crowd wasn’t as big as previous visits, and the fried apple pies were delicious. The grandkids had fun playing on the playground and games, while the adults enjoyed the atmosphere and sights. We used the apples we brought home for various dishes. Some of our favorite apple dishes during the fall include frying apples with breakfast or supper. We also peeled and dried many apples, resulting in three large containers of dehydrated apples for healthy snacks, frying, cakes, or pies. Nothing went to waste. We used all the apples, even down to the peels and cores, which the chickens enjoyed as a fall treat.

Picking apples
Grandkids having fun at the orchard.

Seed saving is a common tradition within the mountains. Fall is the perfect time to save vegetable, fruit, herb, and flower seeds. The late-bearing acorn squash and peppers are the only vegetables left to be picked. We have a remnant of beans hanging on the fences drying to be used for seed next year. When collecting seeds, it is essential to use sources from plants that are healthy and produce the best vegetation or fruit. We collected seeds from the remaining vegetables and placed them on cheesecloth or white paper towels to dry. Once the seeds are dry, we put them in envelopes for storage. We recognize some sources in recycled brown jars/bottles containing organic vitamins. This is a brilliant method of recycling as well. Also, be sure to label your seeds to identify them when you’re ready to plant.

My seed box.

When fall comes to the mountains, so do pumpkins! Children and adults alike enjoy trips to the pumpkin patch to pick pumpkins, enjoy pumpkin treats, and enjoy the beauty of the mountains. Pumpkin spices and flavors are prominent in restaurants, store shelves, coffee shops, and more. Pumpkin spice is a favorite in the mountains. Many mountain families love pumpkin-flavored treats like coffee, pie, bread, butter, and cookies.

A trip to the pumpkin patch is always fun!

When fall comes to the mountains, it’s a time for family gatherings, cookouts, dinners, and a time to socialize and relax away from the world’s cares. Mountain cookouts usually have hot dogs, hamburgers, vegan burgers, marshmallows, chips, and some sides.. This is also a perfect time to include pumpkin cookies or pumpkin bread. Cookouts in the mountains are about the food and the socialization! Sitting by the campfire with loved ones, roasting marshmallows and sharing stories is the best way to enjoy fall in the Appalachian Mountains.

And finally, when fall comes to the mountains, it’s time to prepare for Thanksgiving and Christmas. Thanksgiving in the mountains is a time for family to come together for the day. Each person typically brings a side-dish to menu and everyone gathers at one house, which is typically my house. I love when all our family gathers together to relax with appetizers that consist of; my traditional cheese ball, peanut butter and chocolate buckeye candy, dips with chips, and of course banana and or pumpkin bread. We load Thanksgiving dinner with good food. Dinner usually includes the traditional dishes of turkey, usually prepared two ways. We roast one turkey in the oven and we smoke a second turkey outside in the smoker. A ham is prepared and complete with brown sugar and pineapples. The side dishes usually include mashed potatoes, green beans, fried corn, homemade cornbread stuffing/dressing, brown gravy, sweet potato casserole, and more. It’s a smorgasbord! A literal feast. Family members can be found eating around the dining room table and in the kitchen. We add tables for kids in the family room. After the dinner, dessert is available for those who have room, and those who do not! Dessert typically consists of peach cobbler, Butterfinger delight, carrot cake, cherry cheesecake, and other delicious recipes that family brings with them. Football can be found on the television and often-times, one of our favorite Christmas movies… The Christmas Story is on 24/7 on Thanksgiving and on one of the televisions. It’s also a time that most of the females are bargain shopping as the black Friday sales have begun! But, the best part of the day is the heartfelt prayer that is prayed before the meal begins, and the socializing during dinner and after. It’s a wonderful to catch up on what has been going on in the lives of our family.

When fall comes to the mountains of Kentucky… it’s more than the beautiful scenery. Fall is a time of hard work as we can preserve and clean up the garden. It’s a time of gathering seeds for the following year. Fall is a time of fellowship with friends, our church family, and our family. Fall is a time for campfires, holiday meals, and winter transition.

Late fall last year in the mountains!

I hope you’ve enjoyed this post and a little time in our small corner of the world. Feel free to follow and or comment. Get ready! I have an outstanding sweet potato recipe that I will post in a few days. You can prepare this cake vegan or non-vegan. It’s delicious. Well, let me give you a sneak peek at the cake!

Sweet potato pound cake… recipe coming soon!

For now, God bless, and happy fall from the mountains of Kentucky!

Canning Homemade Vegetable Soup

Good evening, from the mountains of Kentucky! I hope you are having a great start to your week! It’s a hot week in the mountains with temperatures soaring into the nineties. I don’t mind it. I’m savoring the last weeks of summer. With that being said, with the lingering days of summer vanishing swiftly, also comes the final rounds of canning. We have worked to stock and restock our pantry and canned goods from the harvest of our garden. Even though I wasn’t able to do much of the planting because of my hip replacement in June, I have enjoyed the labor of harvesting and canning. Let me say this: God is so good. He has truly been with me literally every step of my recovery. I am so thankful for how well I have progressed. I give Him all the glory for it. Now, to delve deeper into canning vegetable soup.

Recently, I decided I would use the lingering remnants of leftovers in our fridge and turn them into a savory vegan vegetable beef soup. You could easily change this recipe to be vegetable beef soup with real beef.

Vegan vegetable beef simmering on the stove.

Recipe ingredients:

  • One bag of your choice of plant-based beef crumbles. I used a bag of Ultimate Beef pieces.
  • Half of a yellow onion
  • One small bell pepper of choice
  • One tablespoon minced garlic or fresh garlic
  • One cup of fresh diced tomatoes or organic canned diced tomatoes
  • One cup of organic vegetable broth
  • One tablespoon of organic extra virgin olive oil
  • Two cups of freshly cooked green beans or one can of organic green beans
  • One cup of fresh corn or one can of organic corn
  • One cup of frozen organic peas or one can of organic sweet peas
  • Four medium-size potatoes
  • One cup of fresh carrots or one can of organic carrots
  • One quart of freshly canned tomato juice or two-three cups of organic canned juice

Process:

If you are using beef, brown the beef and drain. If you are using vegan meatless meat, you can add to the onions and peppers while they are simmering.

Peel and cut potatoes to desired size. Add potatoes to saucepan of water with a pinch of salt and oil. Cook potatoes until the cut easily with fork or knife. If you’re using fresh carrots, you may either peel, slice and steam them, or cook them with the potatoes. Set potatoes aside.

Add a tablespoon of extra virgin olive oil to a large stock pot. I prefer cast iron to Teflon. Heat on low and add diced onions and peppers. Season with salt and pepper. Allow onions and peppers to become slightly translucent. Add drained beef or vegan meat and stir. I like to add a little extra seasoning at this stage to build flavor. I use a little cumin, paprika, salt, pepper, and turmeric. These are optional. After mixture is mixed well, add diced tomatoes. Drain potatoes and carrots and add to soup mixture. Stir in additional veggies to the soup mixture. Taste to season and add tomato juice. Allow soup to come to a soft boil, then reduce to low and simmer for two hours.

This soup is great served with crackers, cornbread, grilled cheese or vegan grilled cheese. Now to the canning process!

Sterilize jars, rings, and flats. Add warm soup to pint jars. This can be done in the dishwasher or by boiling them in the canne

add water to canner and warm on medium heat. Place canning funnel over pint jar, ladle warm soup into jars. Leave at least a half for head space. I like to wipe the rim of the jar, flat, and ring with a clean dish cloth or paper towel dipped in vinegar before sealing. This helps guard against possible bacteria. Place warm jars of soup in the canner and allow the water to come to a boil. When the water comes to a hard boil set the timer for thirty minutes.

when the time exhausts, turn the stove off and allow the water to simmer for about ten minutes. Remove the jars with the jar lifter. Set the jars on a dry folder to cool. As the jars cool, you should hear the coveted ping ensuring you that the jars are sealed! After the jars have cooled add the date to the lid.

This soup should have a shelf life for 18-24 months. Maybe longer! I’ve never found out as it usually lasts at my house for 10-11 months and it’s gone! This is a great soup to take along as lunch at work, if you have access to a microwave or one of the lunch size crock pots. It’s great for those nights when you don’t feel like cooking. It’s great served with cornbread or crackers. I personally love it with a vegan grilled cheese sandwich. You be the desired!

Don’t forget to add the date to the lids!

I hope you enjoy this soup as much as we do. Feel free to leave a comment or ask a question. As always, feel free to follow for more recipes and canning ideas. For now, God bless from the mountains of Kentucky! Thank you for stopping by my blog! Every reader is appreciated!

Canning Crispy Dill Pickles

Hello, from the mountains of Kentucky. It’s been a bit stormy here today. Days like today make me want to curl up with a good book and read all day. In reality, that isn’t always possible, especially with the academic year about to begin. Our first day back on campus is only a couple of weeks away. Where did summer go?

With the abundance of cucumbers that it seems everyone has been blessed with this summer, I thought I should share my dill pickle recipe. Who doesn’t like a crispy dill pickle on their sandwich or on the side? Dills are great in potato salad, salads, on burgers, and I especially like them on a vegan chicken sandwich.

Ingredients:

4-5 pounds of pickling cucumbers
8 teaspoons of dill seeds
4 teaspoons of mustard seeds
5 cloves of whole garlic
8 teaspoons of whole peppercorns
4 cups of water
3 cups of white vinegar (5% acidity)
4 tablespoons of pickling salt or kosher salt
4 tablespoons of white sugar
8 teaspoons of pickle crisp
8 sprigs of fresh dill

Tools:

Water bath canner
Jar lifter
funnel
Measuring cup
Pint jars, rings, and flats
A large stock pot

Process:

1. Boil jars, flats, and rings to sterilize them and also to safeguard your pickles from bacteria. Next, prepare your cucumbers by washing them. I like to scrub them to remove the sticky little ends of the skins. This also makes the skin of the cucumber smoother. Trim the ends of the cucumbers. Make sure to remove the flowering end. This end of the cucumber contains an enzyme that can soften the cucumber over time.

2. Prepare the brine by adding sugar, salt, and vinegar to the stockpot and bring to a slow boil. While you wait for the brine to boil, combine the pickling spices and add them in equal parts to the jars. Do not add the pickle crip to the spices. Add a sprig of fresh dill to each jar then add your cucumbers. You can slice them in either direction or slice them into spears. They’re also good as whole pickles, especially if the cucumbers are small ones.

3. Keep an eye on your brine. Once the salt and sugar have dissolved, place the funnel in the jars and pour the hot brine over the cucumbers, leaving at least a half inch from the rim. Add a teaspoon of pickle crip to each jar. Wipe the rims to ensure the rims with a dry cloth or paper towel. Add the flat and ring, but not too tight.

4. Add the jars to the canner and add warm water until the water is at least an inch or two above the jar lids. Slowly bring the water in the canner to a boil. Boil for ten minutes. Turn the stove off and leave the jars until the water settles down and then remove the jars with the jar lifter. Place the jars on a dry folded towel on a flat surface and wait for the sounds of the pinging jars to seal. Once the jars have cooled, add the date to the lids.

This recipe typically makes eight pints of pickles x. You can double the ingredients for quarts or for more pints. The projected shelf life of the pickle is typically one to two years. However, I have opened a jar beyond this timeframe and the pickles were still great. One of the keys to a longer shelf life is to ensure the vinegar is at least 5% acidity.

This is a pictures of sliced dill pickles in quart jars.

I hope you and your family love this recipe as much as we do. As always, feel free to follow or comment. For now, God bless, from the mountains of Kentucky.

Holistic Living

Hello, from the mountains of Kentucky! I hope you are having a wonderful day. Things have been quite hectic in our neck of the woods! As a college professor this is one of the busiest times of the year as we are deep into the fall semester. Each year brings growth and change, which are both welcomed, but not always easy. As famers, life has been extremely hectic as we are harvesting, preserving , and canning the remnants of our garden. As a part of a church family, it’s been a busy time of growth, and a sense of urgency to pray more for our country and family than ever before. We’ve also felt the need to preserve and can more than in years past. With that sense of urgency, we’ve actively been growing our pantry, and stocking our shelves with a little more than usual this year.

Making time for self-care, especially when life gets crazy is a must. I have found that taking the time early in the morning hours to sit quietly, reflect, meditate, pray, and journal has proven to be very therapeutic and healthy for my mind and spiritual well-being, which helps to maintain a healthy mind, heart, and soul. I enjoy crocheting, which is also very therapeutic. After prayer, devotion, and Bible study, a few minutes of crocheting is one of my times to reflect and meditate. Mornings are great for me as the house is quiet and the farm outside hasn’t come to life just yet.

Morning fog hovering in the still green mountains. Morning walks are the best!
Crocheting and reflecting on the past and meditating on the day.

Holistic living is healthy and very satisfying way of life. I am often asked how I made the decision to lead a holistic life. I have been an advocate for clean eating for a great number of years, which made the transition somewhat easier. I chose clean eating for my health. My health was declining at a young age. My cholesterol was out of control, my blood pressure was extremely high, I was over weight, and I was border line diabetic. So, the journey began there! I decided that I would take back my health! I chose clean eating as many fad diets just didn’t work. Day by day, week by week, with the help and support of my family, church and friends, changes started happening! One by one I was able to stop taking meds for all of the above health issues, I lost 75, yes 75 pounds! I was finally in control of my diet and my health!

With the wonderful effects that clean eating had on my health, it evolved into my decisions to become a pescatarian, then gradually that evolved to becoming a vegetarian, which both added vitality and a new zeal for life in my thoughts and my body and evolved into an even cleaner diet. I’ve had trouble with digesting diary for years and had gradually made the change to almond milk and plant butter and cheese, which again made the transition easier. For nearly five years now, I’ve enjoyed a vegan/plant based diet, which has lead to an increase in my overall health, and a peace and satisfaction that I am making a difference in my overall well-being.

Enjoying the smell of mint drying in the kitchen.

I am also a herbalist, and enjoyed growing our own herbs for cooking, making teas, and also for minor medial problems for years. I also love sharing them with family and friends. The most recent addition to living a cleaner and healthier life, was the decision to become a doTERRA essential oil consultant. I’ve used essential oils for years, and finally decided that I would become a consultant and purchase from myself rather than online markets. This line is the best that I’ve used thus far and it’s also a nice little supplemental income as well. With a holistic lifestyle come lots of questions. The primary questions I am asked are, why and how.

Fresh basil in the background and one of my favorite oils. Orange is very versatile.

The first question is the most common question. What inspired you to lead a holistic life? I always answer that question with a question. Why wouldn’t I? Then I begin to explain I chose this lifestyle for my health, my peace of mind, and simply put, for my life. I also add some details about the astounding amount of research revealing the high level of toxins, preservatives, and additives that basically poison the human body and our environment. These toxins are found in food, fast foods, shampoos, soaps, toothpaste, makeup, perfumes. detergents, cleaning products, air fresheners, candles, and even in our pet’s food. I’ll share another story in a different post of how we nearly lost my canine baby due to additives in what was supposed to be healthy doggie treats. That was a real eye-opener!

I always share one of the most informative books that I’ve ever read was, How Not to Die, written by Dr Gregor. There is so much information revealed within the covers of this book that confirmed my reasons for eating clean, and eating cleaner than I had been eating. His research also solidified my thoughts about why I had been food poisoned by fast food on more than one occasion, why we nearly lost our house dog, and why cleaning products and certain air fresheners lead to smothering and irritated sinuses. He exposes much about how these horrific toxins are actually allowed to be in our foods, pet foods, cleaning products, and even in medicines and vitamins that we think are helping us.

An eye-opening read!!! I encourage anyone who is interested in living a cleaner, more holistic life to read this book!

Secondly, I’m asked if it was a difficult transition. My answer is no. You don’t have to make the plunge and change everything at once. I made changes over a period time with my diet and I did the same thing with household items, hygiene items, and even my car air fresheners. I didn’t see the need to waste products that I already had on hand, so as I would empty an item, I would replace it with plant based, organic, and a cleaner item. First on the list, I would begin eliminating the toxins from my our home and our vehicles. My first elimination was laundry detergent. To prevent waste, after exhausting the last of my stock, I began using organic plant based detergents that didn’t require fabric softeners. There were some products that I had in my home that I could not convince myself to continue using. Those plug in air fresheners were tossed in the garbage, empty or not!

With the various air fresheners gone, I replaced them with diffusers for essential oils to help clean and purify the air and also bring a wide array of wonderful scents into the house. One by one I replaced our cleaning supplies with either organic plant based cleaning supplies or homemade supplies from natural ingredients. It’s quite amazing how many options are on the market and what’s even more amazing is the number of cleaners you can make using essential oils! I’ll share my bathroom cleaner soon! It cleans great, easy to make, and also prevents those toxic fumes that no one likes.

The next change was hair care products and tooth paste. doTERRA made that change easy for me as well. They have a wonderful plant based shampoo that incorporates essential oils, and a fantastic plant/based conditioner, and leave in conditioner that is excellent! I can’t even explain how wonderful my hair feels after using these products! My hair shines so much more than before and it feels less weighted. I also made the transition from usual tooth paste to a clean toxin free tooth paste from doTERRA. I chose this toothpaste simply because I’m a doTERRA consultant, and after trying it… it works! My teeth are clean and white and after reading the list of ingredients in my old toothpaste, it was an easy transition and one that I am happy I made.

doTERRA shampoo, conditioner, and leave-in conditioner. All natural!!!

Finally, vitamins was the next item to begin changing. It was easy to switch vitamins with doTERRA. The vegan vitality pack is on my monthly auto order. I love these vitamins as they’re all plant based, no additives, or artificial colors added, and they’re in veggie capsules. Essential oils, homegrown herbs, and homemade teas helps with common cold symptoms, allergies, scrapes and minor abrasions. I could go on forever with the reasons why I chose a holistic lifestyle.

Vitality pack! This was a game-changer! Even though I already took vitamins and had for years… I noticed an immediate change in my stamina!!

I’m asked if I miss fast foods, soft drinks, and what in the world do I do about coffee. Number one, I don’t miss fast foods. As a matter of fact, the cleaner you eat, the less you even want fast foods. My husband and I now prefer food prepared at home ten to one over restaurant foods. I gave soft drinks up over twenty years ago for my own personal health and have never looked back. I’ll be honest, coffee change took a while. It took a little while and a lot of different coffees to find a good organic coffee that I truly enjoyed, but have finally found one that is very satisfying. I have also replaced much of the coffee that I drank during the day and evenings with organic and my homemade teas.

Delicious organic coffee from Amazon!!!

Finally, I’m asked if I feel better physically since making so many changes. Simply omitting meats and dairy from my diet was a game changer with my cholesterol and inflammation. Omitting artificial colors, scents, and toxic preservatives really made a positive impact on my allergies. Plant based vitamins, a good clean diet, and the removal of toxic smells in our home has made a positive impact on my overall health, stamina, and lead to a much more simple life that makes me happy knowing I am doing something to improve my quality of life, my families, and decreasing the chances of disease in our bodies.

Enjoy the simple things that bring joy and support your health. Organic lavender growing near our front door! Love to add to plant butter, cookies, teas, and more.

If you’re interested in holistic living, start slow. Remove one thing at a time. Don’t try to do it all at one time! You’ll become overwhelmed, which might result in giving up. Make one change and allow that change to become a routine. Once you feel grounded and content with that change, make a second change. As you empty or exhaust a supply of one particular item, replace it with a cleaner wholesome item. Read the labels, do the research, do a little soul searching, meditate, pray, and take holistic living one day and one change at a time.

Take time to enjoy the change. One change at a time and you’ll be more likely to stay the course. It’s so worth it!

I hope you’ve enjoyed this post. Feel free to leave comments. I enjoy reading comments and answering questions. For now, God bless from the mountains of Kentucky! Happy Fall!!!

Canning Crispy Garlic Pickles

Good evening, from the Mountains of Kentucky. I hope wherever you are this post finds you blessed and well. It’s been a bit of a strange summer in our part of the world. We’ve encountered extremely dry weather that resulted in hand watering our garden, to extremely wet weather that is resulting in our picking buckets of tomatoes as they start to ripen to prevent them rotting on the vines. We’ve been laying our tomatoes in the sun and allowing the sun to finish ripening. We’ve juiced the majority of the tomatoes and will begin canning whole tomatoes next. With the diverse extreme weather our grape tomatoes have flourished! The weather don’t seem to have affected them. We’ve enjoyed them with salads, sides, and more. We’ve had so many of them that I’ve already started freezing them to use in stir fries, sautéed dishes, and for one of my favorites, sautéed basil tomatoes!

Stewed basil tomatoes with breakfast

Our cucumbers are still coming and we’re still picking them! We’ve blessed others to have cucumbers to make pickles, relish, and also to enjoy eating. We’ve canned spicy kosher, pickle relish, and enjoyed them as sides with all meals… and they’re still producing.

Garlic pickles

So the question became… what can we do with those lingering cucumbers? It suddenly came to me. Garlic pickles, I would can garlic pickles! You’ve probably ate those delicious big crunchy garlic pickles that you can pickup at gas stations, convenient marts, and several other businesses at some time in your life. If not, you’ve missed a real treat. We usually pick one up when we visit our local Tractor Supply. It’s enjoyed to its entirety on the trip home. So, with the thoughts of those delicious pickles… I decided to try my hand at making them myself. And, it turned out quite well! I’ve already consumed nearly a quart of them by myself! So, for you pickle lovers… here you go!!!

Ingredients:

  • Approximately three pounds of cucumbers
  • 3 cups white vinegar
  • 3 cups water
  • 1/2 cup kosher salt
  • 1/4 cup white sugar
  • 8-12 cloves fresh garlic
  • 5 tbs dried dill seeds
  • 7 tsp minced garlic
  • 5 tbs whole black peppercorns
  • 7 sprigs fresh dill
  • 7 tbs Pickle crisp

Process:

Sterilize seven quart jars, rings, and flats and set aside on a clean folded towel. Wash, scrub, and dry cucumbers. Trim the ends of the cucumbers and set aside. (We add these to our chicken’s feed) They appreciate it! Happy chickens lay more eggs! Cut clean cucumbers into spears. You can change the cutting to the type of cut you prefer.

In a stockpot, I prefer to use an enamel coated cast iron stock pot, add vinegar, water, salt, dill seeds, and peppercorns. Bring to a boil slowly. While brine is coming up to a boil, divide garlic cloves, sprigs of dill, and minced garlic to clean jars. Add sliced cucumbers to jars. I usually lay the jars on their side with dish cloth folded beneath the ring to create a bit of slant. This prevents all of the garlic from being one-sided and prevents spills. I then carefully stack the cucumbers in jars until tight. Remember, there will be shrinkage as the pickles process. Now add a full tablespoon of pickle crisp to each jar. Add a sprig of fresh dill.

After the brine comes to a rolling boil, remove from heat and ladle the brine over the cucumbers leaving at least a half inch space for headspace. Make sure all cucumbers are covered. Run a butter knife or spoon handle around the jar to remove any air pockets. Wipe the rims with a paper towel that has a bit of vinegar on it and add the flats and rings.

Add warm water to the water bath canner until about half full. Turn the stove on medium high heat, and add the filled jars to the canner. Finish filling the canner until the water is at least an inch over the jars. When the water in the canner comes to a rolling boil, set a timer for ten minutes and allow the pickles to process for the full ten minutes. When the time has exhausted, turn the stove off and allow jars to sit for about five minutes until the water simmers down. Using the jar lifters, remove the jars from the canner and set aside on a folded bath towel or wooden cutting board. Soon you should hear the ping from each jar letting you know the jars are sealed.

I couldn’t wait any longer than two weeks to try them!!! Oh my! They’re delicious! We’ve about devoured a quart in a few days.

I hope you and your family enjoy these delicious crispy garlic pickles as much as we do. I have a feeling they’re going to quickly become a family favorite. Please feel free follow and leave feedback. I love to hear from my readers. I enjoy answering questions and reading comments. For now, may the Lord bless each of you. I’m off to can more tomato juice today! God bless from the mountains of Kentucky.

Canning Our Favorite Pickle Relish

It’s bean picking time in the mountains!

Good morning, from the mountains of Kentucky. I hope your Saturday is off to a wonderful start! It’s been a busy day already for our household. Early morning prayer and meditation with our Heavenly Father, devotion, and studying His word and enjoying fresh perked coffee. God is so good. I love seeing His fingerprints on the small things in our lives as well as the big things. We are truly a blessed people. As you can see from the picture above, it’ll be bean picking time this week!

A larger pot of spearmint grown primarily for mint water and teas.

I was amazed to see so much new growth in the mint garden this morning. I created a weak mint tea from teabags yesterday and generously watered both the peppermint and spearmint. Wow! This morning both mints were strutting and showing off lots of new leafs that were healthy and shiny. Don’t throw away those used teabags or tea that might be out of date. Create your own fertilizer that is a rich organic treat for your herbs. I’ll try to make a post later about the uses of tea in the garden. Now, let me share our favorite relish recipe with you!

So, for this delicious pickle relish you’ll work in two a two complete this relish in a two day setting. You’ll need the following ingredients for day one;

Day one:

  • Two or three gallons of fresh cucumbers washed and dried.
  • One medium yellow/sweet onion.
  • One small red bell pepper washed and dried.
  • One tablespoon of salt.

Process for day one; dice cucumbers, yellow onion, and bell pepper into very small diced pieces. Put in a bowl that has a lid. Sprinkle the tablespoon of salt over the veggies and gently toss. Put in the fridge over night.

Day two:

Wash and sterilize pint jars, rings, and flats. Allow them to drain and dry on a clean towel. If you use the dishwasher to sterilize you can bypass this step. Next, remove the veggies from the fridge. Line a colander with either cheesecloth or sturdy white paper towels. Put the colander in the sink bowl and pour the veggies into the lined colander and drain well. You may use additional paper towels to blot and gently squeeze the veggies to help remove the excess liquid. Allow veggies to sit and drain while you make the brine.

For the brine you will need the following ingredients;

  • Three cups of distilled white vinegar
  • One cup of water
  • 1/4 cup kosher salt
  • 1/4 cup white sugar
  • 1 1/2 tablespoons diced garlic
  • 1 1/2 tablespoons of mustard seeds
  • 1 1/2 tablespoons of course black pepper
  • One tablespoon turmeric
  • A couple sprigs of fresh deal
  • One teaspoon of dried dill weed

Combine the ingredients above other than the fresh dill along with the diced veggies in a large pot. Bring slowly to a boil. Reduce heat and simmer on low for ten minutes. Put a little fresh dill in the bottom of each jar and then add the relish mixture to clean jars. A funnel makes this process easier and less messy. Wipe the rims of the jars and add the flats and rings. Place jars in water bath canner with the water covering the lids. Bring the water to a hard boil, and set timer for 10 minutes. Turn the stove off when ten minutes has passed, and remove jars with a jar lifter. Set them aside on a folded towel or cutting board and listen for that wonderful pinging sound to assure you that your jars have sealed. Once the flats have cooled, write the date on them with a permanent marker.

I hope your family enjoys this relish as much as we do. We add it to chili dogs, hot dogs, and hamburgers. My husband loves it on beef burgers and I love it on plant based burgers! Using organic ingredients creates an even tastier and healthy choice for dishes. You may also add a jalapeño in the diced veggies to create an extra spicy relish. Both are a great addition to your summer dishes! This relish is also quite tasty in potato salad or egg salad. Experiment and feel free to let me know you how used this recipe.

Feel free to leave comments or ask questions. I love to hear from my readers. God bless from the mountains of Kentucky.