Challenges and Rewards on the Homestead

Hello, from the mountains of Kentucky! How is the weather in your neck of the woods? It’s a bit soggy on the homestead and has been most all spring and now still soggy into the first weeks of summer. This brings me to the purpose of this post, challenged on the homestead.

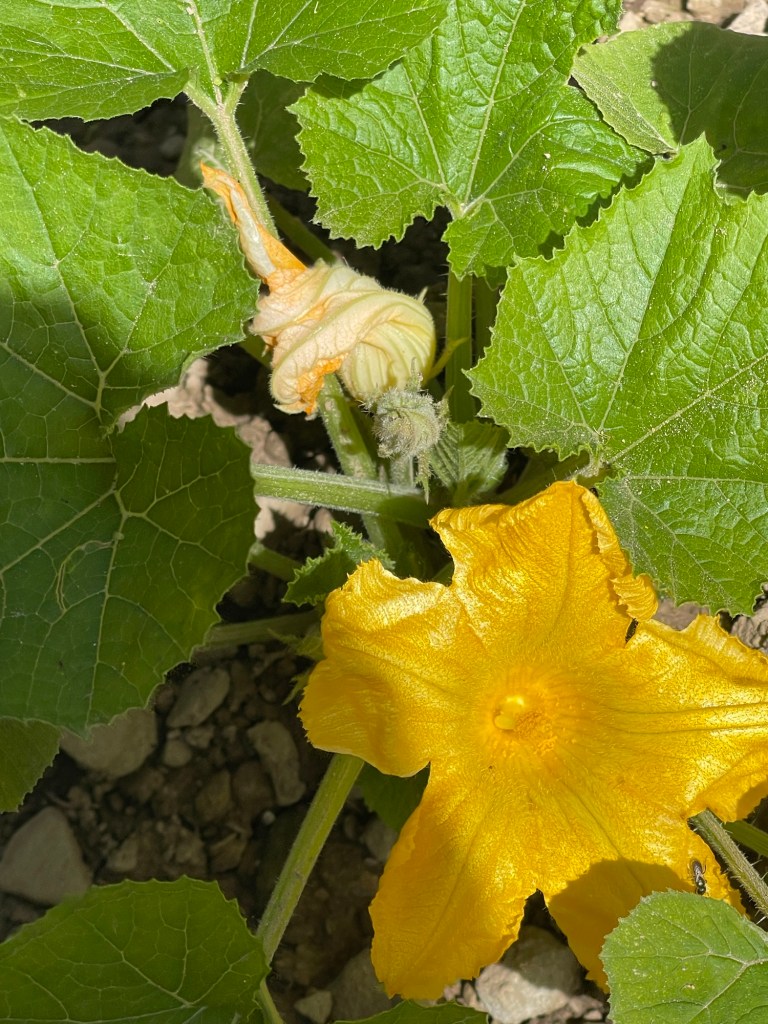
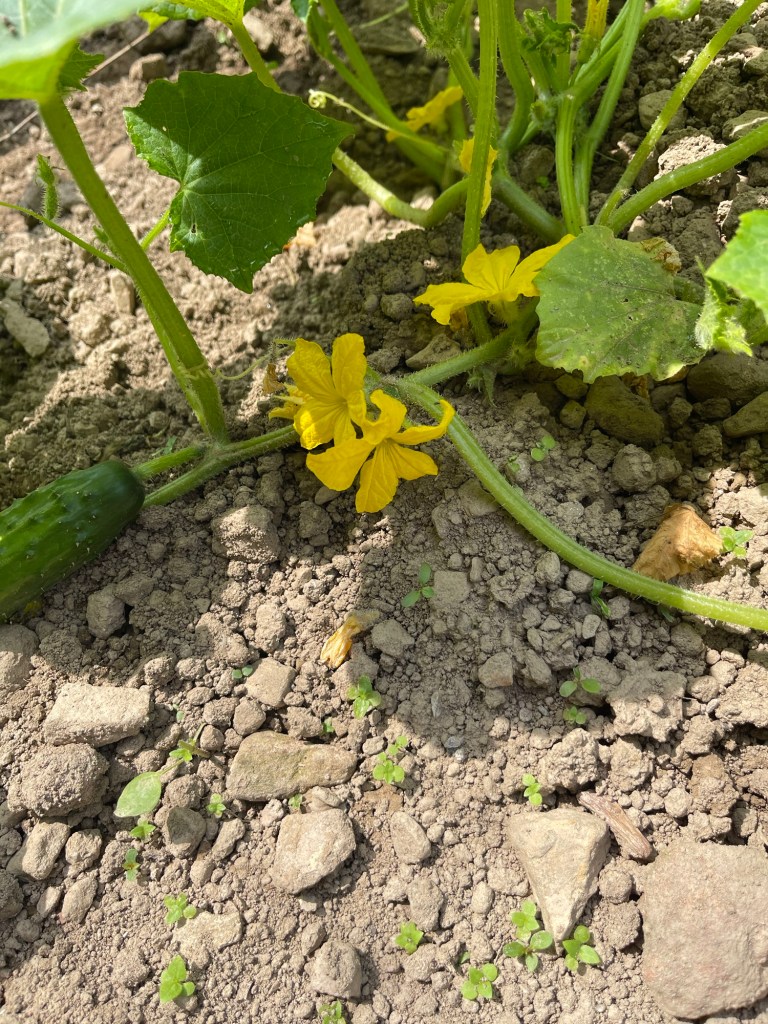
Rain is one of the biggest challenges we have faced this year. As a result of the continuous rain, we are quite a bit later than usual getting all of our garden planted. We’ve had potatoes out since Good Friday. We have been eating spring onions and have finally planted the cabbage, kohlrabi, squash, zucchini, tomatoes, peppers, watermelons, cantalopes, and cucumbers planted. The zucchini is blooming and the squash is coming along nicely but some of the tomato plants are struggling. We’re taking extra care with them to nurture them through the strange weather patterns to ensure we have tomatoes to eat and preserve.

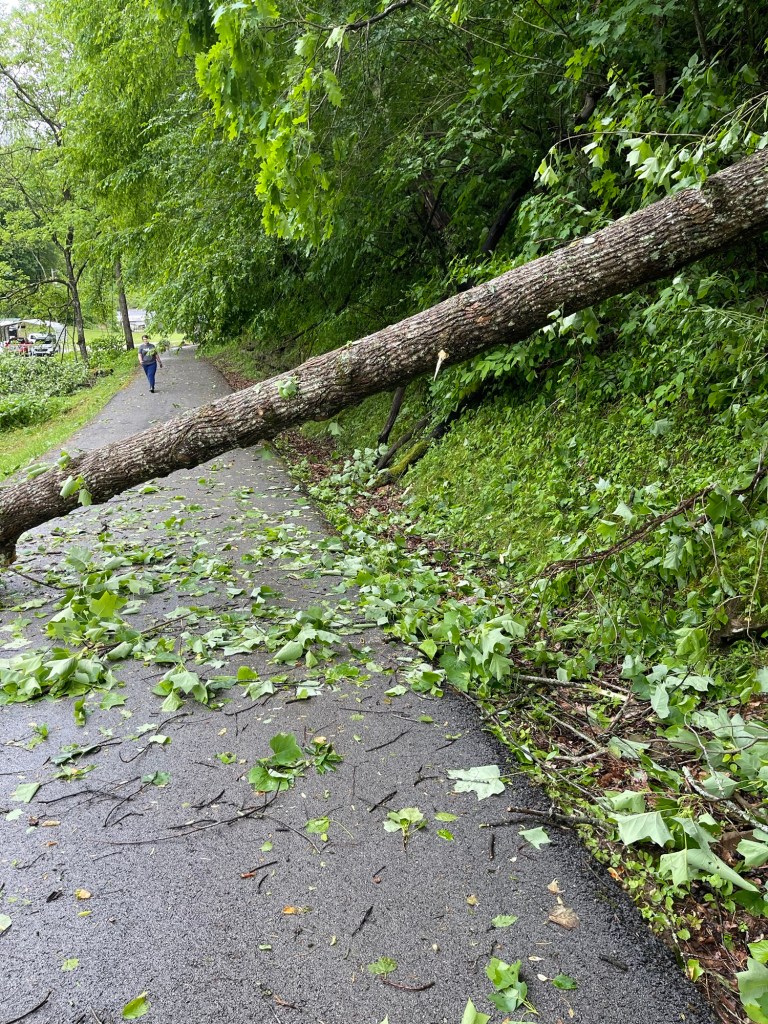
With the excess rain we’ve also had numerous thunderstorms that have brought straight line winds so fierce they uprooted very large trees. Unfortunately, the largest tree fell across our driveway one tree ended up across the driveway and fell into our potatoes. We were blessed it wasn’t a tree that fell on our house. But, it sure wreaked havoc on the potatoes. Now weeks after the tree fell and the branches and limbs have been cleared away, the potatoes vines have all greened back out. We’ll see how potatoes beneath ground endured the damage when we dig them in the fall.

Rain has also caused quite a bit of flooding, which has resulted in the creek banks washing out. To help anymore erosion, we’ve planted a weeping willow tree, which roots deep, which should help protect the bank from further damage.

The abundance of rain turned a small stream to a river!
Building up a retainer wall to help guide the runoff water to the creek.

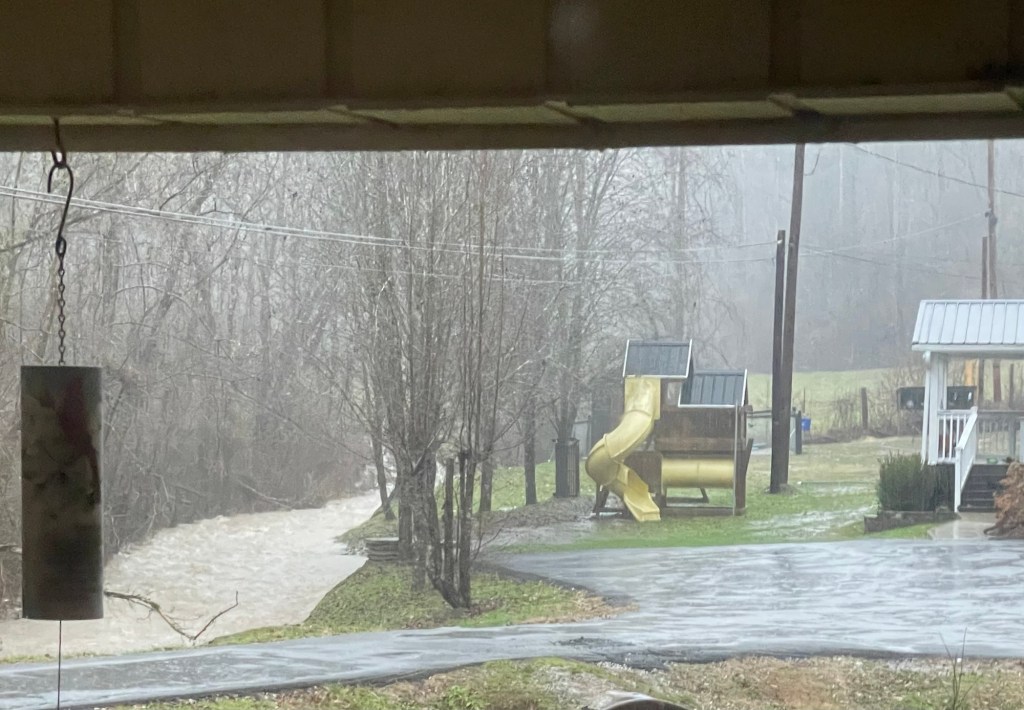
With all the rain, ditching to prevent flooding has been more frequent than most years. The mowing has been a challenge this year as well. It feels like a never-ending job of mowing and weeding on days it’s not raining. Dry days are filled with diligent work mowing, weed eating, and weeding in the garden. Rain and wind has created most of the challenges for us this year, but along with the tremendous amount of rain, we have had to baby plants to prevent them from rotting in the ground. It feels strange to not be picking vegetables this time of the year.

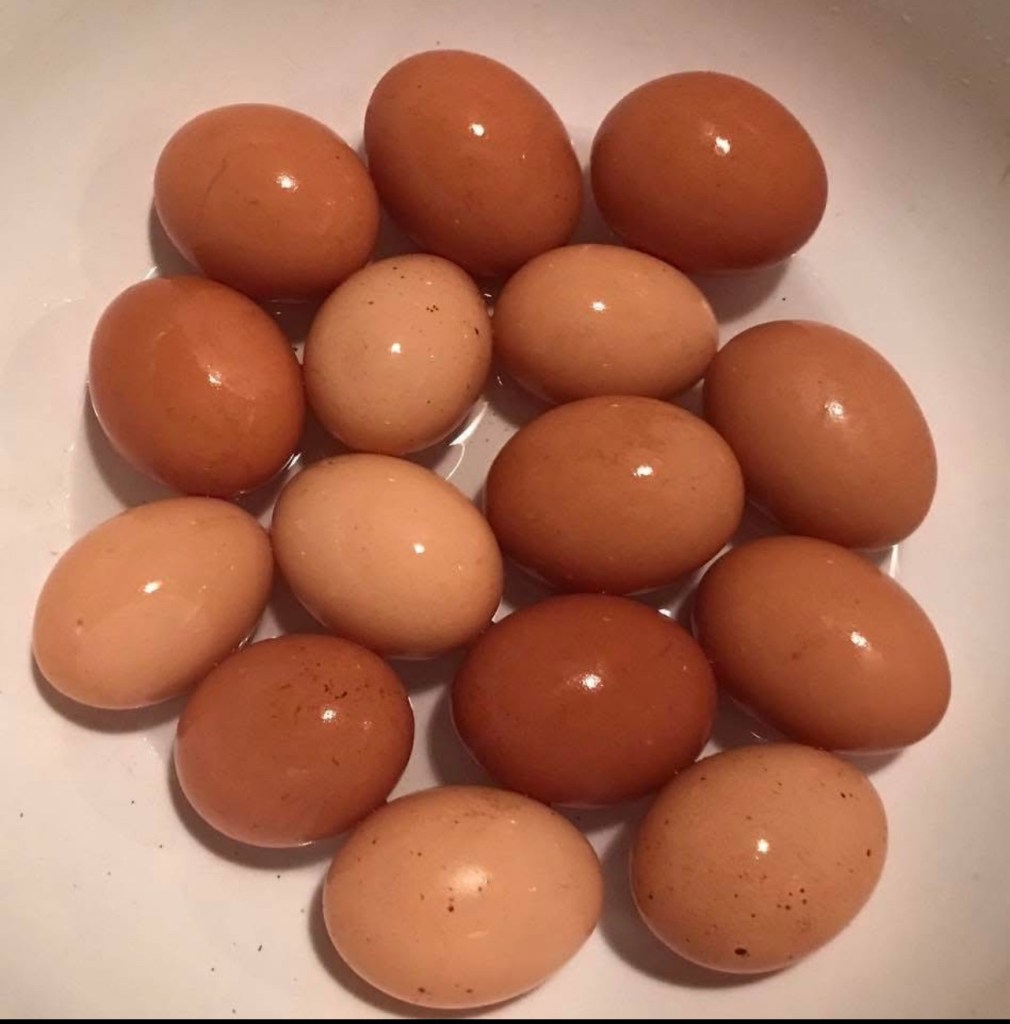
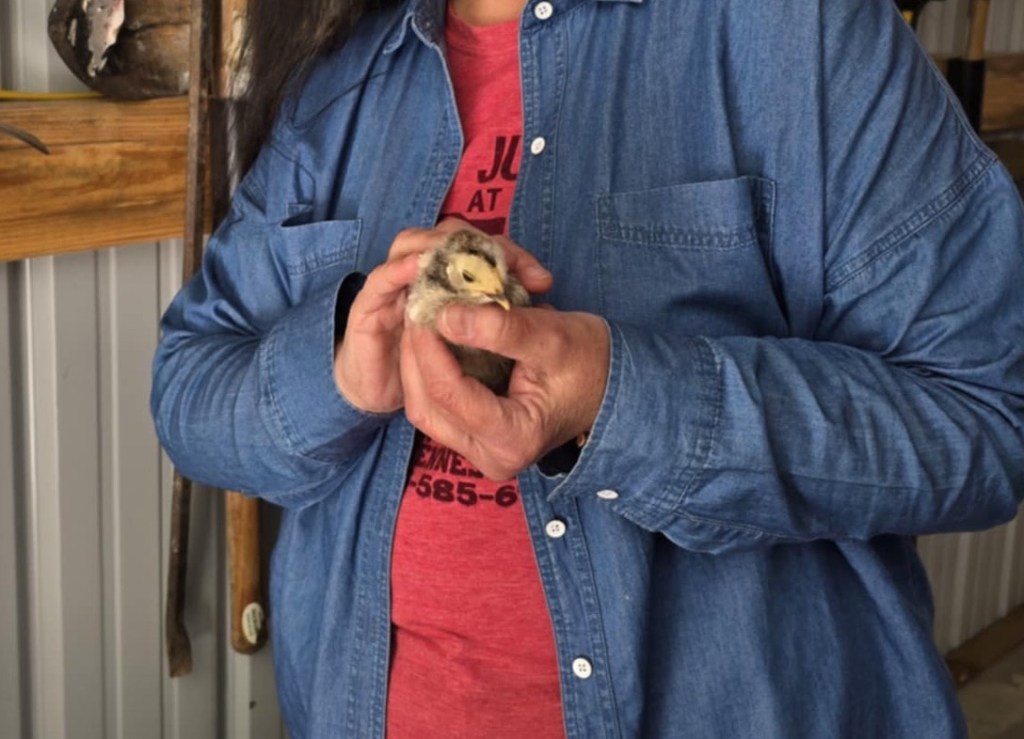
The weather has created a challenge with our chickens as well. They do not like to get out to pick in the green grass when it’s raining. With the lower picking and sunning also comes a decrease in eggs. This leads to more laying mash, handpicking greens for them between rain showers, and providing them ground oyster shells to keep them healthy and maintain egg production.

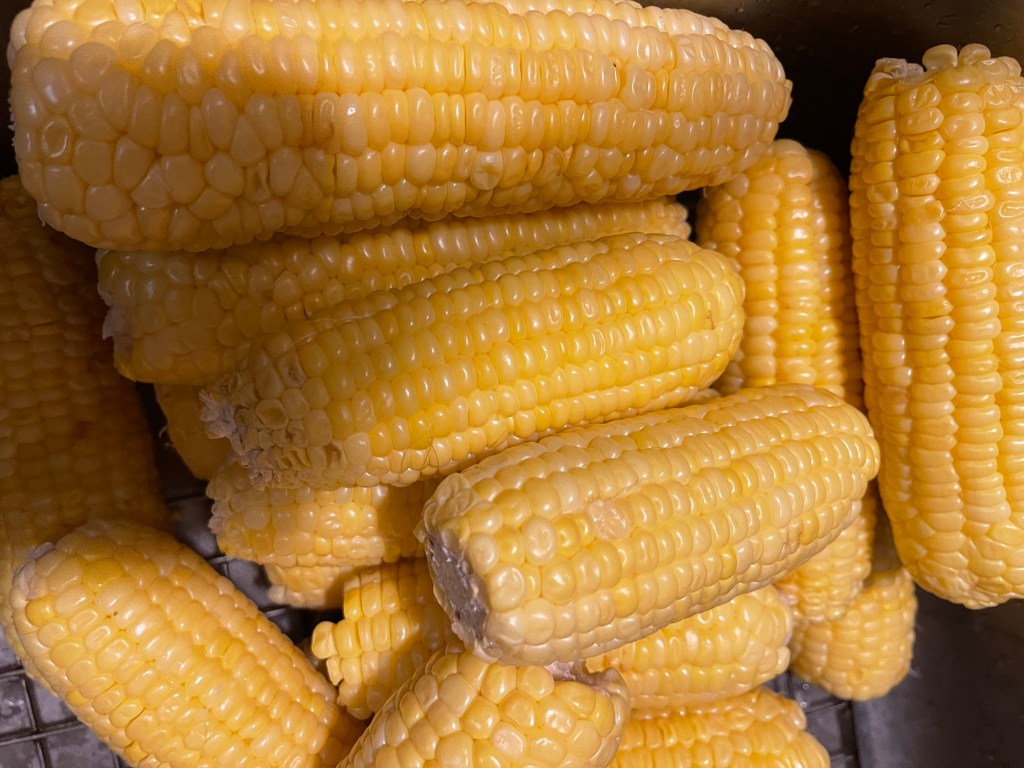
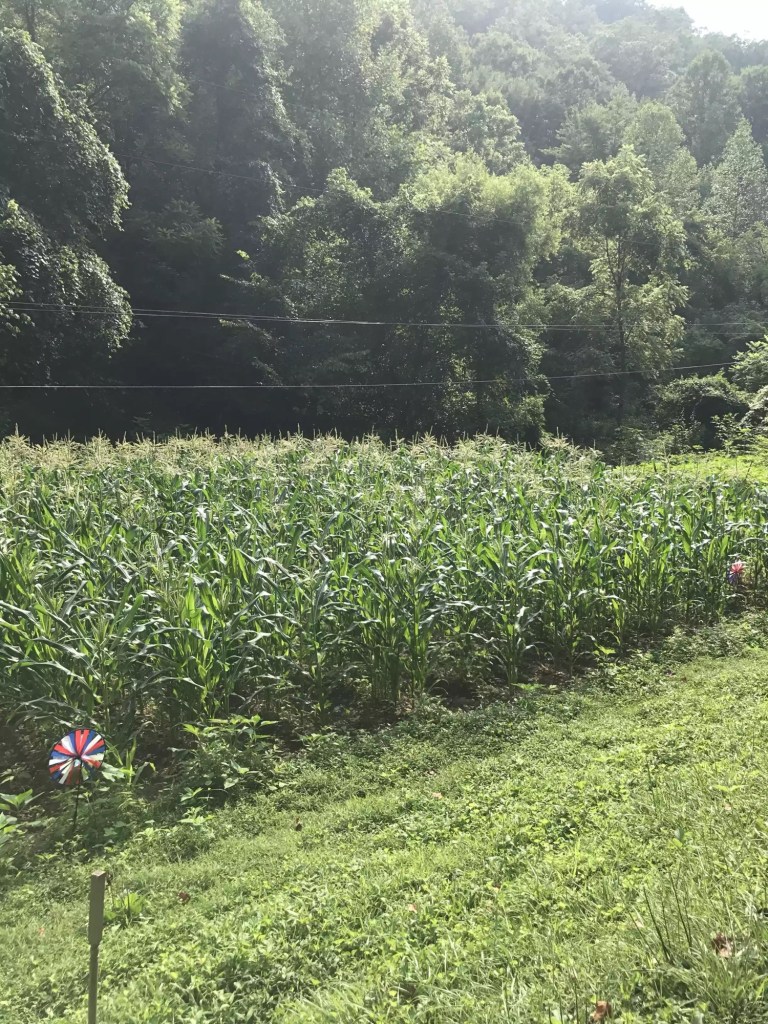
Once the unusual amount of rain subsided, the challenges of heat arrived with a vengeance. We were able to fence the cucumbers, finish the second raised strawberry bed, and plant six long rows of beans and more peppers before the extreme heat arrived. As the heat index rose, we’ve had to decrease the amount of time spent planting, hoeing, and tilling. That work has been replaced by late evening watering the garden by hand. With temperatures up to 96 and the heat index even higher, it’s taking a toll on our beans. But I think they will survive. It has truly been a roller coaster of unusual extreme weather. Finally, the heat index lowered and it looked like rain was in the forecast again. We were able to get twelve rows of corn planted minutes before the rain arrived again. With the late corn, we have hopes that maybe we have missed the majority of the storms that include wind that often damages our corn. We are hopeful we’ve endured the majority of the storms this season and our corn will grow free from wind damage.

We faced the challenge of losing one of our mommy bunnies this season. It was sad as she was a favorite. But, on a happier note another mommy bunny gave birth to ten more baby bunnies with eight of them still thriving. We also lost two of our best laying hens, but gained twenty two doodles. The Lord has a way of easing the loss with the gain and miracle of new life. Just when I was ready to replace our precious barn cat, Harry, who we lost in September, with an adopted cat from the pound, a new feline showed up one evening. He was desperate need of a home. He is now a happy and healthy kitty on our homestead who loved doing his part by catching ground squirrels who quickly can become pests in the garden.

Meet peaches, our newest addition to the homestead.
Meet owl one of the many new doodles.

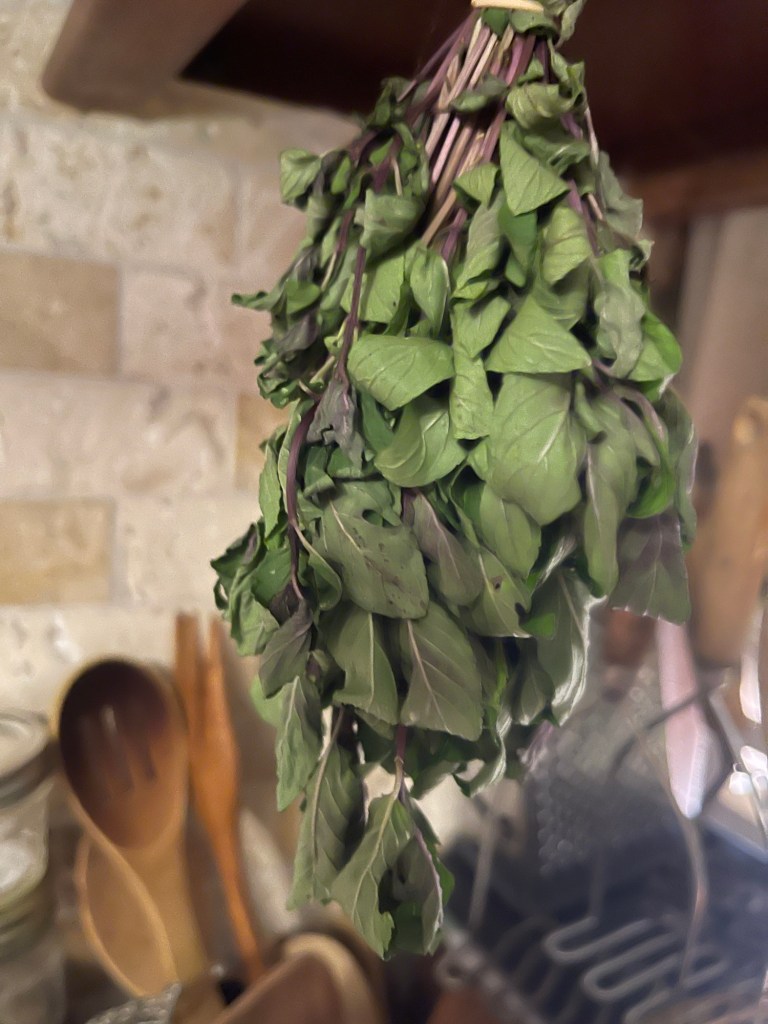
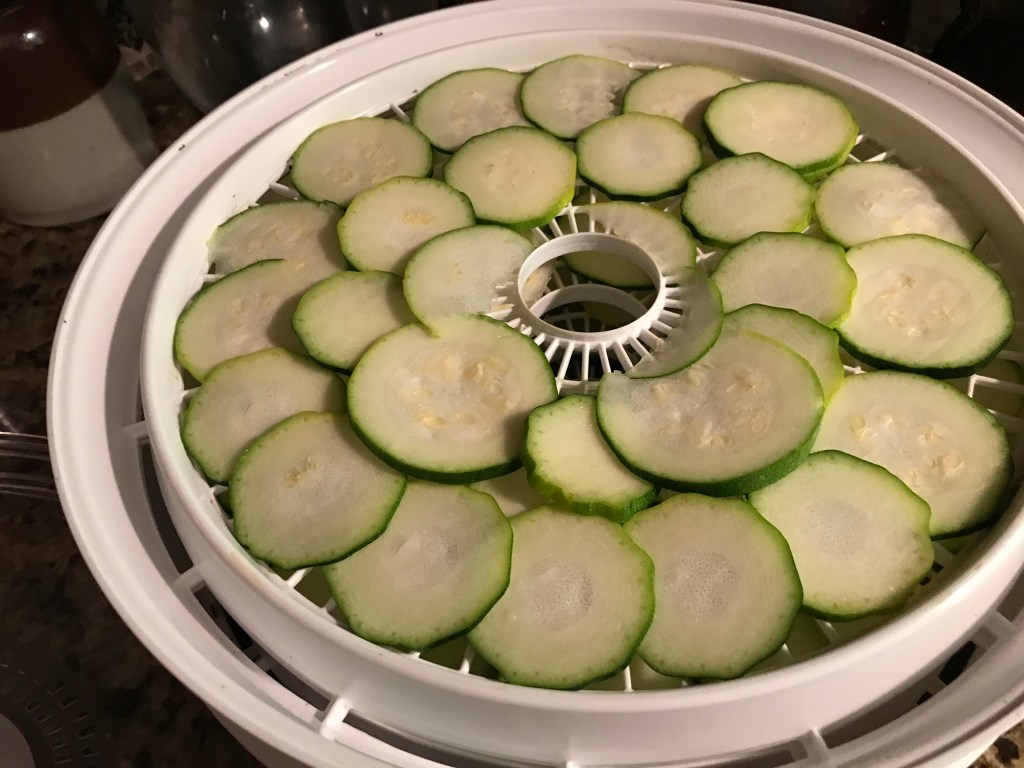
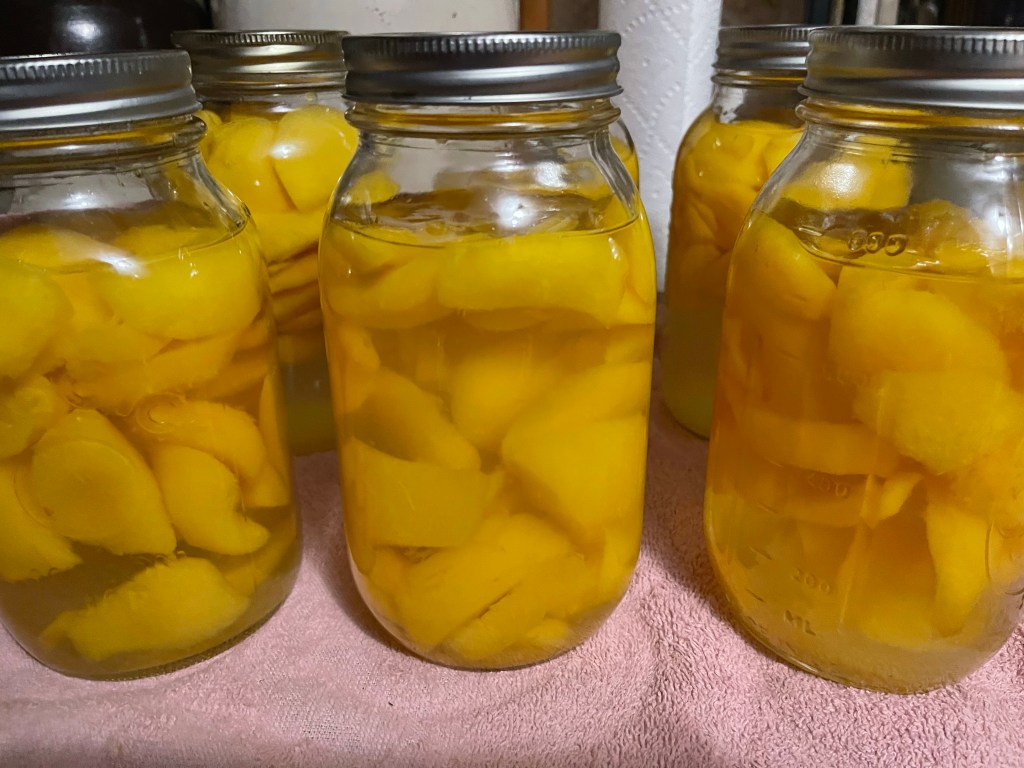
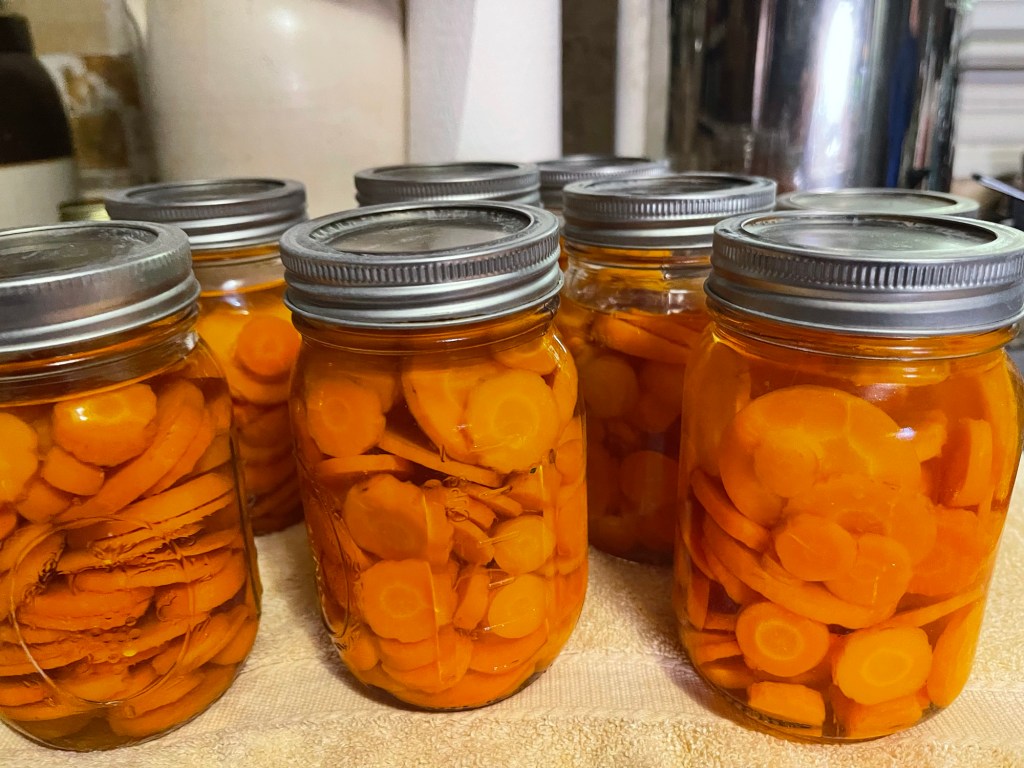
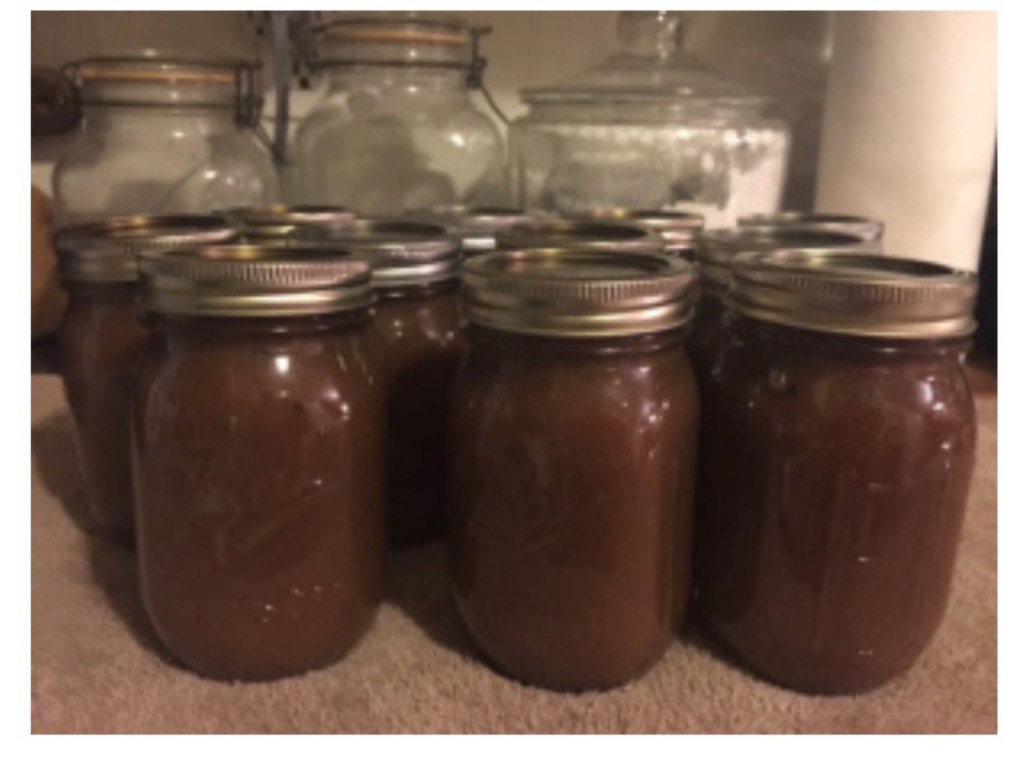
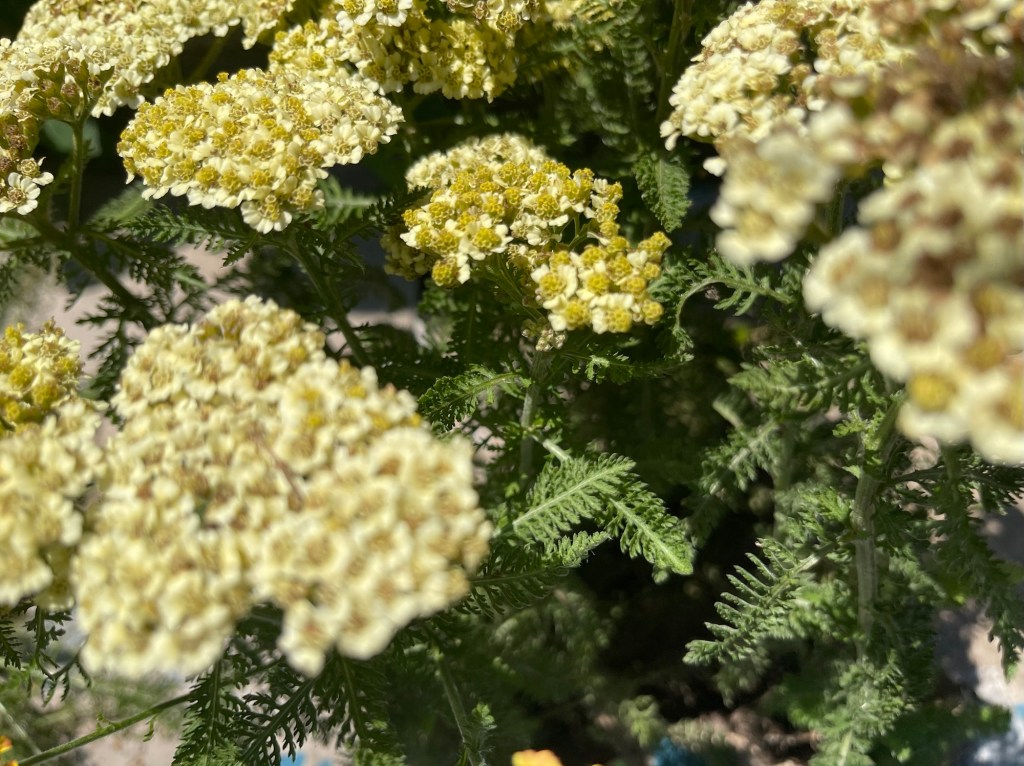
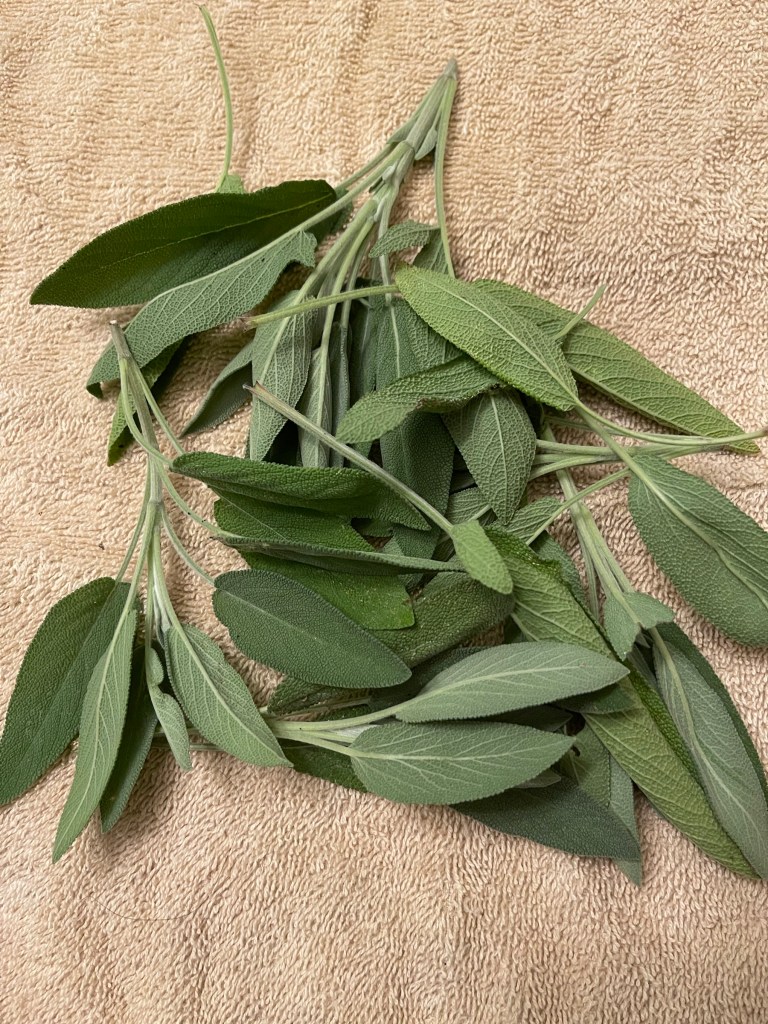
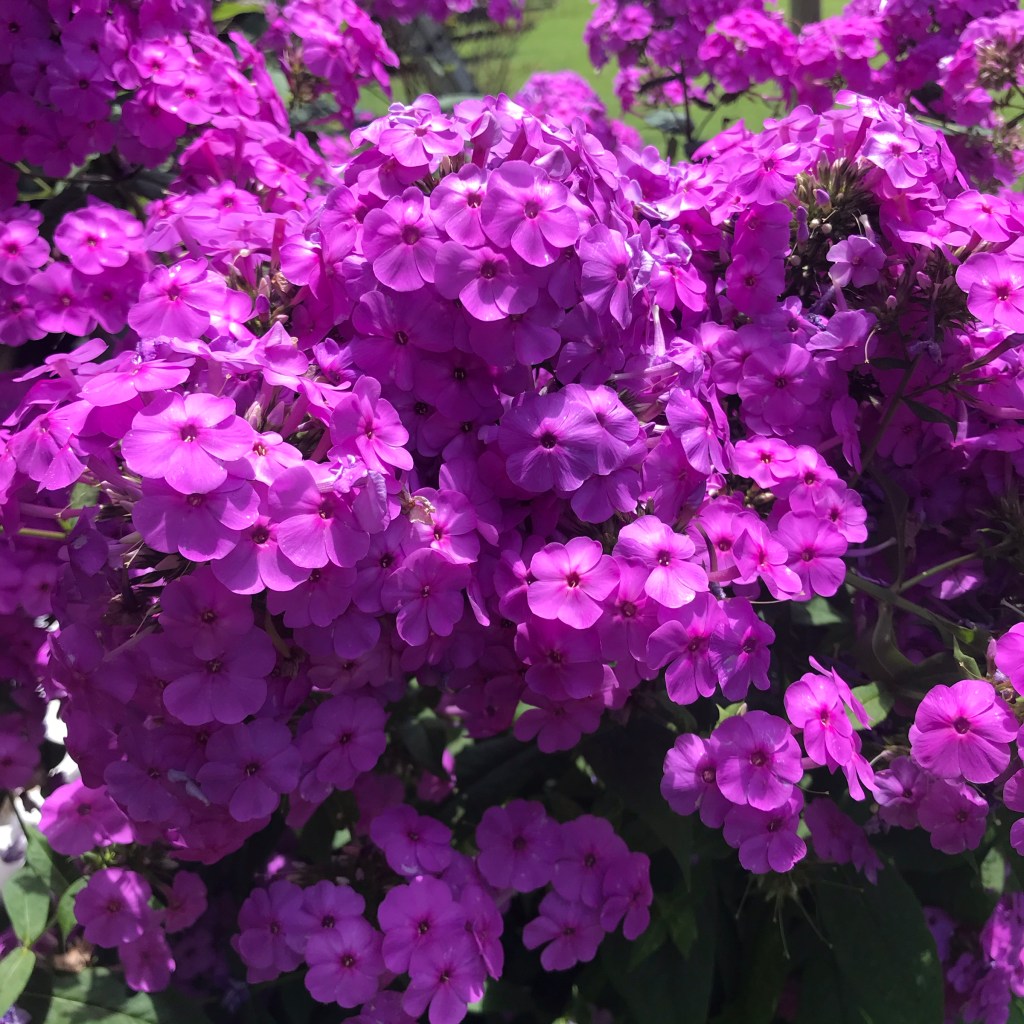
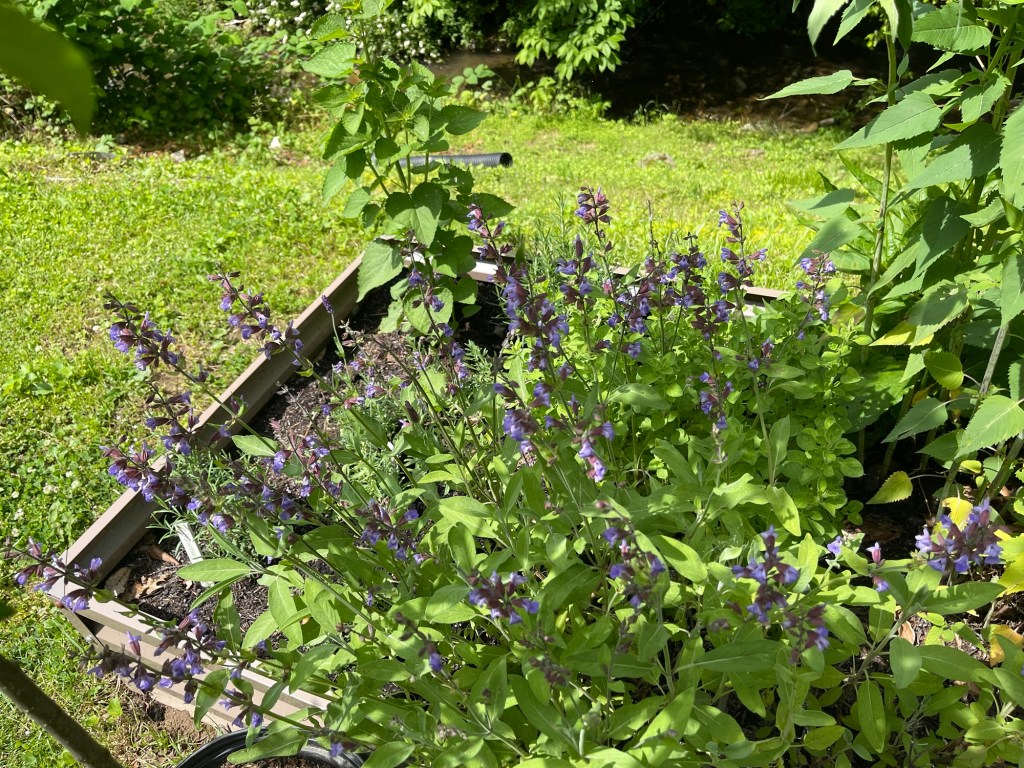
The challenges of homesteading are real, but so are the victories! On the upside, the rain has helped our herbs flourish. I’ve already been drying basil and eating herbs for a few weeks. I will harvest sage, oregano, basil, lavender, a couple variety of mints, and lemon balm this week when the heat decreases. Again the rain has increased the growth in our cucumbers, squash, and zucchini and has been good for our flowers as well.

Our roses bloomed more this year than any other.
Iris’s are still blooming!
The flocks are loving the sunshine!
The bees love our sage blooms!

With homesteading comes both challenges, rewards, failures, and success. But most of all comes the rewards of satisfaction in planting, harvesting, preserving, and eating our own food, loving the land that the Lord has provided, sharing our bounty with others, and caring for the animals that we’ve been blessed to care for are the best rewards. Homesteading rewards far outweigh the challenges, and it’s nice to remember that with challenges comes the rewards of learning and overcoming hardships.

Our garden is later than usual coming in… but we are overcoming the challenges the weather has presented this season.

I hope you’ve enjoyed this short post and enjoyed learning more about our life on the homestead. Feel free to subscribe, like, comment and share with others. For now, God bless and happy homesteading from the mountains of Kentucky.

Helpful Homesteading Skills

Hello, from our homestead in the mountains. Spring is so close I feel like we could almost reach out and touch it! I don’t know about you, but it’s been a pretty rough winter here. We’ve gone from snow, to spring like temperatures,to flooding, to ice and snow, back to massive flooding, and snow again. But the good news is spring is less than month away! That and planning for our vegetable and herb garden helps make the lingering days of winter tolerable. Not to mention, a lot of reading and crocheting.

I was recently interviewed about our homestead. Many questions were asked about wby, what does it take, what advice can I give, and many more. I was a little surprised at the misconceptions that many people have about homesteading. That interview helped inspire this post. I am excited to bring to you ten skills that we use on our homestead in everyday life. These are skills that have been handed down from generations past, learned from fellow-homesteaders, and some we learned ourselves through trial and error.

Gardening is a plus for homesteaders. Having your own garden can eliminate or decrease buying from farmer’s markets, farms, or grocery stores. Don’t get me wrong, we love to shop our local farmer’s market for produce that we don’t grow. We buy some things from the grocery, but not to the extent we would buy if we did not have a garden. Gardens can be overwhelming for some and some may not have room for a large garden. I know some people who raise a large amount of produce for their families. Follow our blog and head over to our podcast, Homesteading in the Mountains, on Apple Podcasts for a tips, ideas, and gardening posts.

Our garden last spring.

Saving seeds has been a part of homesteading in our family as long as I can remember. I recall my grandparents shelling bean seed and many other types of seeds to dry for the next season. That tradition has been handed down through the generations to me. Saving bean seeds, seed potatoes, tomato and cucumber seeds mean we do not have to buy seeds, we know how the plants were grown where the seeds originated from, saves money, and ensures we have seeds for the next season.

One of our seed boxes

Herbs are my favorite! I love working in our raised herb beds. We grow lots of basil, chives, oregano, thyme, lavender, bee balm, echinacea, Mullein, yarrow, peppermint, chocolate mint, strawberry mint, spearmint, lemon balm, and more. Do you have to grow this many different herbs? The answer is no. Grow what you will use and what you like. I use our herbs to make spices for culinary purposes and many of them for teas, while other herbs are used for balms, herb and oil-infused oils for a medicinal and cooking. We also use them for wide-variety of medical rubs, cleaning supplies, and repurpose them for compost and fertilizer. I love to gift herbs and teas as well. Follow our blog and podcast for more information. My Favorite Top Ten Herbs (Chocolate Mint part 3) This is one of many links to posts about our herbs. Herbs have the ability to make food taste better, makes great teas, and can be used for many medicinal purposes.

Harvesting Mint for Teas

An early mint bed from a couple years ago. Future tea!
Chocolate mint drying to be used as tea.

Baking bread is making a huge comeback. Take a few minutes and look at the ingredients in your favorite store bought bread. Then, look at the price. Finally, think about the preservatives that have been added to prevent mold. With that being said, there is no comparison to the taste of fresh baked bread. I enjoy baking a variety of styles of bread. I love artisan bread, my husband loves sandwich bread. I also enjoy baking sourdough bread, wheat bread, and high-fiber seeded bread. Recently, I branched out to making sourdough tortillas and sourdough crackers. We enjoy baking all types of cakes and cookies. Homemade has less ingredients, is healthier, and tastes better. Give Us This Day Our Daily Bread: Homemade Crusty Vegan Bread This is one of many posts about baking fresh bread.

Artisan seeded bread.
Fresh homemade tortillas.

Sourdough Tortillas

Sewing is something I grew up with. My mom was a seamstress, my grandmother sewed clothes and was known for her quilting skills. My sister inherited the love for quilting. I can, and have a made a few quilts, dresses, shirts, and pants. I use my sewing skills more in hemming, sewing a button on, or mending clothes that need repaired. Nevertheless, learning to sew can save a nice chunk of change for hemming and mending. It is also a skill that that produces very nice gifts, and can become a nice side income.

Just a few of my sister’s homemade quilts I have used and now display as a keepsake.

Canning, Dehydrating, & preserving canning vegetables helps to ensure we have food for the winter, saves money by decreasing store bought food. Having our own canned or preserved food ensures we are eating healthy garden food, even in the winter. And garden food allows us to share our bounty with others. Canning Green Beans the Time-Tested Way (updated) This is only a few of the wonderful things we can and preserve for our family.

Fresh zucchini and squash
Dehydrating zucchini that can be rehydrated later.
Green beans from the garden canned and ready for winter.
Corn from the garden to the freezer and ready for winter.
Fresh peaches canned and ready for cobblers or bread.

Canning My Favorite Peaches

Crocheting or knitting is not a necessity, but it is a great skill to have when making blankets to share as gifts, for family, and as a business. My favorite of the two is crocheting. I have made a nice little stash of cash by creating ponchos and afghans. It also provides a means of relaxation late evenings, and in during the dark days of winter.

Crocheted afghan in process

Chickens bring eggs to our family. With the prices of eggs lately, our girls are appreciated more than ever before. They also provide an extra income. We sell eggs at a much better price than the over priced eggs in the grocery store. Chickens also provide meat for the freezer, they help decrease insects in the yard, and the rooster’s early morning crow prevents one from oversleeping. Our chickens help us to friends and flail who cannot pay the high price of store bought eggs.

Fresh eggs!
A few of our layers.

Composting is a way of repurposing what most people throw away into fertilizer. Some people buy a gadget that allows them to compost their leftovers in the house. They’re nice and work if you do only have the space outdoors for a compost bin. We chose to build a compost bin from used concrete blocks that would have otherwise been sitting unused in a pile, or sent to a landfill. The compost bin is basically three outside walls with an open front and top. It is open in the front to allow the tractor or shovel access. The top is open to allow easy dumping and to allow the weather elements to reach the compost, helping it to decompose. Once the raw vegetables, fruits, egg shells, tea leaves, fruit and vegetable peelings, dried leaves, and other organic decomposable additives have decomposed, and it is totally dry, it is added back to the gardens as organic fertilize and around the fruit treats. Composting reduces waste, fertilizes, and ensures our plants are not being exposed to toxic fertilize.

Thank you for stopping by and spending a little time reading about our life on our homestead. Please feel free to leave comments, like, follow and or share. Happy homesteading from our homestead to your home. God bless!

Canning Carrots

Hello, from the mountains of Kentucky! It’s a beautiful time of the year in the mountains. The trees are alive with beauty! I try to savor the gorgeous leaves as long as they cling to the trees before the freezing temperatures bring them down. Every season in the mountains brings unexplainable beauty, but I think spring and fall are my favorite seasons. Enough about the beautiful bounty and onto the topic at hand, canning carrots.

The beauty of the mountains! It never gets old.

Carrots are versatile and can be prepared in many ways. We love them raw, glazed, in stews, breads, soups, and as carrot soup. We grow enough carrots to enjoy, but not always enough to preserve. With the prices of groceries soaring, that will change in upcoming seasons. We were recently gifted with an abundance of carrots that would be nigh to impossible to eat raw, so we decided to can them! It was too easy not to do! we had several large bags of carrots. I’m not sure on the weight or amount.

Ingredients:

  • Carrots (we had several large bags)
  • Kosher salt or sea salt (do not use table salt as it may cause cloudy water to form in the jars.
  • Filtered water.
  • White vinegar

Preparation:

  • Remove leaves and tips from the carrots.
  • Scrape and rinse carrots.
  • Slice carrots however you desire. We sliced ours for soups and stews.
  • Add the carrot slices to a large bowl of filtered water.
  • Cover and refrigerate over night.
  • Remove the next morning and rinse the carrots.
  • Add carrots to filtered water in a large stock pot. Bring to a slow boil. Boil for five minutes.
  • While carrots are boiling wash and sterilize jars, rings and flats. We used pints.
  • Add water to canner and allow it to begin warming. We used a water bath canner. You can use the method of pressure canning.

Process:

  • Using a funnel in the top of the jar, add hot carrots and hot water from the stock pot to jars. Add 1/2 tsp of salt.
  • Wipe the rims of jars and rings with a white towel soaked in vinegar.
  • Add seal and ring.
  • Place hot jars in the warm water in the canner.
  • For water bath canning, allow jars to come to a slow boil and process for two hours. Allow jars to sit in the water when the stove is turned off for at least thirty minutes. Pressure canning time would be much less than water bath. Someone told me for pressure canning carrots they allowed theirs to process for thirty minutes.
  • Remove the jars with a jar lifter and set the carrots aside on a towel to protect the surface of the cabinet or table.
  • Once cooling process begins you should hear the coveted ping of the jars sealing.
  • Add dates to the lids or labels. Allow to cool and store with your other canned goods.
Canned carrots

The rabbits enjoyed the tips and pieces of carrots that we removed. The chickens enjoying the remains that were scraped away from the carrots. Everyone enjoyed some raw carrots and we will enjoy the canned carrots in many ways. I hope your family enjoys your canned carrots as much as we enjoy ours. Remember, when you find a sale on carrots, stock up and can them for the future! Thank you for stopping by! Remember to like, comment, and or subscribe! I am headed back to the kitchen to work up and preserve three large bags of kale! Recipe coming soon. Before you go, check out the following canning recipes that are time-tested! Canning Green Beans the Time-Tested Way (updated). We have canned beans like this for more than thirty years. Canning Savory Indian Relish this is a family favorite!! More recipes coming soon. Feel free to like, comment, subscribe or follow. God bless from our homestead in mountains of Kentucky!

Fall on the Homestead

Good morning, from the mountains of Kentucky. Fall in the mountains is one of my favorite times of year. I love the vibrant colors of the mountains. The leaves go through change that ranges from green to yellow, to red, and orange. The colors remind me of my mamaw’s colorful patchwork quilts made from random scraps of fabric. I love the aroma of fall in the mountains as the leaves fall. The flavors change in our cooking, teas, diffusers, and in the local coffee shops. Lots of pumpkin spices, carrot cakes, pumpkin lattes, and more. I love the sweaters and boots that come with fall. It’s a beautiful time to live in the mountains of Appalachia.

Fall in the mountains.

Fall on the homestead is more than just pumpkin spice and colorful leaves, it’s a time of hard work. It is time to dig the late potatoes and onions. Once the potatoes are dug, they’ll be stored in the basement for winter potatoes and left overs will become seed potatoes next year. Once the onions are dug, they’ll be placed in a large box on the porch in filtered sunlight to allow the skins to dry. When the skins are dry, the onions are stored in the basement for the winter. Fall is also the time for cleaning up the garden, rolling up fence rows, clearing away the debris from spent plants, and rolling up plastic used to help prevent weeds. It’s also time to collect remaining plants for seeds.

Beautiful fall foliage

With the remnants of beans left on the fence, we pick the shriveled pods and place them in a large breathable box in the basement to continue drying for bean seed. Once the bean hulls have dried completely the beans are removed and allowed to dry an additional couple of days and then stored in a clean jar for seed next year. Don’t forget to always label your jars as it can get confusing which bean is which once they’re shelled. Fall is also a time to can delicious apple butter for the year. We usually can apple butter every other year. Apple for frying are put away yearly.

Homemade apple butter

Once the potatoes and onions are dug, the seeds are collected from remnant tomatoes, and beans and the garden is cleared from dying plants, it’s time to clear the ground and burn some wood in the garden to richen the soil with necessary magnesium, phosphate, zinc, and other nutrients required to grow a healthy garden. The land will then be plowed and the wood ash turned under the soil. We’ll then sew a cover crop for the winter.

Finally, fall is a time to collect herbs for drying. The herbs are dried for culinary purposes, oils, and salves. We’ve been richly blessed this year with an abundance of basil, oregano, yarrow, and sage all of which are delicious additions to dishes, oils, and for medicinal purposes. With all the outdoor work winding down, fall is also a time to reorganize the many jars of food we’ve preserved over the year with moving the fresher jars to the back of the shelves to ensure we are using the preciously canned jars first. It’s also a time to reorganize the spice and tea cabinets. Herbs and spices that are older than three years are emptied into the compost bin to help enrich the compost with antioxidants. Some of the older tea leaves are reserved for weak teas to water house plants.

Yarrow plant used for making salve.

That’s just a few things that happens on the homestead in the fall. There’s more work, but also some fun activities. During the fall we have cookouts, nights with toasting marshmallows, roasting wieners, and big fall dinners for all the family. It’s a time that we enjoy baking pumpkin bread, and other fall favorites. Fall is when we dehydrate apples to enjoy during the winter. It’s also the best time to porch sit with a cup of tea or coffee and enjoy the beautiful fall leaves in the mountains.

Fresh baked peach bread

I hope you’ve enjoyed this glimpse into our life during the fall on the homestead. Feel free to like, subscribe, comment or follow. May the Lord bless you with a wonderful and peaceful fall. God bless from the mountains of Kentucky.

Preserving Corn Two Ways

Good morning from the mountains of Kentucky. It’s the time of year that most are cleaning up the remainder of the remnants left in the garden. We too, are at that point. We have scattered tomatoes, and peppers still clinging to the vines and potatoes to yet to dig. Our corn is exhausted and finally put away in the freezer for the cold days of winter. I am excited to share how we preserve our corn so we have corn year around. Grab a cup of coffee or tea and discover how we preserve our corn.

The last ears of corn if the season.

Preserving corn was a tradition handed down to me by my mom and grandmother. I remember sitting on the porch helping them shuck corn in large quantities. Memories like those are vivid in my mind and remind me of the blessings of the knowledge of working the land. I cherish the memories and the gift of rich traditions and knowledge of homesteading and farming. Our heritage helps us save money, be self-sufficient, and provides fresh homegrown food for our family year around.

Our grandson enjoying roaming through the young corn.

Corn can be preserved on the cob or off the cob. Below is the steps for both methods.

Tools required:

  • Sharp knife
  • Large bowl or pan
  • Large Dutch oven
  • Vacuum sealer
  • Vacuum seal bags

Ingredients:

  • Corn
  • Butter
  • Sugar
  • Evaporated milk

After picking the corn, find a cool pace to shuck the corn. we usually clean ours on the porch in the evening shade. We then discard our shucks into the compost bin, which in turn later becomes fertilizer for our garden. We use a damp cloth to wipe down the corn as we shuck it to help remove stray silks. We freeze anywhere from 50 to 60 ears of corn per family each year. To freeze corn on the cob, we simply vacuum seal anywhere from four to eight ears and add it to the freezer. The key is vacuuming raw dry corn. It’s amazing how fresh the corn is when thawed and prepared. It tastes almost like fresh from the stalk! Do NOT boil corn prior to freezing! Raw is the best method of preserving.

Mid-season corn.

For cream style corn, the method is a bit more complicated but well worth the process! Once the corn is shucked the cutting begins. I like to used the knife picture below to cut the corn off the cob.

Cutting fresh corn from the cob.

I hold an ear of the corn with the larger end down in a large bowl and cut down the cob to remove the corn from the cob in large sections. Be sure to get all the corn off, including the creamy bits left beneath the kernels of corn as this is what creates the creaminess in the fried corn. Once the bowl or container is full pour the cutoff corn into a large stockpot. Heat on low heat to prevent the corn from scorching. I usually use 6-8 quart cast iron Dutch ovens to prepare corn. Add one cup of organic cane sugar, one large spoon of butter of choice. I use plant butter, but any good quality butter will work. If the corn is not creamy enough, add evaporated milk or plant milk for a vegan option until desired consistency is achieved. Allow corn mixture to cook on very low heat until kernels are tender. I usually simmer my corn on low for about ten minutes stirring frequently. Remove from heat. I allow my corn to cool and place in a covered bowl in the fridge overnight. Allowing it to cool makes it easier to handle when sealing in vacuum seal bags.

Simmering the cutoff corn.

After the corn has cooled over night in the refrigerator, place the corn in desired size vacuum seal bags. Allow enough room between the corn and the edge of the bag for the seal to seal without pulling the liquid from the bag. I typically use quart and gallon bags. This allows me to have a variety of sizes. Either size I choose, I leave a couple of inches free from corn and press the air out and seal the edge of the bag with the vacuum sealer. If the bag begin vacuuming, you can remove a little of the corn and wipe the bag clean and start the sealing process over. The seal prevents air from gathering in the bag while in the freezer, thus allowing it to last longer. I have used zipper quart bags and they work okay, but the corn is not as fresh tasting as it is almost impossible to keep air out of the zip style bags.

TIP: to help with storing multiple bags of corn is to place a piece of wax paper or parchment paper between the bags before placing them in the freezer to prevent them from sticking or freezing together.

Sealing the bag, not vacuum sealing, just sealed.
One batch finished.

We’ve kept corn frozen for a couple of years and found it to be as good on the third year as it was the first year. The key to great corn on the cob is not over boiling it. I have found that dropping the thawed ears of corn in warm water, bringing it up to a boil, and turning it off works best for me. I also thaw it sometimes and wrap a damp paper towel around an ear of corn, and microwave for one minute for a quick tasty ear of corn. I prepare the fried corn by thawing and warming it slowly in a skillet or pan.

I am sure you’ll love it either way you choose to prepare it. Corn is a staple in our home. We eat creamed, fried, boiled, grilled, and add it to soups and other delicious dishes. We enjoy eating what we have grown from seed to the table and knowing we are not putting artificial fertilizers into our body and saving money while eating our own fresh produce. God bless from the mountains of Kentucky. Feel free to like, leave a comment, or subscribe. Also, check out our podcast for more about our homestead. God bless!

https://podcasts.apple.com/us/podcast/homesteading-in-the-mountains/id1757178995

Dehydrating Apples in the Air Fryer

Good morning, from the mountains of Kentucky! It’s the time of year that I am typically dehydrating apples. This year many of my harvesting plans have not gone as planned due to spending much time with my elderly mom in the hospital for the past five weeks. While at home yesterday, I noticed a small bowl of neglected apples sitting in the kitchen. They were long overdue being sliced, fried, or dehydrated. After sizing the situation up, I determined there wasn’t enough apples to unbox the big dehydrator, I didn’t want to fry them, so I decided to dehydrate them in the air fryer! There were just enough apples to make a small batch of dried apples! Here’s how I did it.

Ingredients:

Apples

Tools:

Air fryer & liner

Process:

Wash, dry, and peel apples. Slice them to suit your preference. I prefer them to be sliced rather than cubed. Place a liner in the air fryer for easy removal and easy cleanup. Close the drawer, turn the air fryer on, press dehydrate, and push start.

My air fryer temperature for dehydrating is preset. So, I decided to experiment and use the suggested temperature and time. All I had to lose was seven or eight apples.

Ready to dry.
Preset temp and time.

After about two hours, I checked the apples and they were doing wonderful. I continued to check the apples each hour until they reached the desired texture that I like. I stopped the apples at 5 1/2 hours. They were perfect to my liking. Delicious!

Delicious dried apple chips.

Dried apples can be seasoned prior to dehydrating by adding cinnamon, sugar, or whatever spice or seasoning you prefer. My family and myself prefer plain dried apples. They’re rich, sweet, and a bit tart. I used honey-crisp organic apples, because it’s what I had and what needed to be used. Dried apples make a wonderful healthy snack to take to work, school, long car rides, or on vacation. I also like to rehydrate them for frying, and they make an awesome apple stack cake. I typically dry a bushel in September in multiple batches in our large dehydrator, but for small batches, the air fryer was perfect. It doesn’t heat the kitchen up, doesn’t take too much space, not very noisy, and is a great way to salvage apples that may have lingered in the kitchen too long. It’s a money saver! With the price of groceries continually on the rise, cost cutting ideas are always appreciated!

I want to leave you with a scripture that has always blessed me. Zechariah 2:8 For thus saith the LORD of hosts; After the glory hath he sent me unto the nations which spoiled you: for he that toucheth you toucheth the apple of his eye. KKV

For now, God bless, from our homestead in the mountains of Kentucky. I hope you enjoy this short post, time saving, and money saving delicious recipe. Feel free to like, share, subscribe or follow. Head on over to listen to my podcast, Homesteading in the Mountains, on Apple Podcasts. My latest post is about growing, using, and dehydrating oregano.

Also check out our recipes for Canning Your Very Own Delicious Apple Butter and Organic Vegan Apple Tea Bread

Have wonderful week!

Why We Homestead

Hello from the mountains of Kentucky. I hope August is off to great start for you. It’s been a busy one for us as we head into harvesting season, and with my mom being in the hospital for past two weeks. I’ve spent much of my time with her and let the family tend most of the harvesting. However, I have been enjoyed picking beans, canning a couple dozen jars of those, preserved some pickles, and pickle relish. In reality, the harvesting and preserving has just begun. Now, onto the topic at hand, why we homestead.

Spreading two-year old manure over the garden.

I am often asked why we homestead. I wanted to share a few of the reasons why we chose and enjoy our way of life. Homesteading was a way of life for our grandparents, and great grandparents. Our parents also raised large gardens and homesteaded to an extent. It’s a way of life that we find rewarding in many ways. It’s a lot of hard work, but it’s work that comes with great rewards.

We homestead because we are blessed with land that is rich and fertile. The soil is perfect for growing a garden. We enjoy growing corn, beans, potatoes, tomatoes, peppers of all kinds, cucumbers, onions, zucchini, squash, cantaloupes, carrots, radishes, lettuce, kale, and other seasonal vegetables. We love having fresh organically grown fruit and vegetables in the warmer months and preserved vegetables for the winter months. Either way, growing, harvesting, and preserving our own produce ensures we are eating healthy food that is free from artificial fertilizers, and or pesticides.

Early spring garden.

We love to can, freeze, and dehydrate. Canning green beans is a favorite! Canning Green Beans the Time-Tested Way (updated) our family enjoys fresh tomato juice to make soups, pasta dishes, and more. If you’ve not tried home canned tomato juice, you don’t know what you’re missing. Canning Tomato Juice the Easy Way! Updated Information! Feel free to browse my website for canning pickled tomatoes, pickles, relish and more. Preserving veggies also reduces our grocery bills, and again, allows us to have our own homegrown organic veggies at our fingertips year round.

Our family also enjoys growing our own fruit. We have blackberry, raspberry, and blueberry bushes. We also grow strawberries and various types of melons. and have apple and peach trees. We also love growing, cooking, and preserving rhubarb. We love preserving jams, jellies, and pie fillings from the fruit and we can be found picking and eating it fresh.

Drying chocolate mint for teas.
Blackberry jam made from wild blackberries our grandson picked.
Fresh strawberry jam.

Homesteading is more than growing, harvesting, and preserving our own food. It’s about working the land to help it provide for us as well as our animals. It’s about taking pride in the land that the Lord has blessed us so abundantly with. We love to share our bounties with others and we enjoy bartering. If we have an abundance of cucumbers and someone else has an abundance of peppers, we may trade produce with each other to help the other person out.

Homesteading also allows us to be more self-sufficient by growing and harvesting our fruits and vegetables, raising our own chickens and ducks for eggs and meat, and growing and tending our herb garden to make teas, spices, and medicinal oils and poultices. it’s a way of life that allows us to share our bounties with our family, friends, neighbors, and church family.

Farm fresh eggs

Homesteading is a tradition that’s been passed down from generation to generation. Our parents and grandparents shared their knowledge of working the land with us as children, young adults, and they’re still sharing their words of wisdom with us through conversations, written journals, and precious memories from the past. My grandfather taught me much about fertilizing the land with natural fertilizer such as, rabbit and horse manure, compost, egg shells, and more. He taught me how to reduce waste and turn peelings, coffee grounds, egg shells, tea leaves, and veggie and fruit scraps into rich fertilizer by creating compost from all natural food scraps, dried leaves, wood chips from the chicken and duck run, and nature. Compost creates a rich fertilizer for the garden, and fruit trees.

Herbs are another large part of our homestead. Our herb garden expands each year with new herbs that we find useful for making great tasting teas, spices, and for medicinal uses. We enjoy growing a variety of basil, mints, oregano, chives, sage, lemon balm, bee balm, hyssop, yarrow, dill, echinacea, lavender, rosemary and more. Chocolate mint and peppermint are two of our favorite herbs for making hot and cold tea. Oregano, basil, and sage are among our favorites for spices. Chives make a great addition to most meals, and fresh dried sage makes Thanksgiving stuffing even more delicious. Head over to my podcast, Homesteading in the Mountains on Apple Podcasts to learn more about growing herbs, cooking with them, and using them and discover how I use them for medicinal purposes.

A few clippings of sage to dry and add to the spice jar.

Homesteading is something we take pride in. We also love to bake all of our breads from scratch. Our daughter bakes sourdough bread, white yeast bread for sandwiches, rolls, buns, and more. I like to bake artisan breads. We both enjoy baking biscuits and cornbread. Regardless the bread, cakes, or cookies, they’re delicious and do not contain all the added preservatives as processed bread. Either bread is a healthier choice that we enjoy with soups, as toast, for sandwiches, with meals, and if there’s an end piece left when baking day rolls around, we use it to make croutons for delicious soups and salads. The grandkids all enjoy the breads and the sweet treats. Baking helps keep our family healthier by consuming less processed foods. We also like to avoid food dyes, preservatives, and enjoy using organic flours and yeast to bake with.

Fresh baked banana peach bread
Fresh baked crusty seeded yeast bread
Two loaves of fresh baked sandwich bread.

Homesteading, has health benefits through consuming less processed foods, eating primarily organic foods, decreases our grocery bills, increases our income through selling produce and eggs. Increases our health through gaining exercise working the land all while being more self-sufficient, and proud of our hard work, our land, our harvest, and the fact of taking Better care of our nutritional needs and our families. Homesteading also allows us to work independently. I am a college professor and am on campus two days a weeks. I host a podcast and maintain this website as well as being an author of various books with one in works. I am also a doTERRA essential oil dealer. My husband is retired from welding for a major coal company in our area. Our daughter who shares the homestead with us homeschools, is self-employed as a Plexus consultant, and also an author. Her husband is self-employed, which helps him have time to work the land as well. Any way you look at it, homesteading is one of the most rewarding ways of life. We give our Lord, Jesus Christ, all the glory and praise for His blessings and the land and wisdom that He provides us with.

I hope you’ve enjoyed this post. I look forward to reading your comments. Feel free to like, comment, share, and or subscribe. God bless, from the mountains of Kentucky!

Canning One Jar at a Time (Recipe links included)

Hello, from the mountains of Kentucky! It’s a dreary looking day in the mountains. It looks like rain, which would be great for our garden. The temperature has been so hot we need some rain! I am excited to share a recent amazon find with you! For all my readers who enjoy preserving, canning, and living a self-sufficient lifestyle… you’re going to love this incredible and versatile steamer/canner.

This is a stainless steamer with a basket that can double as a one quart/pint canner!
Canning a pint of leftover vegan taco soup.

With the rise in prices at the grocery store, this handy canner allows you to can leftover soup, soup beans/pinto beans, spaghetti sauce, chili and more. I like the idea of saving money and canning pints of leftover soups to have an easy one serving meal, or a quick lunch at work. Canning Homemade Vegetable Soup

Homemade veggie soup!

Our grandson recently picked me a half gallon of blackberries. I knew there wasn’t enough berries to make enough jam to fill a full size canner. I reached for the single serve canner. In just over thirty minutes I had four full pints of blackberry jam canned and ready for the pantry. Using this small canner kept me from having to make what I call “dummy” jars filled with water and pre-used lids to fill the canner space for smaller canning projects such as this one. It’s ideal for single jar projects or for canning a couple of jars. I’ll post the blackberry jam recipe as soon as possible.

Making homemade wild blackberry jam.
Four jars of wild blackberry jam.

I am also planning to use this small canner this fall when I do the majority of our canning/preserving. I will randomly have one odd jar of pickles, beans, or juice that won’t fit in my seven quart canner! The possibilities of this handy single canner/steamer are endless!

Canning Green Beans the Time-Tested Way

When I gave at least eight to ten extra cucumbers I will create pint jars of pickle relish. This canner comes in quite handy for four or five jars rather filling a full size canner with fake jars of water that often times doesn’t want to stay down in the canner. Below is a link for our favorite canned pickle relish.

Canning Our Favorite Pickle Relish

I have included the link below for your convenience. I’m anxious to hear how you use this handy kitchen gadget in your kitchen! Feel free to leave comments. As always, God bless from the mountains of Kentucky. Feel free to comment, like share, or follow.

https://a.co/d/095PN7o7

My Favorite Top Ten Herbs (Chocolate Mint part 3)

Hello from the mountains of Kentucky. I hope your week has been filled with blessings and sunshine. Life’s been busy in our neck of the woods! We finally have all our garden planted. The squash and zucchini are blooming and beginning to produce. We harvested our first two this week. The cucumber vines are running and blooming! We have our fence up and have a lot of small cucumbers on the vines. Now comes all the tilling and hoeing! But great rewards will follow!

Zucchini blooms
First cucumber of the season almost ready to pick!

This is the third part of my ten favorite herbs. I want to share my love and experience with chocolate mint, which is my third favorite herb post. Remember, I’m not posting in any particular order.

My chocolate mint bed.

I discovered chocolate mint about ten years ago when a friend gave me a small section she had propagated. I maintained it in a large pot in hopes it would come back the next spring. I was disappointed when it didn’t return. I could not find it at the local nurseries, so I ordered a small plant from Amazon and chose to plant it in one of my herb beds. It has thrived since then. Chocolate mint is in the peppermint family. The leaves of this wonderful mint is a deeper green than peppermint and the underside of the plant and stem is a purplish color. It is hardy in zones 3-9. The aroma is amazing!

Chocolate mint can quickly become invasive. The more it’s pruned, the thicker and bushier the plants become. If left unpruned the plants become leggy. I have had mint spring up outside the bed, in nearby pots, and even random places in the yard. If you are pruning but not harvesting, be careful with the clippings. They will sometimes take root where you discard them.

Chocolate mint makes a refreshing cold tea, by simply washing the leaves and adding them to glass of cold water. You can infuse them with an infuser or as whole leaves. It also makes excellent hot tea, especially in the winter months. Feel free to mix mints for a more bold flavor, add cinnamon for a festive tea, or just enjoy the flavor alone. It’s very refreshing.

I dry my mint by clipping the plants and pruning any damaged leaves. I then wash the mint and gently pat it dry with a clean towel or unbleached paper towel. I like to hang herbs in bundles to dry. Once the mint is dry to the point of crumbling, I give it a rough grind with the mortal pestle, and add to a glass jar and place it in the cabinet away from the light. I add the dried tea leaves to a tea ball or infuser for hot and cold tea.

Chocolate mint drying in the kitchen.

The dried mint can also be ground in a spice grinder for a powdery type spice to use when making brownies, cakes, and as a fun additive to a cup of hot chocolate. The uses for this tasty mint are endless.

I just chocolate mint tea to help sooth an upset stomach, help digestion, and ease indigestion. It is also beneficial in soothing oral mouth pain, and to add antioxidants in my body. It and versatile herb that has been used for centuries. Chocolate mint has a multitude of benefits with great taste whether you enjoy it as a hot or cold tea, or as a spice.

I hope you’ve enjoyed this post. Feel free to ask a question, or leave a comment. You may follow my blog for more recipes, posts about mountain living, herbs, and gardening tips. Homesteading is a wonderful way of life that helps us to be independent, sustainable, and a way of life. God bless from the mountains of Kentucky.

My Favorite Top Ten Herbs (part one – mint)

Good morning, from the mountains of Kentucky! I hope your Memorial weekend is off to a great start. We don’t have big plans for the weekend, other than getting a little work done, grilling out, and relaxing with family. I was recently asked about my favorite herbs as well as a few questions about how I grow them, use them, and how I store them. So, decided to post a blog to help others who may have some of the same questions.

I love all herbs, but decided to narrow my focus on the top ten that I use the most. I will give details about herbs used for teas, cooking, and add how I use them for my health. For the first post, I will focus on mints.

Let’s get started! So my number one go to herb for teas is peppermint. I should say mints, as mint comes in a variety of flavors. I love all mints, especially peppermint and spearmint. We grow strawberry and chocolate mint as well. Each have such a refreshing wonderful aroma and flavor.

Beautiful organic peppermint!

Peppermint is a staple in our household. It’s easy to grow and very versatile. I use it primarily for teas. It also adds a surprisingly tasty bite to salads. The challenge of growing mint in a herb garden with other plants is that it can become invasive and overtake the other plants. Mints are perennials, which means they typically return each year, especially when planted in the ground. I grow peppermint and spearmint in large containers to prevent overgrowth and maintain control in my herb garden. Some years it returns and some years it doesn’t. The return of mint in the spring, depends a lot on the severity of the winter weather, if I place them in the basement for the winter, or cover them with bedding. If your mint does not return, and you have to replant it, it’s okay. Organic peppermint plants are very inexpensive. The cost of two plants is about the cost of one good box of organic peppermint tea. So, you are really getting your money worth from growing and harvesting your own peppermint. Peppermint tea is also my go to tea for an upset stomach or indigestion. It also makes a great addition to green tea and black tea.

We have a chocolate mint bed as well. It is one of my favorite herbs. It’s great a delicious addition, as is peppermint and spearmint, to add to a cool pitcher of water for a refreshing summer drink, or for hot tea. We also grow Strawberry mint. It has a unique taste that is light and a bit fruity. I find it a refreshing addition to spearmint tea. It’s a beautiful decorative mint that has a wonderful aroma. I like to rub my hand through the mint while I’m working in my herbs just to release the sweet aroma. It’s relaxing and oh so fragrant!

Chocolate mint hanging to dry.

To harvest mint, I clip the tops of the mint a couple inches down the stem. Then I usually fix myself a cup of tea or coffee, get a comfortable seat on the porch and turn on a good podcast or some music. I usually place the gathering baskets of mint clippings on the table beside me, place a baking sheet on my lap with an unbleached paper towel or unbleached parchment paper to hold the cleaned mint leaves and begin the harvesting process.

I carefully pick through and select the healthiest sprigs. I remove any of the leaves that may have damage from insects. I then gather the healthiest stems or sprigs and bundle them together to wash and then gently them spin dry in the salad spinner. Sometimes I pat them dry with a clean cloth and hang the bundles up to dry. It’s totally up to you how you choose to dry the mint. I have found that air dried herbs are more potent than dehydrated or oven dried herbs. I find it more satisfying as well.

There are times if I am a bit overwhelmed with the amount of mint that I have, I will remove the leaves and just spread those out on unbleached paper towels, or paper plates and allow them to air dry. Either method of drying produces the same great taste. When the mint is completely dry, to the point of being crispy, I will remove the leaves from the stem for one jar. I will grind these leaves into a finer tea mix using a coffee grinder. Other leaves, I will simply grind with a mortar and pestle including the stems for a more potent tea. I use a stainless steel tea ball to steep the hardier teas.

I store my dried mint in glass jars and shelve them in a dark place in my herb or tea cabinet. The shelf life of dried tea or most herbs is typically one to two years. If I have tea leaves that’s lost their flavor, I will add them to a a gallon of water, cover it and let let absorb all the goodness of the dried tea leaves and then use it to water my herbs. It provides loads of antioxidants to the soil and it acts as a great fertilizer.

The key to healthy mint of all kinds is moderate watering, feeding them at least once a month with organic plant food or weakened cold peppermint tea. (That’s a post for another day.) Regular pruning is necessary for mint to become full and to encourage new growth.

Mint is a staple for our pantry for baking, teas, tummy trouble and crushed mint leaves helps soothe a bee sting as well! See my post Harvesting Mint for Teas to learn how I make a great cup of mint tea from the herbs of our garden. God bless for now from the mountains of Kentucky. Have a wonderful and blessed Memorial weekend. Drop a comment, like or follow.

My favorite tea mug!