Good morning, from the mountains of Kentucky! It’s a quiet morning on the homestead! The sound of crickets outside the window, the calm stillness in the air, the hum of a tractor in the far distance, and the crows from the chicken coop stir a desire deep within me to reflect on our bountiful blessings from God. I am thankful for our salvation, our family, our health, our church family, and for His amazing grace. As the sun rises, the world outside our window comes to life… what a beautiful fall-like day we have been gifted!
Early morning visitor!
With the recent surge in heat we have been experiencing, the fall-like temperatures are a welcomed change. This change has brought many of the summer leaves down early over the course of the past few weeks. The crunch of the dry leaves beneath my feet this morning feels as if it were late September in the mountains. I am reminded of time this morning and how precious it truly is. Time is something that we often take for granted. Many of us count down the days until Christinas, a birthday, summer vacation, the birth of a child, a holiday, graduation, and even retirement. Just as many of you are guilty, I too, have counted days until an event or date.
During the quiet morning meditation, prayer time, and Bible study, my heart aches for a friend who received the news that no one wants to hear… you have cancer. I know God is bigger than cancer and He can perform miracles that man cannot. This news made me think even more about life. It is truly as described in the Bible as vapor on water. In other words, it is temporary and we have it for a borrowed amount of time.
This thought lead me to be even more thankful for life and the time that I have been blessed with and a question on my thoughts. What are we doing with this time? Once time has passed, it cannot be reclaimed… it’s gone. This lead me to the urgency, even more than before, to stop counting days down until some big or even small events. I am reminded to cherish this day, make the most of this day, live it to its fullest, be thankful for what the day brings, and be content with this specific day and know that tomorrow is a new day and then today becomes a yesterday… a day that is past and finished.
Early morning fog in the mountains.
I hope this short post inspires you to slow down, stop wishing your life away, take time to enjoy the day to its fullest, and cherish the days one by one we have been given. Remember, each day is a day that we are gifted. As the Bible tells us in James 4:14 Whereas ye know not what shall be on the morrow. For what is your life? It is even a vapour, that appeareth for a little time, and then vanisheth away.
Feel free to like, share, or follow. Also, head over to Apple Podcasts and check out our latest episode on Homesteading in the Mountains. God bless, from the mountains of Kentucky and happy homesteading from our homestead to yours.
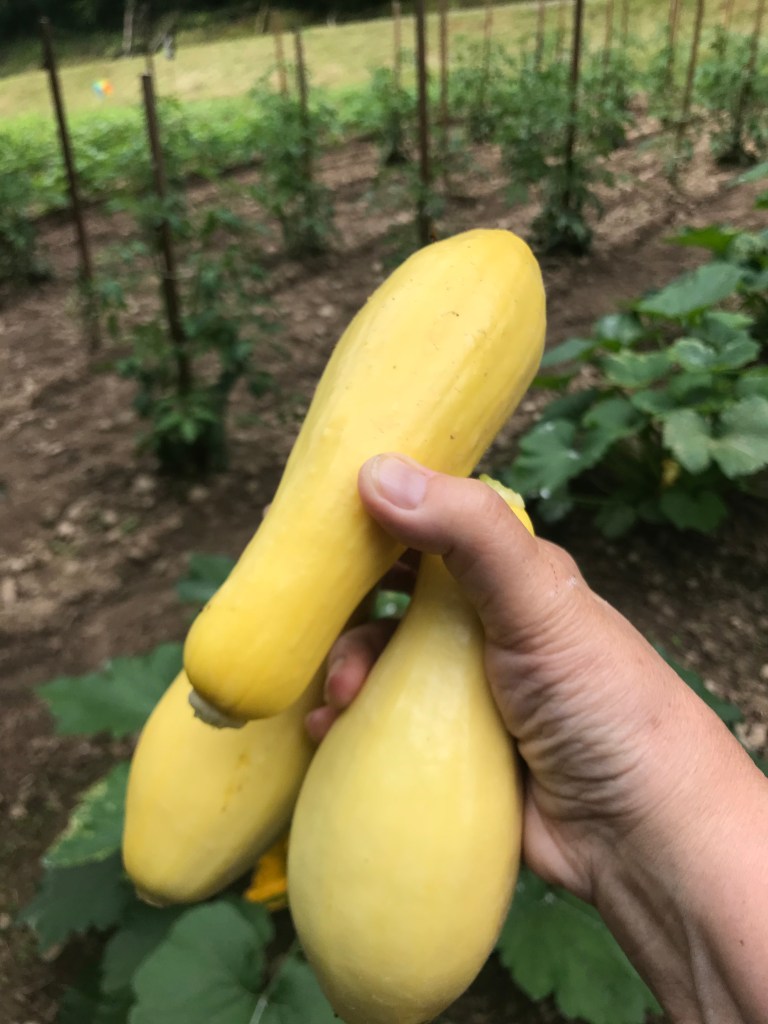
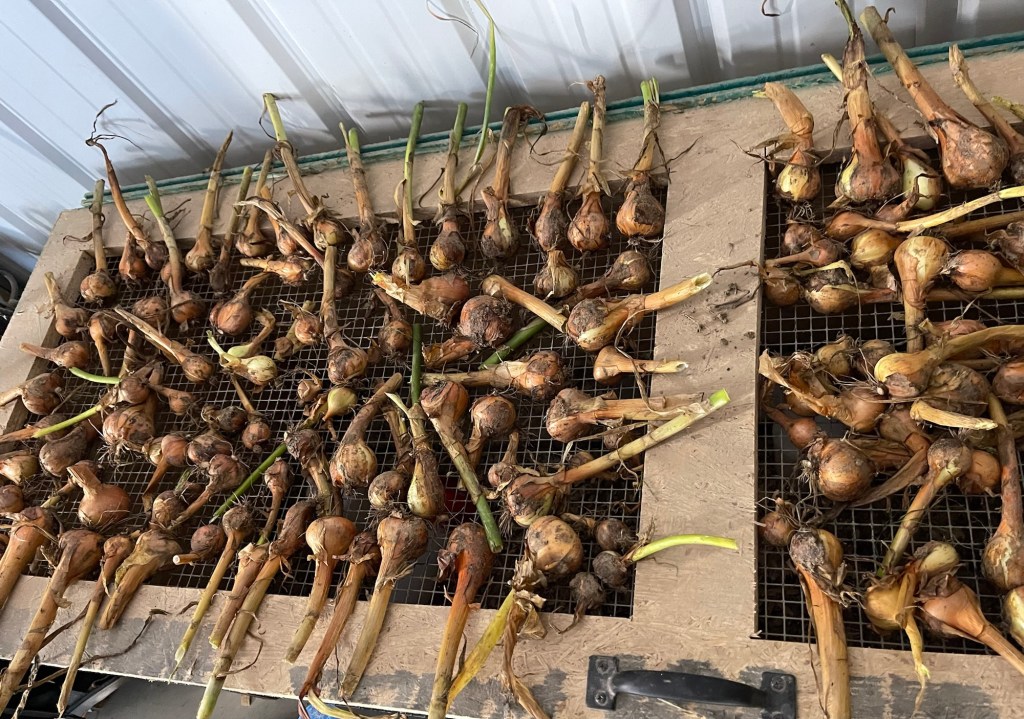
Hello, from the mountains of Kentucky! It’s been a busy start to July on the homestead. We have been working fiercely in the vegetable garden on dry days because we’ve had a magnitude of rainy days this spring and summer. The garden looks great! Everything seems to be flourishing. We’ve been picking a lot of cucumbers, zucchini, and summer squash. These are our favorites! We love incorporating it with breakfast, lunch, and supper. We can, freeze, and dehydrate squash and zucchini. We harvested last summers’ onions a few days ago to dry for winter onions and planted a new row of onions to eat this summer and fall.
Summer squashLast season’s onionsDrying last season onions for the winter. Lemon balm plant
Enough about the homestead, this post is about one of my favorite herbs, lemon balm. Lemon balm (Melissa officinalis) is an herb from the mint family. The leaves have a mild lemon aroma and a lemony taste. The leaves are used to make teas, medicinal salves, oils, and to flavor foods. Our favorite use of lemon balm is making tea. Lemon balm tea is great to relax after a busy day. It not only has a relaxing element, it soothes as well. We have found that the leaves can sooth a cold sore, and minor scrapes. Sipping lemon balm tea can also help ease indigestion.
Growing Lemon Balm
Lemon balm is a perennial that loves to thrive in partly sunny beds. Forewarning, it It will spread quickly and overtake other plants. We grow it in a huge flower pot as it is a bit of an escape artist and will escape beds and overtake other plants. After the last harvest, the pot is covered with a warm bedding to protect the roots from the harsh winter elements. Some years, it returns and some it doesn’t. However, it is easy to grow from seeds. The plants are also inexpensive at most green houses. It will always return if you plant it in the ground. It can be planted in an isolated bed and thrive for years to come. Like all mints, the more it’s pruned, the thicker it gets. It actually needs pruned frequently in the summer and early fall to prevent it from getting leggy. Pruning is easy. I use kitchen shears to snip the stem between the leaves. Before you know that snipped stem produces two or more new stems that produce more leaves. A good cutting does it well.
Drying Lemon Balm For Tea
Lemon balm is easy to dry. I typically cut small to medium quantities throughout the summer and a large amount with the final harvest of the season. For the smaller amounts, I prune the stems with the leaves in tact, and spread them over a cheese cloth or paper towel in a large sheet tray placed in a well ventilated place in the house. For the larger harvests, I use a large mesh drying rack in the garage. Once the leaves are brittle and crispy, they are ground for teas and spices. I store my teas in glass jars in a dark cabinet. Teas usually maintain their flavor for up to three years before they become rancid. To make a cup of lemon balm tea, add tea leaves to tea bag or tea ball and place it in your desired tea cup or mug. Pour boiling water over the tea ball or bag and allow tea to steep for at least five minutes. Removing the ball or tea bag is optional. Your tea is ready. It is a delicious lemon flavor that we enjoy for the taste and the soothing benefits. I also find true satisfaction with drinking tea made from the plants we plant, grow, harvest, and dry. Self-sustaining is a satisfying wonderful feeling.
My favorite tea mug
Making Lemon Balm Oil
I love to make lemon balm oil for my skin, to sooth sun burns, to massage sore muscles, and more. It’s easy to make. Dry lemon balm leaves and stems until crispy. Once the leaves are dried, add them to the carrier oil in a glass jar. I like to use amber jars. I don’t really measure for this oil. It would depend on the size of the jar. For example, I typically fill the jar or bottle about half full of leaves and then add the oil. I like to use organic fractionated coconut oil, you can also use jojoba oil. Seal the bottle and place in a dark cabinet. Give the jar of oil a gentle shake daily and place it back in the cabinet. After three to four weeks, strain the leaves out of the oil and you are ready to use your lemon balm oil. Keep it stored in an amber bottle to help it maintain its strength. Keep in mind this is not lemon balm essential oil, that is an entirely different type of oil.
Don’t Discard the Leaves
Don’t just discard the teas leaves or those soaked in oil! I use teas leaves that have reached or exceeded their shelf life as a weak tea to water my herbs, house plants, ferns, garden plants, herbs, and flowering shrubs. They’re great to add to the soil near squash and zucchini plants in the garden. Herbs are filled with rich antioxidants that are as good for the soil and plants as they are for us. Older teas and dried herbs can be added to the compost for enrichment.
Research to Read
Lemon balm is a versatile herb that is even recognized by The Cleveland Clinic as a herb that can be used medically This is a very interesting read!
I hope you took time to read the article. It’s actually quite amazing as most medical personnel do not give credit to the medicinal power of plants.
I hope you have enjoyed this post about one of my favorite herbs and a little update from our homestead. Feel free to leave comments, like, share, subscribe, or follow Also, head over to Apple podcast and listen to my podcast, Homesteading in the Mountains, for more tips, ideas, and information about homesteading and more. Have a blessed week! For now, God bless from the mountains of Kentucky! Happy homesteading!
Good morning from the mountains of Kentucky. The sunshine has been a welcome sight this week. The heat has been extreme but I’m not going to complain. I’m glad it’s not raining! The heat presents a challenge with collecting herbs from the garden. Herbs should be pruned in the cool of the morning, and this week the mornings are still quite warm. But today, it’s tolerable and I’m anxious to spend a little time amongst the herbs I love so good. I enjoy cooking with herbs, making teas, baking with dried herbs, making oils, ointments, and using them medicinally. They’re also beautiful in bloom!
Come and take a walk with me in our herb garden. We have herb beds, potted herbs, and herbs in the garden. Let’s start with lavender! The lavender that’s harvested today will be dried for tea and some of the blooms will be used to make lavender butter. Vegan Lavender Butter: A Sweet Herbal Treat From the Mountains… one of our favorites on homemade bread and great on pancakes. This butter can be made with plant butter as the recipe explains or regular dairy butter. I like the dairy free butter and my husband prefers dairy butter. It’s great either way! To make lavender tea. I dry the blooms and leaves and store in glass jars to later be steeped into a delicious tea. My Top Ten Herbs (Part Four Lavender) sew
Pots of common lavenderPots of Spanish lavender Common lavender plants in theherb bed. Also shown is rosemary, oregano, and sage.
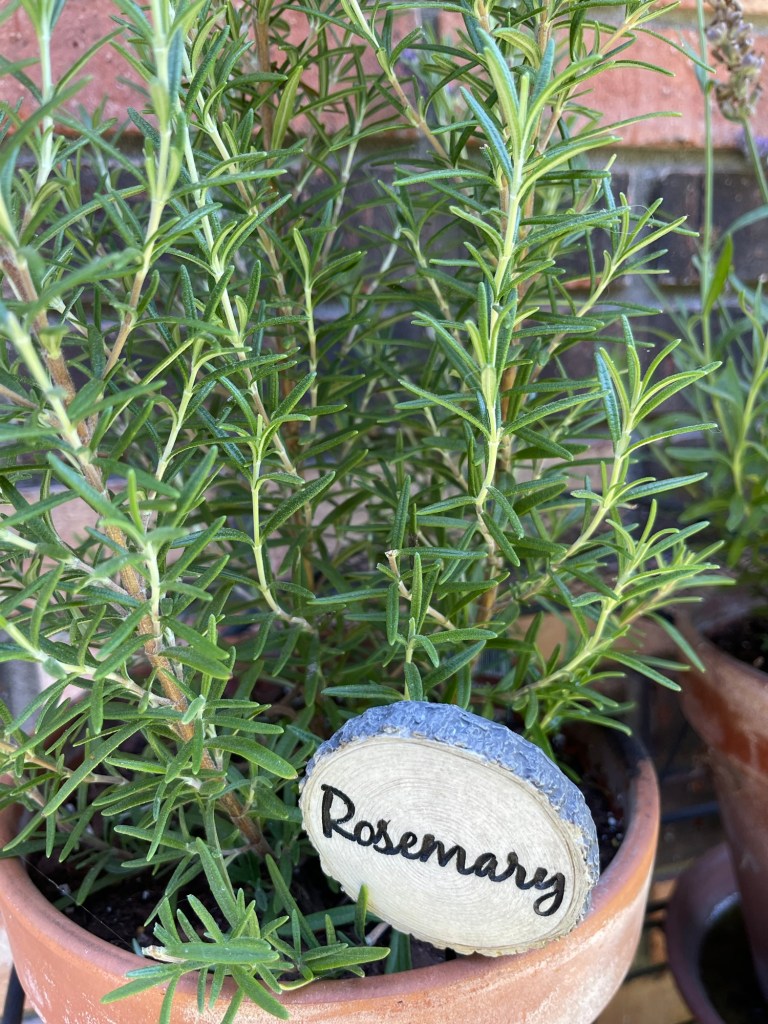
Rosemary is one of our family’s favorite herbs. I like to dry rosemary to make rosemary salt, spray for my hair, dried stems for a savory addition to meats, and sprigs for bath water. The rosemary that is harvested today will be used to make rosemary spray for my hair. My Top Ten Herbs (Part Six; Rosemary Recipes included)
Potted rosemaryRosemary and lavender in early spring.
Rosemary is an aromatic herb that is a versatile herb we use for a wide-variety of things from cooking to spray for linens. I also like to add a few sprigs of rosemary to my bath water. In the following link I give more useful information about this wonderful aromatic herb. My Top Ten Herbs (Part Six; Rosemary Recipes included)
Orange mint used for hot and cold teas
The orange mint I harvest today will be used for teas. This aromatic herb makes a delicious cold or hot tea. To dry the mint, I clean the cut leaves, pat dry with a towel, and allow to air dry until crispy. The dried leaves are then stored in a glass jar in the pantry. I always label and date the lid for quick identification and freshness. Dried herbs typically last two to three years in the pantry. Once the date has exhausted, I like to make a weak tea to water plants with and then compost the leaves. I think you’ll love this fresh tasting mint.
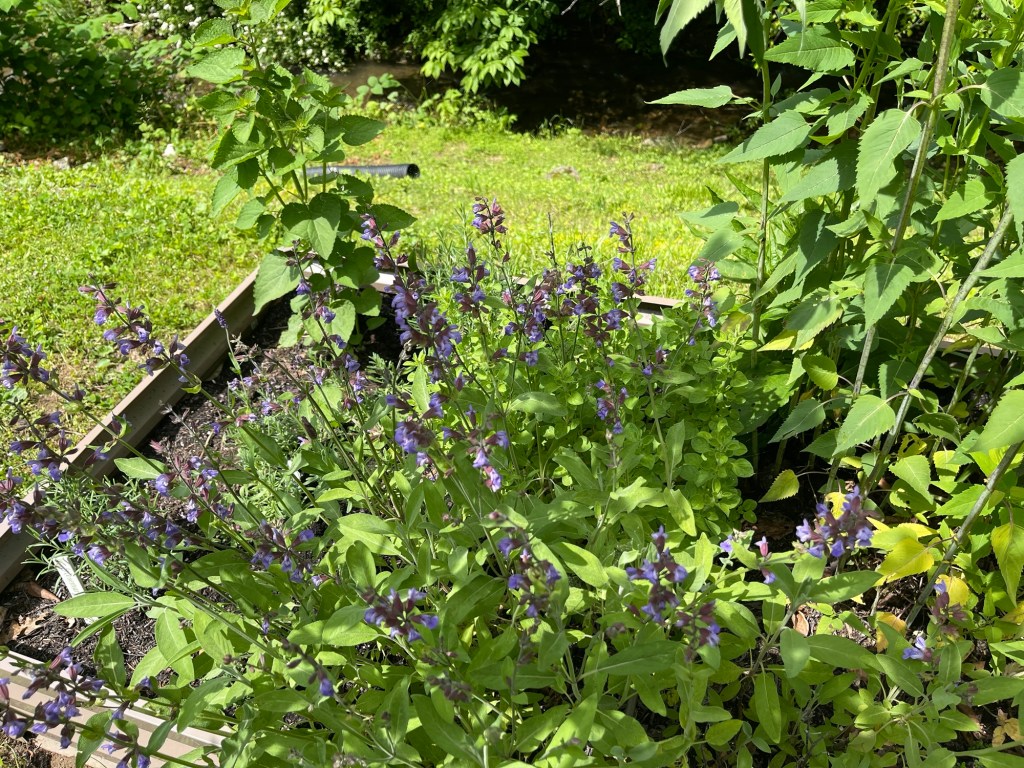
Sage is another favorite herb of ours.
The sage that is harvested today will be dried and added to my sage jar in the spice cabinet. Fresh dried sage is delicious and there is no comparison to store bought sage! Once you’ve tried fresh sage, you will not want to go back to the sage on the store shelves. Yes, it’s a more work, but well worth it!
Oregano is grown in large quantities
My Top Ten Herbs (part five-oregano) this link will take you to a post with some valuable and useful information and oregano recipes. The oregano harvested today will also be added to our spice cabinet.
Lemon thyme with a few onion chives sharing the photo
Lemon thyme is great in desserts, in meat marinade, and it makes an attractive addition to the herb garden. The bees love its blooms… almost as much as I do. The lemon balm that is harvested today will be added to our spice cabinet to use when baking lemon brownies, scones, and added to teas.
Potted basil! Basil is a favorite of all our family.
My Top Ten Herbs ( Part Two Basil) basil is one of our favorite herbs. I love to add it to salads, eggs, in spaghetti sauce, pizzas, and more. The link above provides a multitude of information on the herb, how to dry it, and a few recipes. The basil I harvest today will be dried and added to our jar of dried basil for spices. I may add a few fresh leaves in our omelets this morning!
Anise
This anise is loved by the pollinators! The hummers love it as well. It also makes an excellent tea!
Chive blooms amongst the mint. More blooming sage in one of the beds.
The bees love the blooms of the anise herbs.
Echinacea in full bloom!Yarrow blooms!
Yarrow is an herb that all farms need to grow. It produces beautiful flowers and is a beneficial medicinal plant. It’s quite tasty in salads as well. My Top Ten Favorite Herbs: (Part-Seven: Yarrow)
Chives, holy basil, garlic chives, anise and bee balm. My favorite for tea!!! Chocolate mint!
More yarrow with a few sprigs of chocolate mint peeping through. Young oregano plant amongst sage. They pair well together.My favorite birdhouse that houses martins. Yarrow blooms are seen peeking out in the background.Bee balm in full bloom. Bee balm makes a great first aid ointment. Herbs cut from the walk this morning.
Other herbs that we grow that is not pictured in our walk include, tarragon, a couple of varieties of thyme, more basil, oregano, chamomile, mullein, and a few more varieties of mint. We also love to harvest from the wild around us.
I hope you’ve enjoyed our walk through the herb garden. The garden brings me joy, relaxation, a closeness to the earth, In upcoming days, I will take you on a walk through our vegetable garden. Feel free to comment, follow, or share. For now, God bless from our homestead in the mountains of Kentucky. Happy homesteading!
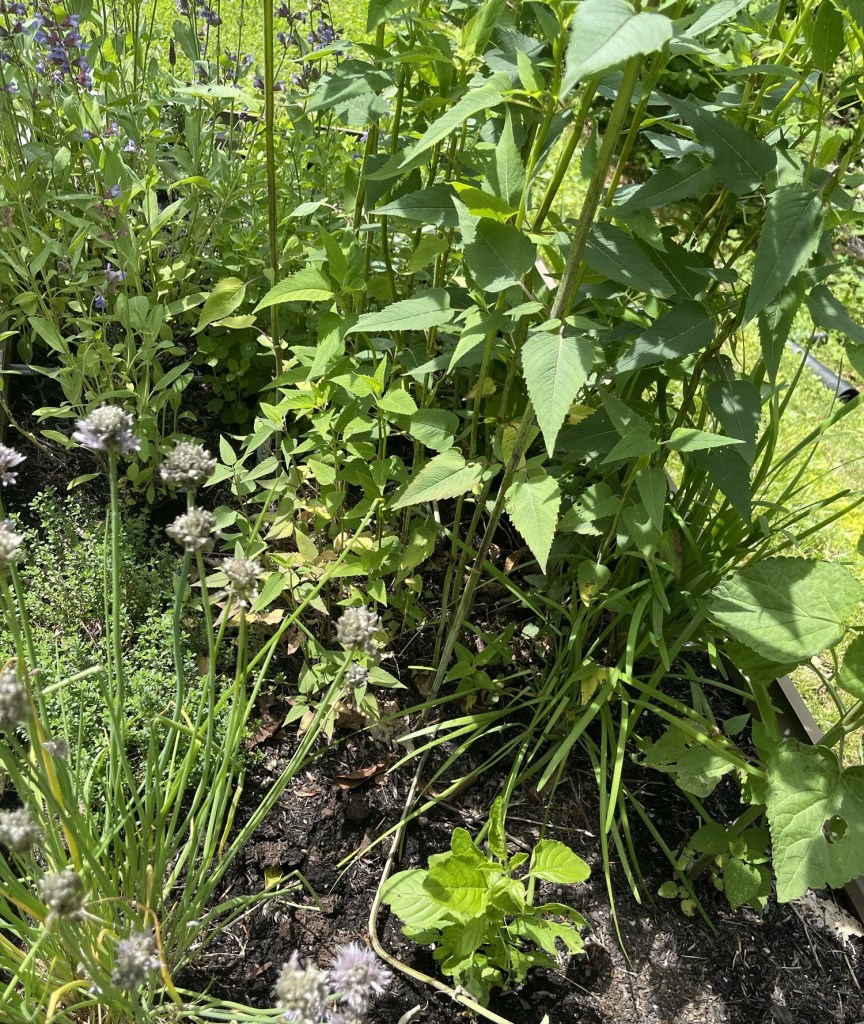
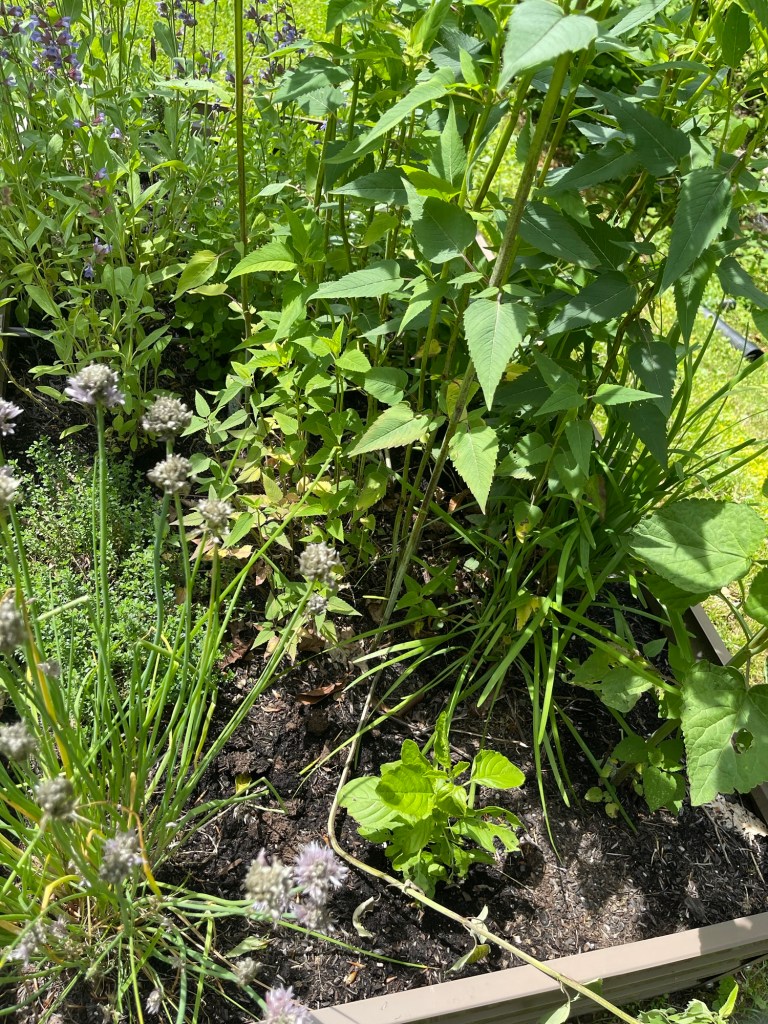
Hello from the mountains of Kentucky! I don’t know how the weather is in your area, but it’s been really wet in Kentucky. With the amount of rain we’ve had this spring, we’ve been working more in raised beds than our vegetable garden. We did, however, get our potatoes in the ground the week of Good Friday. They’re up and beautiful! If the potatoes grow as well as the vines, we’ll have loads to dig this fall. Our onions are thriving as well, but otherwise, our garden is plowed and desolate of plants. We’re not the only local homestead or farm that hasn’t planted much, which makes me feel some better about the delay. I think this might be the rainiest spring season that I can remember. This is the year of the seventeen year cicada’s as well. Even with the rain, they’re still singing. With that being said, it has been a good time to work in our raised beds, herb beds, flower gardens, and update our garden journal.
Bee balm, hyssop, lemon thyme, garlic and onion chives, and sage.One of my herb beds. The sage is in full bloom.
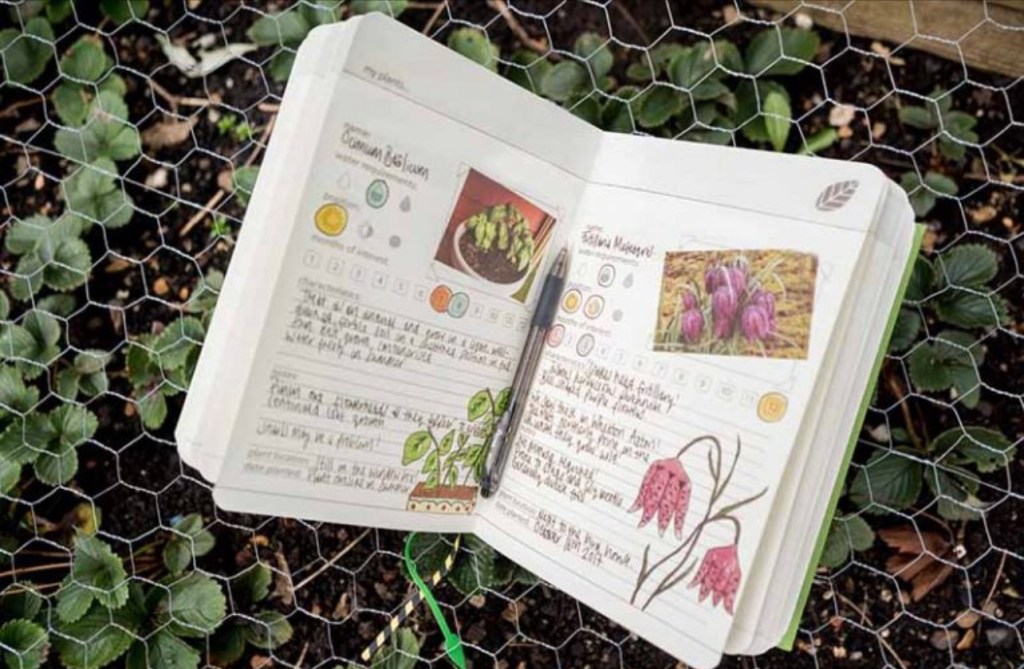
I started keeping a garden journal many years ago. I was prompted to do this when we had a crop of beans that was an epic failure. When we realized the beans were tough and not easy to cook, we tried to recall the kind of beans we had planted. After much thought, scouring bean containers, and wracking our minds, we finally recalled the kind of beans we had planted. We had accidentally planted white half runners and greasy beans side by side. This resulted in the beans crossing and creating a leathery hulled type of green beans. Needless to say, we learned a valuable lesson. Don’t plant two different beans near each other and to always record what we planted, the dates we planted, fertilized, weather occurrences, etc. The wondering, worrying, and the unknown nearly drove me nuts! I had always kept a journal for my herb garden and even my flower gardens. They had proven beneficial. I don’t know why I hadn’t thought to maintain a journal for our vegetable garden. So, I extended my journal with a section devoted to our vegetable garden, and most recently added a section for our berry bushes and fruit trees. Each have proven to be a resourceful tool.
Our extended vegetable garden journal has helped with crop rotation, planting times, seed purchases, plant identification, fertilization, and with learning what crops grow well together and those that do not. Keeping our journal has also been a blessing. I like to add notes and pictures as a future keepsake for our children and grandchildren. Our journals can be a diary of our lives as homesteaders for generations to come.
Garden journal
I encourage you to begin keeping a garden journal for all your gardens. Our journal has been a blessing and a fun way to record our family traditions and way of life between the covers of a simple journal that can be handed down for generations to come.
For now, God bless from the mountains of Kentucky! I welcome comments! Feel free to like, share, and follow. Also, feel free to check out our podcast, Homesteading in the Mountains, on Apple Podcasts. Coming soon… a post of the benefits of red clover!
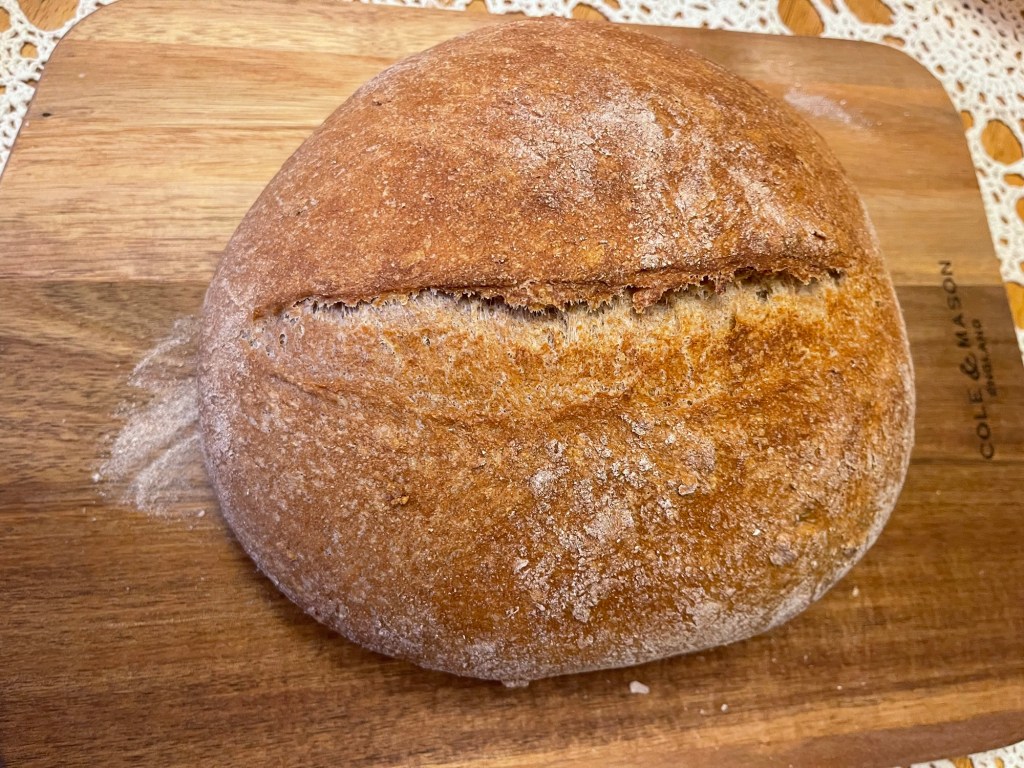
Hello, from the mountains of Kentucky! Today was baking day on our homestead. The day included banana bread, sour dough tortillas, and whole wheat bread. I am often asked why I bake. My answer is always the same. I love to bake, and I don’t like the ingredients in store bought bread. Have you read the bread labels? Even the bread that is supposed to be healthy has questionable ingredients. Let’s get into the whole wheat bread recipe!
Ingredients:
3 1/2 cups of King Arthur organic whole wheat flour
2 1/2 teaspoons quick rise organic yeast
2 teaspoons pink Himalayan fine sat
1 1/2 cups of warm filtered water
2 teaspoons organic vital wheat gluten (optional)
Mix the dry ingredients in a large glass bowl. The vital wheat gluten is optional. It helps the bread to be fluffier and less dense. If you choose to use this ingredient it should be mixed with the dry ingredients. Heat the water to 78 degrees and add a little water at a time while mixing the ingredients with a danish dough whisk or a large wooden fork. Mix ingredients thoroughly. You may add a little water if the dough feels too dry. Don’t over mix the dough. When the dough is shaggy and sticky, cover the bowl of dough with glad wrap and place it in a warm place to rise for two hours.
After two hours the dough should be doubled in size. Add a cup of water to a large pan and place on the bottom oven rack. The steam from the water will help keep the bread crust tender. Place the cast iron Dutch oven with the lid on it in the oven on the middle rack. The pan of water should be below the Dutch oven. Set the oven to 450 and start the oven. Do not use the convection setting to bake the bread.
My bread Dutch oven
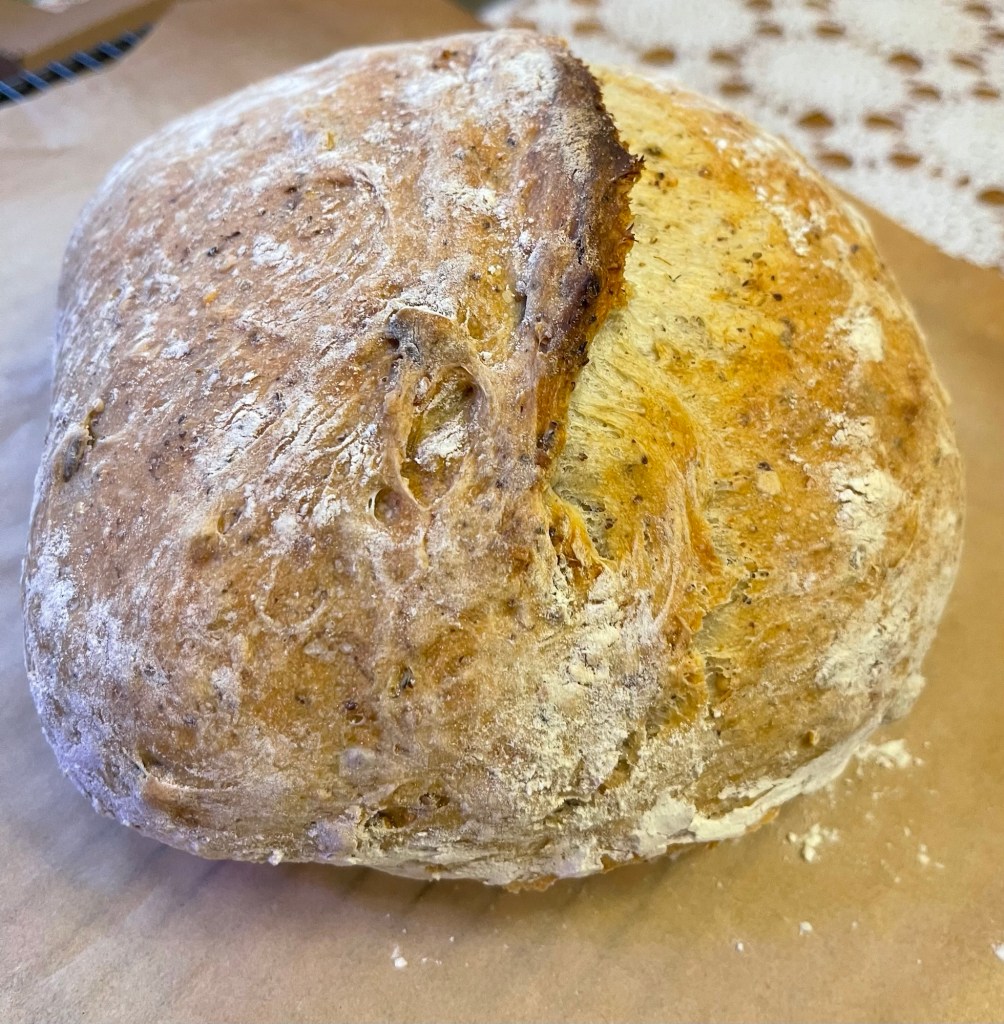
Scrape the dough out of the bowl onto a floured non-bleached parchment paper. Dust your hands and the dough with flour to make it easier to handle. Fold the dough from each side and shape the dough. Allow the dough to rise while the oven is preheating. When the oven reaches 450 score the top of the bread with a bread lame or a sharp knife. Carefully remove the Dutch oven and place the bread on top of the parchment paper inside the Dutch oven and cover with the hot lid. Bake for 25 minutes with the lid on. I usually take the lid off the Dutch oven and bake for an additional three to five minutes allowing the bread to brown, if needed.
Carefully remove the Dutch oven from the oven. Using the edges of the parchment paper lift the bread out of the Dutch oven and place it on a cooling rack. Cover the bread with a clean dish towel. Allow the bread to cool for at least 30 minutes before cutting.
Feel free to like, follow, or subscribe to our blog. Also, head over to the Apple Podcasts and search out our podcast, Homesteading in the Mountains! I am anxious to share how to grown your own micro-greens in an upcoming post! I hope you and your family enjoy this bread as much as we do! God bless, from our homestead to yours! Happy baking!
Hello, from our homestead in the mountains. Spring is so close I feel like we could almost reach out and touch it! I don’t know about you, but it’s been a pretty rough winter here. We’ve gone from snow, to spring like temperatures,to flooding, to ice and snow, back to massive flooding, and snow again. But the good news is spring is less than month away! That and planning for our vegetable and herb garden helps make the lingering days of winter tolerable. Not to mention, a lot of reading and crocheting.
I was recently interviewed about our homestead. Many questions were asked about wby, what does it take, what advice can I give, and many more. I was a little surprised at the misconceptions that many people have about homesteading. That interview helped inspire this post. I am excited to bring to you ten skills that we use on our homestead in everyday life. These are skills that have been handed down from generations past, learned from fellow-homesteaders, and some we learned ourselves through trial and error.
Gardening is a plus for homesteaders. Having your own garden can eliminate or decrease buying from farmer’s markets, farms, or grocery stores. Don’t get me wrong, we love to shop our local farmer’s market for produce that we don’t grow. We buy some things from the grocery, but not to the extent we would buy if we did not have a garden. Gardens can be overwhelming for some and some may not have room for a large garden. I know some people who raise a large amount of produce for their families. Follow our blog and head over to our podcast, Homesteading in the Mountains, on Apple Podcasts for a tips, ideas, and gardening posts.
Our garden last spring.
Saving seeds has been a part of homesteading in our family as long as I can remember. I recall my grandparents shelling bean seed and many other types of seeds to dry for the next season. That tradition has been handed down through the generations to me. Saving bean seeds, seed potatoes, tomato and cucumber seeds mean we do not have to buy seeds, we know how the plants were grown where the seeds originated from, saves money, and ensures we have seeds for the next season.
One of our seed boxes
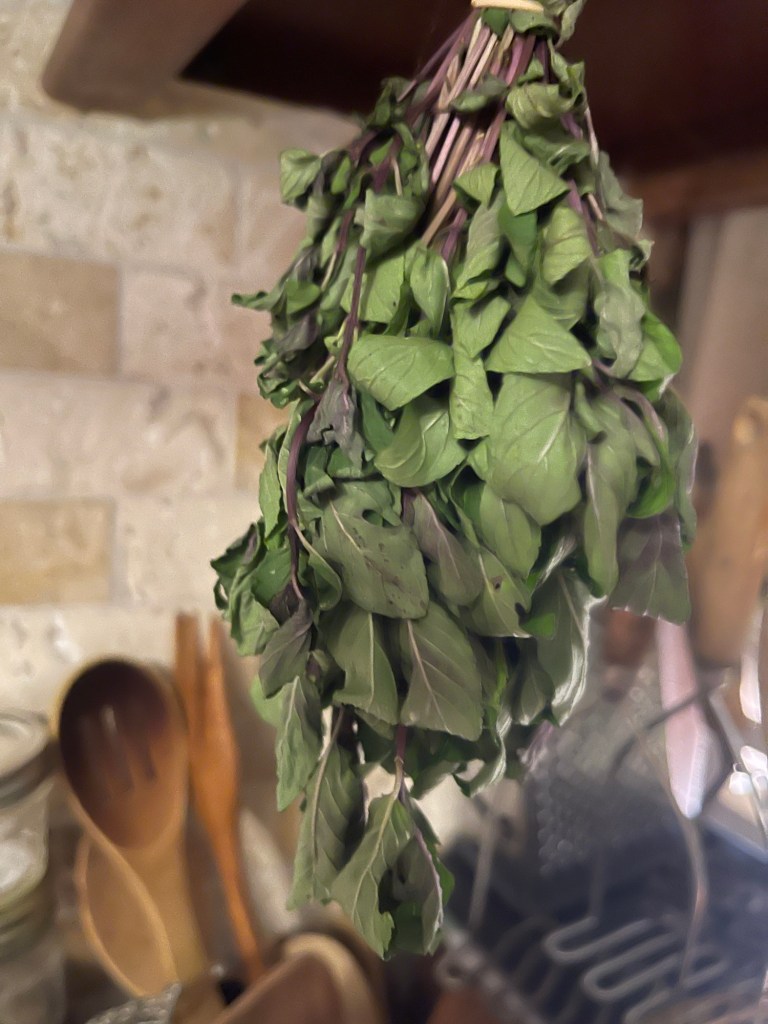
Herbs are my favorite! I love working in our raised herb beds. We grow lots of basil, chives, oregano, thyme, lavender, bee balm, echinacea, Mullein, yarrow, peppermint, chocolate mint, strawberry mint, spearmint, lemon balm, and more. Do you have to grow this many different herbs? The answer is no. Grow what you will use and what you like. I use our herbs to make spices for culinary purposes and many of them for teas, while other herbs are used for balms, herb and oil-infused oils for a medicinal and cooking. We also use them for wide-variety of medical rubs, cleaning supplies, and repurpose them for compost and fertilizer. I love to gift herbs and teas as well. Follow our blog and podcast for more information. My Favorite Top Ten Herbs (Chocolate Mint part 3) This is one of many links to posts about our herbs. Herbs have the ability to make food taste better, makes great teas, and can be used for many medicinal purposes.
An early mint bed from a couple years ago. Future tea!Chocolate mint drying to be used as tea.
Baking bread is making a huge comeback. Take a few minutes and look at the ingredients in your favorite store bought bread. Then, look at the price. Finally, think about the preservatives that have been added to prevent mold. With that being said, there is no comparison to the taste of fresh baked bread. I enjoybaking a variety of styles of bread. I love artisan bread, my husband loves sandwich bread. I also enjoy baking sourdough bread, wheat bread, and high-fiber seeded bread. Recently, I branched out to making sourdough tortillas and sourdough crackers. We enjoy baking all types of cakes and cookies. Homemade has less ingredients, is healthier, and tastes better. Give Us This Day Our Daily Bread: Homemade Crusty Vegan Bread This is one of many posts about baking fresh bread.
Sewing is something I grew up with. My mom was a seamstress, my grandmother sewed clothes and was known for her quilting skills. My sister inherited the love for quilting. I can, and have a made a few quilts, dresses, shirts, and pants. I use my sewing skills more in hemming, sewing a button on, or mending clothes that need repaired. Nevertheless, learning to sew can save a nice chunk of change for hemming and mending. It is also a skill that that produces very nice gifts, and can become a nice side income.
Just a few of my sister’s homemade quilts I have used and now display as a keepsake.
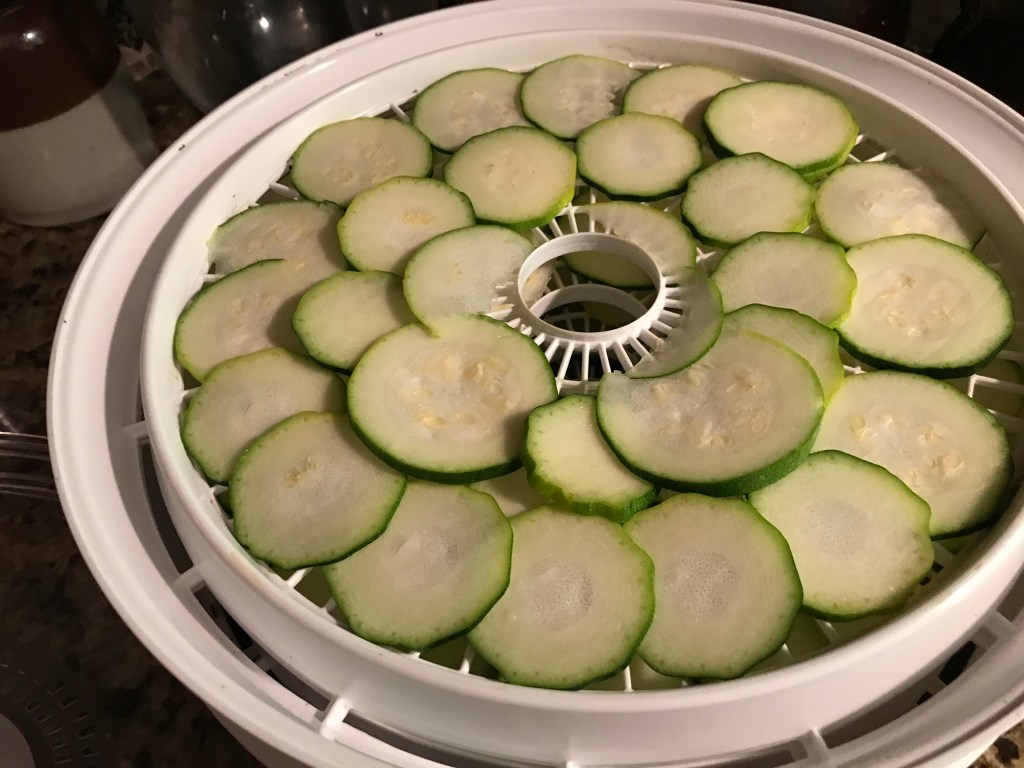
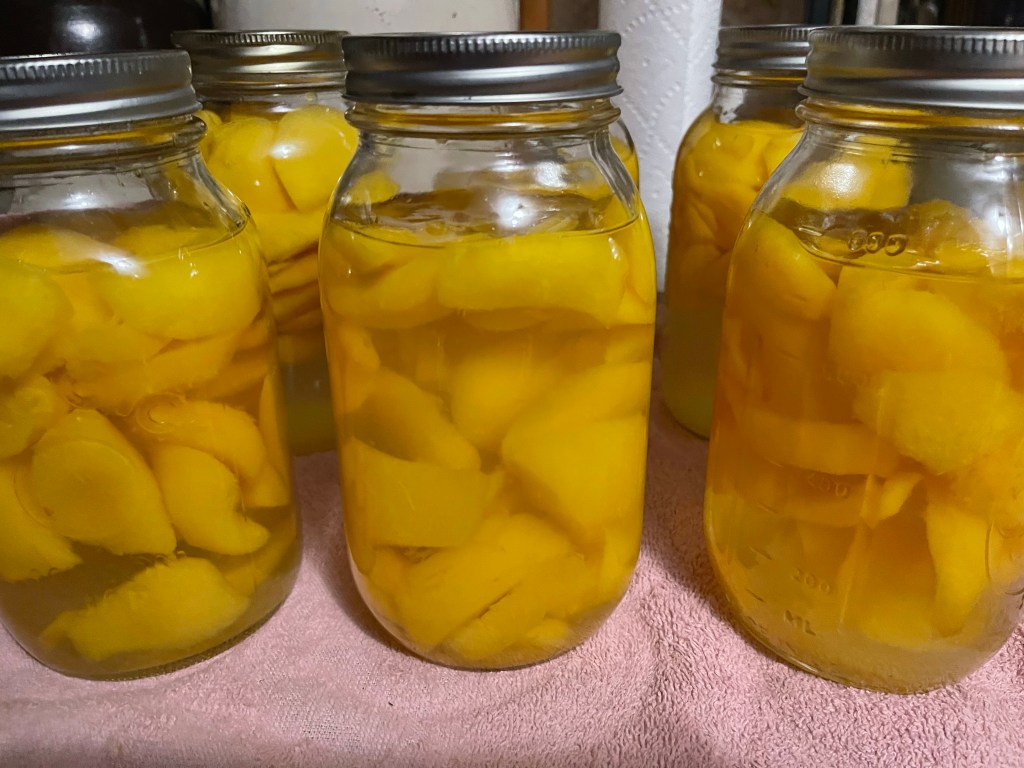
Canning, Dehydrating, & preserving canning vegetables helps to ensure we have food for the winter, saves money by decreasing store bought food. Having our own canned or preserved food ensures we are eating healthy garden food, even in the winter. And garden food allows us to share our bounty with others. Canning Green Beans the Time-Tested Way (updated) This is only a few of the wonderful things we can and preserve for our family.
Fresh zucchini and squashDehydrating zucchini that can be rehydrated later.Green beans from the garden canned and ready for winter. Corn from the garden to the freezer and ready for winter.Fresh peaches canned and ready for cobblers or bread.
Crocheting or knitting is not a necessity, but it is a great skill to have when making blankets to share as gifts, for family, and as a business. My favorite of the two is crocheting. I have made a nice little stash of cash by creating ponchos and afghans. It also provides a means of relaxation late evenings, and in during the dark days of winter.
Crocheted afghan in process
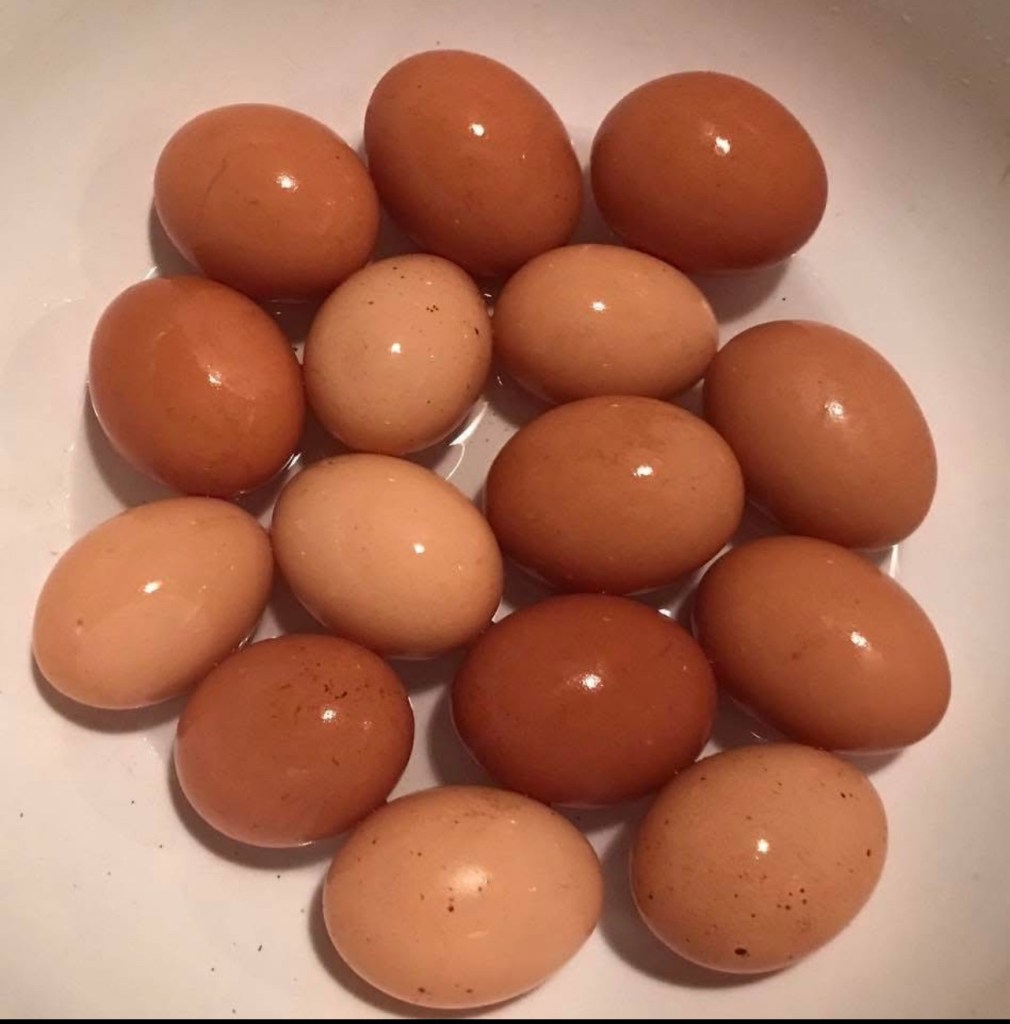
Chickens bring eggs to our family. With the prices of eggs lately, our girls are appreciated more than ever before. They also provide an extra income. We sell eggs at a much better price than the over priced eggs in the grocery store. Chickens also provide meat for the freezer, they help decrease insects in the yard, and the rooster’s early morning crow prevents one from oversleeping. Our chickens help us to friends and flailwho cannot pay the high price of store bought eggs.
Fresh eggs!A few of our layers.
Composting is a way of repurposing what most people throw away into fertilizer. Some people buy a gadget that allows them to compost their leftovers in the house. They’re nice and work if you do only have the space outdoors for a compost bin. We chose to build a compost bin from used concrete blocks that would have otherwise been sitting unused in a pile, or sent to a landfill. The compost bin is basically three outside walls with an open front and top. It is open in the front to allow the tractor or shovel access. The top is open to allow easy dumping and to allow the weather elements to reach the compost, helping it to decompose. Once the raw vegetables, fruits, egg shells, tea leaves, fruit and vegetable peelings, dried leaves, and other organic decomposable additives have decomposed, and it is totally dry, it is added back to the gardens as organic fertilize and around the fruit treats. Composting reduces waste, fertilizes, and ensures our plants are not being exposed to toxic fertilize.
Thank you for stopping by and spending a little time reading about our life on our homestead. Please feel free to leave comments, like, follow and or share. Happy homesteading from our homestead to your home. God bless!
Hello, from the mountains of Kentucky! I hope your February is going well! It’s hard to believe that we spring is so close! Where does the time go? So, I recently started a new journey on the homestead. Our daughter was always the only sourdough baker on our homestead… until she gifted me a starter of sourdough. My initial reaction was that I did not have time to babysit this starter. I thought I would forget to feed it and it would die. I wasn’t sure that I wanted to learn a new process of bread baking. Well… I was wrong on all counts.
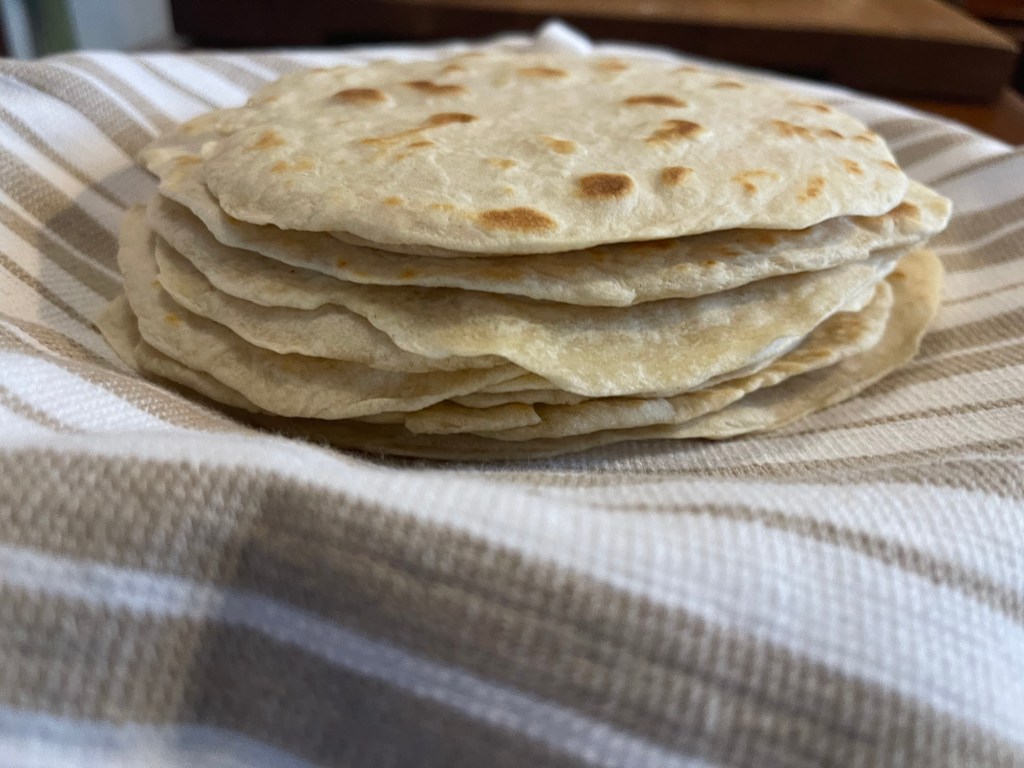
I discovered that I have a few minutes each day to discard from the starter and feed the remaining starter. It wasn’t a very difficult process to fall into routine with. What I didn’t realize was that each day I would have the gift of the sourdough discard to do something with. I didn’t realize that I could make pancakes, muffins, breads, cakes or gift it to others. I also learned that I could save my discard in the fridge, and I learned to make tortillas with it! This sourdough starter turned out to be the gift that keeps on giving. Let’s get started with making sourdough tortillas!
INGREDIENTS:
1 cup of sourdough discard
3 cups of unbleached all purpose flour
1 1/2 tsp. Salt (I use organic pink fine Himalayan salt)
1/4 cup extra light extra virgin olive oil
3/4 cup warm filtered water (70 – 75 degrees)
Add the ingredients in a large glass bowl. Mix with either a large wooden fork or with your hands. I prefer to work the ingredients into dough by using my hands. I find working dough with my hands to be a satisfying experience. Once all the ingredients are in the bowl, work the dough into a ball. Knead and stretch the dough and fold it several times.
When the dough is no longer shaggy and feels soft to the touch, put the dough on a floured parchment paper, or floured surface. Work the dough by kneading it a few more times. Cut it into six pieces then divid each of the six to make twelve total balls of dough.
Next, heat a skillet over medium heat until it very hot. I used a ceramic coated cast iron skillet to fry the tortillas in. It worked fine. While the skillet was heating on medium heat, I rolled each of the six pieces of dough into small balls. I floured the parchment paper and then rolled one ball at a time until I reached the desired size and depth of each the tortilla.
Rolling the small balls of dough for tortilla.
I fried each tortilla for approximately one minute on each side. I adjusted the heat of the skillet after about six of the tortillas to prevent burning the bread. The tortillas fried equally as fast as the first tortillas as the skillet remained hot.
I used unbleached coffee filters to separate the warm tortillas. I had a box of the filters I had purchased that are too large for our coffee pot. So instead of wasting them, they acted as a great vessel to prevent the tortillas from sticking to each other. Once all twelve tortillas were fried, I allowed them to completely cool and then stored them in a gallon zip lock bag. The tortillas can also be stored in a large bowl with an air tight seal. The second time I made tortillas I did not use the coffee filters to separate. Instead, I stacked them and wrapped them with a clean cotton dish towel. Once they were all fried, I wrapped the stack of them in wax paper and put them an air tight container. Both ways worked well.
We have used the tortillas as wraps, to dip hummus with, and for fajitas. One thing to keep in mind is the taste of the tortillas do not take on a strong taste of sourdough unless you let the dough rest for several hours prior to rolling and frying. Allowing it to stay covered for several hours ensures the starter/dough ferments. If you make the tortillas as soon as you mix them, there will be a slight sourdough taste on the backside of each bite. If you rest the dough, the tortillas will have a strong sourdough taste. Either way, they’re delicious!
I hope you and your family enjoys this recipe as much as we do. The temperature is frigid in the mountains today’ it’s a low 25 degrees this morning. Knowing that it’s 29 days until spring makes me happy! I’m ready to get out and work in the gardens. Don’t forget to head over to our podcast, Homesteading in the Mountains, on Apple Podcasts. God bless from our homestead! Feel free to follow, like, or comment!
Hello, from the mountains of Kentucky. Snow still covers the ground on the homestead. While it has melted in a lot of places, it lingers here. Our farm lies down between two mountains resulting in us being behind the north side of the mountain. Our farm is located in what Appalachian people call a holler! We don’t mind it… I can’t imagine living anywhere else. Our homestead is the property in the end of the holler. No one above us, in front of us, or behind us. We love the privacy and lack of a of seeing traffic passing by. We have one neighbor who can see the lower end of our land, which helps with insurance and to keep an eye on our property if we’re gone. All that being said, I am excited to bring a new recipe that is gluten free, dairy free, and vegan it can easily be changed to non-vegan as well.
I was challenged with creating a dessert for our daughter’s birthday, that our youngest grandson could eat. He has recently become gluten and dairy intolerant. He tested negative for celiac disease and allergy tests are scheduled to help diagnose the problem. Until an official medical diagnosis is made, we’ve strived to remove both dairy and gluten from his diet, as this is what seemed to give him the most trouble. Our efforts seem to be working. We also discovered while on this gluten free journey that many spices contain gluten. I have used organic spices for years and was happy to learn that the majority of organic spices are gluten free. However, we must always read the labels to be for sure. With all that being said, I am excited as we move forward to post gluten free recipes that are also dairy free and vegan in upcoming posts. Here we go with a first, which was a huge success! Carrot Cake!!!
Cake Ingredients:
Egg substitute equaling 4 eggs ( I like just egg)
1 1/2 cups of organic cane sugar
2/3 cup of organic light brown sugar
2 tsp of pure vanilla extract
1 cup of melted organic unrefined coconut oil
1/2 cup of sweetened almond milk with a tsp of organic white vinegar (you may sub for buttermilk if not following a plant based diet)
1/2 cup drained crushed pineapple in pure juice no sugar added
2 tbs of pineapple juice from pineapples
2 1/4 cup of gluten free King Arthur’s organic flour (may sub for all purpose flour)
1 1/2 tsp good quality non caking baking powder
1 tsp non caking baking soda
1 tsp organic cinnamon
1/4 tsp organic ginger
1/4 tsp of organic nutmeg
1/2 tsp non caking salt (I like pink Himalayan)
2 1/2 cups finely grated organic carrots
1/2 cup organic pecans finely chopped (optional)
1/2 cup choice organic raisins (optional) I like dark raisins but you may use golden
Frosting Ingredients:
3 cups sifted organic confection sugar
1 stick (equals 1/2 cup) of Country Crock plant butter
8 ounces of organic plant based cream cheese (I like the Simple Truth brand)
Ingredients can be substituted for non-vegan cake.
Process:
Preheat oven to 350, spray and line a 13×9 glass baking pan with unbleached parchment paper. Mix vinegar into milk and set aside. Mix sugar, eggs or egg substitute, oil, vanilla, pineapples, milk, and juice. In a separate bowl mix dry ingredients and then fold the dry ingredients into the wet ingredients. Fold in the carrots, pecans, and raisins. Gently stir and when well mixed pour into the prepped cake pan.
Gently tap the pan of batter on the counter top to decrease air bubbles. Bake on the middle rack. Bake for forty minutes. Due to difference in oven temperatures test at 30 minutes with a skewer for doneness. If the skewer comes out clean, the cake is done. If the cake is not ready, return to oven and check again at 35, etc. Bake until the skewer comes out clean when resting for doneness. I baked in a Pyrex glass baking pan, which is thicker. My cake was done at 42 minutes.
Unfrosted cake
When the cake is baked, set it on a cooling rack. Wait until cake is completely cool before frosting. While the cake is cooling, make the frosting.
Process:
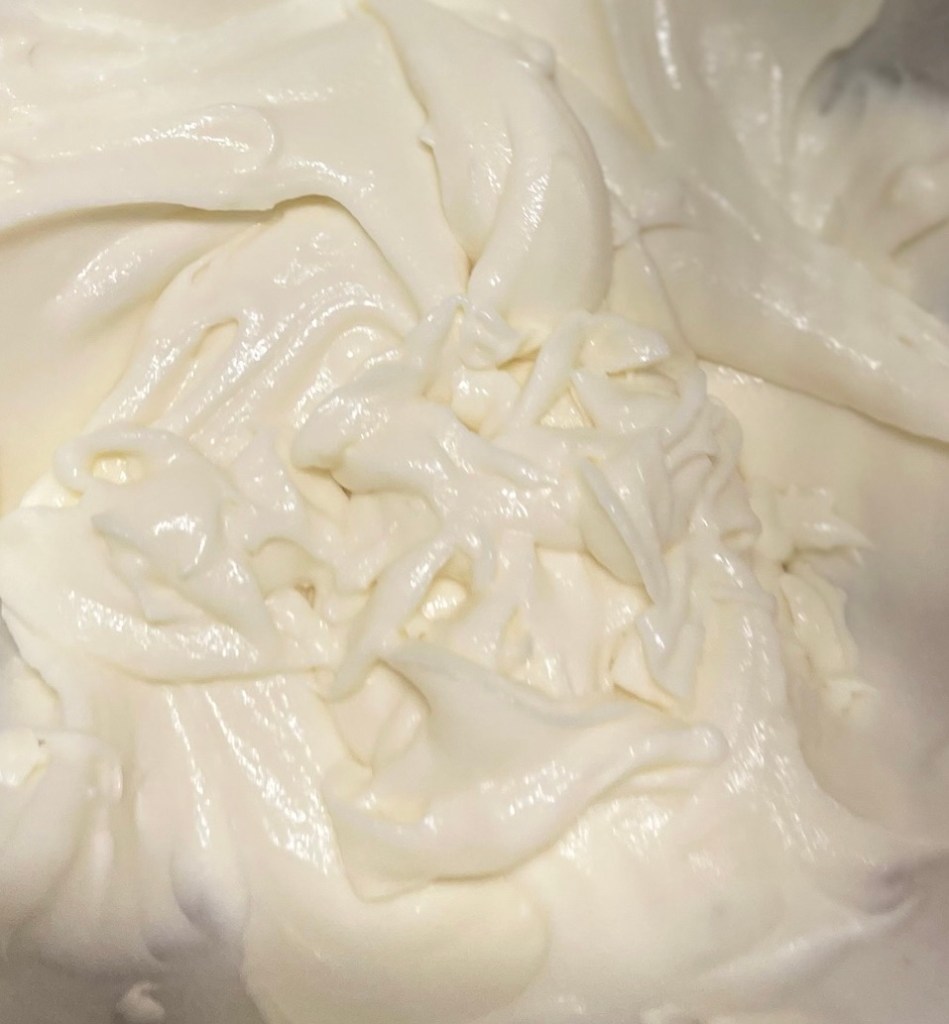
Mix room temperature plant-based butter, room temperature plant-based cream cheese, and three sifted cups of confection sugar on slow in a stand mixer. Once the sugar is incorporated, speed the mixer up to create a fluffier frosting.
Frosting is ready for the cake!
When the cake is completely cooled, using a rubber spatula, frost the cake. (Optional) Sprinkle chopped pecans over the top.
Top of frosted cake. I didn’t add pecans to the top.
I was amazed how creamy the frosting turned out. It is smooth, creamy, and tart enough to be delicious. The frosting didn’t have a phony taste like store bought frosting often has. I couldn’t wait to taste the cake after it was frosted. I actually didn’t wait until our daughter’s birthday dinner. I tasted the corner of the cake and was super happy with the results! I explained to her why a tiny little piece was missing from one of the corners. She understood and said she would’ve done the same.
Plant-based gluten free carrot cake.
The cake was a success! Everyone enjoyed it and loved the addition of the raisins. I had additional chopped pecans for those that wanted to add nuts to the top of their cake. The moisture level was off the charts! Had I not told everyone the cake was non dairy, plant-based, organic, and gluten free, they would have never known. Eating healthy doesn’t mean that you have to scrimp on taste.
I hope you and your family enjoy this cake as much as our family has. It is a great sweet treat for evening coffee, after dinner dessert, or even a breakfast treat. For now, God bless from the mountains of Kentucky. Feel free to like, share, subscribe or comment. If you’re enjoying our recipes and adventures in homesteading, go check out our podcast, Homesteading in the Mountains on Apple Podcasts. Have a wonderful week and weekend!
Good morning from the mountains of Kentucky. As I writing we are awaiting and preparing for the biggest winter storm for Kentucky this season. Meteorologists are calling it a crippling storm of rain, snow, ice, and freezing temperatures. In the natural we began preparing, we made a quick run to the store to pickup a few things, filled our gasoline jugs with gas for the generators to be ready if needed, picked up extra feed and straw for the animals, and made sure our water reserve tanks were full. I spent yesterday baking extra bread in case we lose electricity. I think we are as prepared as we can be. Now comes the wait.
Radar this morning. Screenshot credited to Kentucky Weather Center.
With that being said, I awoke this morning, looked out the window to see if the expected storm had arrived. The land was and is very still and quiet other than the stirring of our chickens, and a couple crows calling. It’s almost eerie quiet as the winds have made their presence known for the past couple of days and have totally ceased this morning. The roads are very still with no traffic moving at all. It feels like the world has stopped in expectation for the storm that is predicted to hit our little community this morning.
With that thought, I began to think about our spiritual preparation. The word tells us that Jesus is returning to take those who have prepared through accepting Him as their savior, and are ready to go home to be with Him for eternity. But yet, many are not preparing for His returning as they are preparing for this winter storm. This leaves me to ponder and reflect on my own efforts. Am I doing enough? Am I preparing daily for His returning? Have we heard of His returning so often that we are taking it nonchalantly? Am I spreading the word enough about His returning? These and other questions and thoughts stirred my mind.
As the new year is still fresh and new, instead of making resolutions that are often not kept, or insignificant, I feel compelled to take the time to ensure daily preparations for His returning. To spread the word to others about this glorious day just as the meteorologists hype the public up about the physical storm that awaits us. They are blasting the news on television, the radio, through text messages, and social media. Should we not be doing the same thing? Indeed we should! For His returning will be a glorious day for those who are ready. We, as Christian’s, must help spread the word, He is coming, in effort to help everyone be prepared and ready for His coming!
Matthew 24:27 For as the lightning cometh out of the east, and shineth even unto the west; so shall also the coming of the Son of man be. (KJV)
Matthew 24:36 But of that day and hour knoweth no man, no, not the angels of heaven, but my Father only. (KJV)
Matthew 24:37 But as the days of Noe were, so shall also the coming of the Son of man be. (KJV)
Snow in the mountains!
The snow has begun to fall on the homestead and in within a matter of moments has covered the tops of buildings and sticking to the trees. I am so very thankful today to be prepared both physically and spiritually. Be safe, stay warm, prayers for all during this uncertain weather event, but most of all, prayers that everyone will be ready for His returning. God bless from the mountains of Kentucky. Feel free to like, comment, and or subscribe.
Hello from the mountains of Kentucky! I hope each of you had an amazing Christmas. We had a wonderful Christmas on the homestead with family and friends. God is good. Anyone that knows me knows that when Christmas is over… I start counting down the days till spring. I know, we shouldn’t wish our time away. I keep reminding myself of this. Take each day, savor it, as it is gift we never get back. However, I still get excited to see how many days till planting time! As of today, 78 days till calendar spring!
That being said, I am excited to bring anotherof my favorite herbs to you today. Last year, I completed the courses to finally earn my herbalism certification. During my studies, I learned about the common wild plant, yarrow.
Close up picture of yarrow leaves.
Achillea millefolium, more commonly known as yarrow is a perennial herb that is a member of the daisy family. It is found in growing in the wild and sometimes will in your yard as birds carry the seeds far and wide. It grows up to three and a half feet tall. The leaves are dark green, fern like, but yarrow is more feathery. See above picture. It has been used for centuries for nose bleeds, minor cuts, thus becoming known in son areas as the nose-bleed plant. The blooms are more commonly white with tiny yellow centers. Some yarrow blooms are yellow in color. We grow both and both are beautiful in flower beds and landscaping. Both are equal in quality.
Pictures above is our yellow tallow in full bloom.
Yarrow leaves are safe to mix in salads and are quite tasty. The leaves can also be dried for teas. Yarrow is considered to be a safe herb, however it is not advised to ingest large amounts of yarrow on a regular basis as yarrow contains thujone, which can be toxic if consumed on a regular basis in large quantities.
Cut yarrow drying. Preparing for yarrow salve.
Yarrow is versatile and very useful as a topical herb. It can be used in topical oils, salves, or even just by picking the leaves and crushing them or chewing them to apply to a wound to help slow and even stop bleeding. As always seek medical attention for wounds that might require stitches.
Drying yarrow is not difficult. I dry it during the summer and fall. You may dry the blooms and the leaves for external use. Stay with the leaves for internal. I dry it in small batches by cutting it in the early morning hours while the air is cool. Rinse the leaves and pat them dry. Place the leaves and or blooms on a white cloth or paper towel and spread them out to allow air to circulate. Place them out of direct sunlight and allow to dry until the leaves are crumbly. Once dried the herb can be stored in a glass container away from the light to be used as needed.
Dried yarrow can be added to jojoba oil or fractionated coconut oil for an external oil to help heal wounds. I add a couple of heaping tbs of the dried herb to a half pint jar of either organic extra virgin olive oil, fractionated coconut oil, or jojoba oil. I prefer to use amber colored glass if possible. I allow the dried herb to stay in the oil of choice for two to three weeks in a dark cabinet. I then strain the oil into either a small spray bottle or dropper bottle, which makes it easier to carry with me. This oil is great for helping to heal scrapes, minor cuts, sooth burns, as a rinse for mouth sores, and other small abrasions.
I also like to add the oil to equal parts of shay and cocoa butter to make a slave that absorbs through the skin and can carried in small containers for emergencies. I will post this recipe and details of how to make the salve in an upcoming post.
I hope you have enjoyed reading about how we use yarrow. Feel free to comment, like, or subscribe. God bless each of you. Happy New Year, from the mountains of Kentucky!