Canning Carrots

Hello, from the mountains of Kentucky! It’s a beautiful time of the year in the mountains. The trees are alive with beauty! I try to savor the gorgeous leaves as long as they cling to the trees before the freezing temperatures bring them down. Every season in the mountains brings unexplainable beauty, but I think spring and fall are my favorite seasons. Enough about the beautiful bounty and onto the topic at hand, canning carrots.

The beauty of the mountains! It never gets old.

Carrots are versatile and can be prepared in many ways. We love them raw, glazed, in stews, breads, soups, and as carrot soup. We grow enough carrots to enjoy, but not always enough to preserve. With the prices of groceries soaring, that will change in upcoming seasons. We were recently gifted with an abundance of carrots that would be nigh to impossible to eat raw, so we decided to can them! It was too easy not to do! we had several large bags of carrots. I’m not sure on the weight or amount.

Ingredients:

  • Carrots (we had several large bags)
  • Kosher salt or sea salt (do not use table salt as it may cause cloudy water to form in the jars.
  • Filtered water.
  • White vinegar

Preparation:

  • Remove leaves and tips from the carrots.
  • Scrape and rinse carrots.
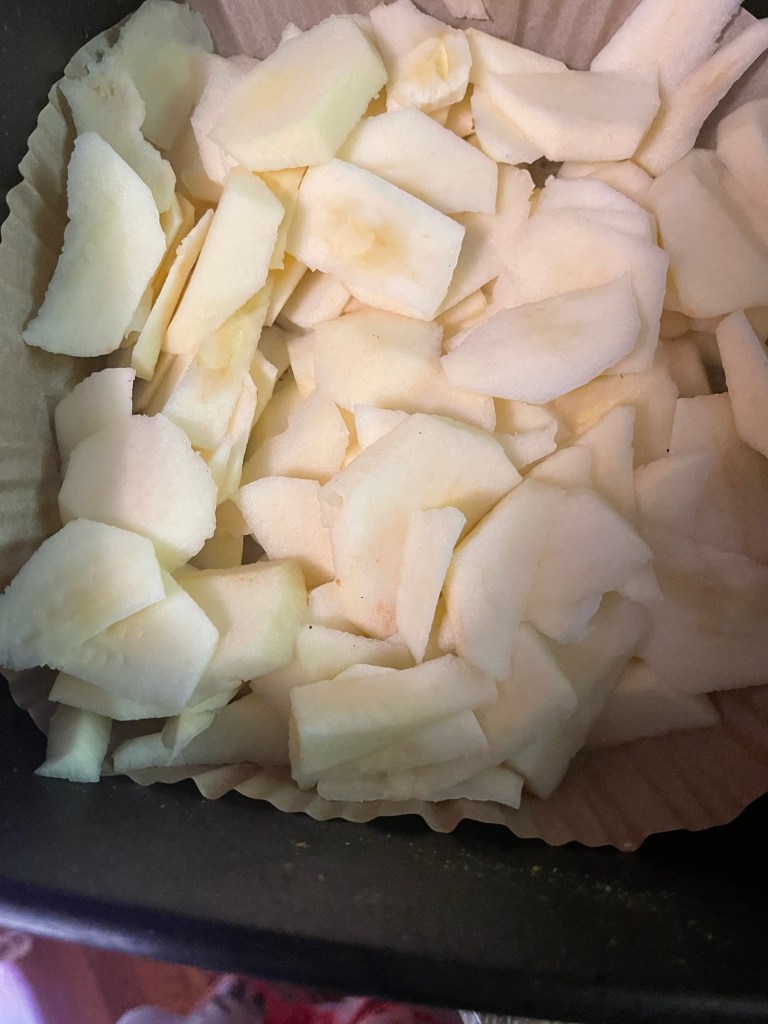
  • Slice carrots however you desire. We sliced ours for soups and stews.
  • Add the carrot slices to a large bowl of filtered water.
  • Cover and refrigerate over night.
  • Remove the next morning and rinse the carrots.
  • Add carrots to filtered water in a large stock pot. Bring to a slow boil. Boil for five minutes.
  • While carrots are boiling wash and sterilize jars, rings and flats. We used pints.
  • Add water to canner and allow it to begin warming. We used a water bath canner. You can use the method of pressure canning.

Process:

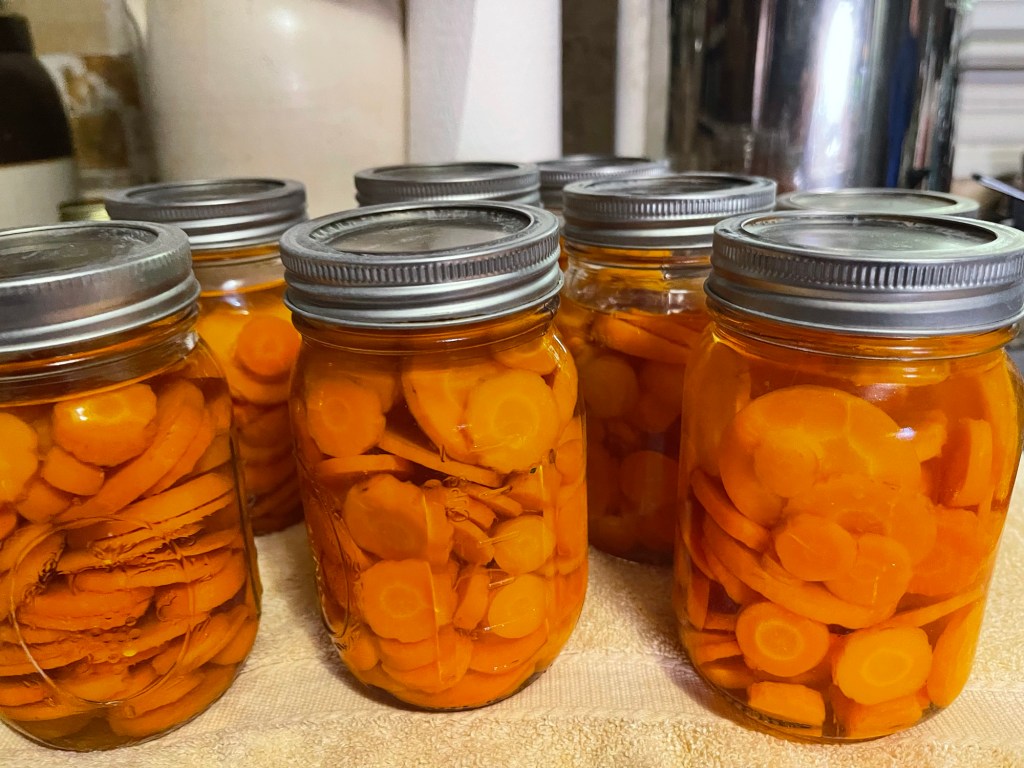
  • Using a funnel in the top of the jar, add hot carrots and hot water from the stock pot to jars. Add 1/2 tsp of salt.
  • Wipe the rims of jars and rings with a white towel soaked in vinegar.
  • Add seal and ring.
  • Place hot jars in the warm water in the canner.
  • For water bath canning, allow jars to come to a slow boil and process for two hours. Allow jars to sit in the water when the stove is turned off for at least thirty minutes. Pressure canning time would be much less than water bath. Someone told me for pressure canning carrots they allowed theirs to process for thirty minutes.
  • Remove the jars with a jar lifter and set the carrots aside on a towel to protect the surface of the cabinet or table.
  • Once cooling process begins you should hear the coveted ping of the jars sealing.
  • Add dates to the lids or labels. Allow to cool and store with your other canned goods.
Canned carrots

The rabbits enjoyed the tips and pieces of carrots that we removed. The chickens enjoying the remains that were scraped away from the carrots. Everyone enjoyed some raw carrots and we will enjoy the canned carrots in many ways. I hope your family enjoys your canned carrots as much as we enjoy ours. Remember, when you find a sale on carrots, stock up and can them for the future! Thank you for stopping by! Remember to like, comment, and or subscribe! I am headed back to the kitchen to work up and preserve three large bags of kale! Recipe coming soon. Before you go, check out the following canning recipes that are time-tested! Canning Green Beans the Time-Tested Way (updated). We have canned beans like this for more than thirty years. Canning Savory Indian Relish this is a family favorite!! More recipes coming soon. Feel free to like, comment, subscribe or follow. God bless from our homestead in mountains of Kentucky!

Preserving Corn Two Ways

Good morning from the mountains of Kentucky. It’s the time of year that most are cleaning up the remainder of the remnants left in the garden. We too, are at that point. We have scattered tomatoes, and peppers still clinging to the vines and potatoes to yet to dig. Our corn is exhausted and finally put away in the freezer for the cold days of winter. I am excited to share how we preserve our corn so we have corn year around. Grab a cup of coffee or tea and discover how we preserve our corn.

The last ears of corn if the season.

Preserving corn was a tradition handed down to me by my mom and grandmother. I remember sitting on the porch helping them shuck corn in large quantities. Memories like those are vivid in my mind and remind me of the blessings of the knowledge of working the land. I cherish the memories and the gift of rich traditions and knowledge of homesteading and farming. Our heritage helps us save money, be self-sufficient, and provides fresh homegrown food for our family year around.

Our grandson enjoying roaming through the young corn.

Corn can be preserved on the cob or off the cob. Below is the steps for both methods.

Tools required:

  • Sharp knife
  • Large bowl or pan
  • Large Dutch oven
  • Vacuum sealer
  • Vacuum seal bags

Ingredients:

  • Corn
  • Butter
  • Sugar
  • Evaporated milk

After picking the corn, find a cool pace to shuck the corn. we usually clean ours on the porch in the evening shade. We then discard our shucks into the compost bin, which in turn later becomes fertilizer for our garden. We use a damp cloth to wipe down the corn as we shuck it to help remove stray silks. We freeze anywhere from 50 to 60 ears of corn per family each year. To freeze corn on the cob, we simply vacuum seal anywhere from four to eight ears and add it to the freezer. The key is vacuuming raw dry corn. It’s amazing how fresh the corn is when thawed and prepared. It tastes almost like fresh from the stalk! Do NOT boil corn prior to freezing! Raw is the best method of preserving.

Mid-season corn.

For cream style corn, the method is a bit more complicated but well worth the process! Once the corn is shucked the cutting begins. I like to used the knife picture below to cut the corn off the cob.

Cutting fresh corn from the cob.

I hold an ear of the corn with the larger end down in a large bowl and cut down the cob to remove the corn from the cob in large sections. Be sure to get all the corn off, including the creamy bits left beneath the kernels of corn as this is what creates the creaminess in the fried corn. Once the bowl or container is full pour the cutoff corn into a large stockpot. Heat on low heat to prevent the corn from scorching. I usually use 6-8 quart cast iron Dutch ovens to prepare corn. Add one cup of organic cane sugar, one large spoon of butter of choice. I use plant butter, but any good quality butter will work. If the corn is not creamy enough, add evaporated milk or plant milk for a vegan option until desired consistency is achieved. Allow corn mixture to cook on very low heat until kernels are tender. I usually simmer my corn on low for about ten minutes stirring frequently. Remove from heat. I allow my corn to cool and place in a covered bowl in the fridge overnight. Allowing it to cool makes it easier to handle when sealing in vacuum seal bags.

Simmering the cutoff corn.

After the corn has cooled over night in the refrigerator, place the corn in desired size vacuum seal bags. Allow enough room between the corn and the edge of the bag for the seal to seal without pulling the liquid from the bag. I typically use quart and gallon bags. This allows me to have a variety of sizes. Either size I choose, I leave a couple of inches free from corn and press the air out and seal the edge of the bag with the vacuum sealer. If the bag begin vacuuming, you can remove a little of the corn and wipe the bag clean and start the sealing process over. The seal prevents air from gathering in the bag while in the freezer, thus allowing it to last longer. I have used zipper quart bags and they work okay, but the corn is not as fresh tasting as it is almost impossible to keep air out of the zip style bags.

TIP: to help with storing multiple bags of corn is to place a piece of wax paper or parchment paper between the bags before placing them in the freezer to prevent them from sticking or freezing together.

Sealing the bag, not vacuum sealing, just sealed.
One batch finished.

We’ve kept corn frozen for a couple of years and found it to be as good on the third year as it was the first year. The key to great corn on the cob is not over boiling it. I have found that dropping the thawed ears of corn in warm water, bringing it up to a boil, and turning it off works best for me. I also thaw it sometimes and wrap a damp paper towel around an ear of corn, and microwave for one minute for a quick tasty ear of corn. I prepare the fried corn by thawing and warming it slowly in a skillet or pan.

I am sure you’ll love it either way you choose to prepare it. Corn is a staple in our home. We eat creamed, fried, boiled, grilled, and add it to soups and other delicious dishes. We enjoy eating what we have grown from seed to the table and knowing we are not putting artificial fertilizers into our body and saving money while eating our own fresh produce. God bless from the mountains of Kentucky. Feel free to like, leave a comment, or subscribe. Also, check out our podcast for more about our homestead. God bless!

https://podcasts.apple.com/us/podcast/homesteading-in-the-mountains/id1757178995

Dehydrating Apples in the Air Fryer

Good morning, from the mountains of Kentucky! It’s the time of year that I am typically dehydrating apples. This year many of my harvesting plans have not gone as planned due to spending much time with my elderly mom in the hospital for the past five weeks. While at home yesterday, I noticed a small bowl of neglected apples sitting in the kitchen. They were long overdue being sliced, fried, or dehydrated. After sizing the situation up, I determined there wasn’t enough apples to unbox the big dehydrator, I didn’t want to fry them, so I decided to dehydrate them in the air fryer! There were just enough apples to make a small batch of dried apples! Here’s how I did it.

Ingredients:

Apples

Tools:

Air fryer & liner

Process:

Wash, dry, and peel apples. Slice them to suit your preference. I prefer them to be sliced rather than cubed. Place a liner in the air fryer for easy removal and easy cleanup. Close the drawer, turn the air fryer on, press dehydrate, and push start.

My air fryer temperature for dehydrating is preset. So, I decided to experiment and use the suggested temperature and time. All I had to lose was seven or eight apples.

Ready to dry.
Preset temp and time.

After about two hours, I checked the apples and they were doing wonderful. I continued to check the apples each hour until they reached the desired texture that I like. I stopped the apples at 5 1/2 hours. They were perfect to my liking. Delicious!

Delicious dried apple chips.

Dried apples can be seasoned prior to dehydrating by adding cinnamon, sugar, or whatever spice or seasoning you prefer. My family and myself prefer plain dried apples. They’re rich, sweet, and a bit tart. I used honey-crisp organic apples, because it’s what I had and what needed to be used. Dried apples make a wonderful healthy snack to take to work, school, long car rides, or on vacation. I also like to rehydrate them for frying, and they make an awesome apple stack cake. I typically dry a bushel in September in multiple batches in our large dehydrator, but for small batches, the air fryer was perfect. It doesn’t heat the kitchen up, doesn’t take too much space, not very noisy, and is a great way to salvage apples that may have lingered in the kitchen too long. It’s a money saver! With the price of groceries continually on the rise, cost cutting ideas are always appreciated!

I want to leave you with a scripture that has always blessed me. Zechariah 2:8 For thus saith the LORD of hosts; After the glory hath he sent me unto the nations which spoiled you: for he that toucheth you toucheth the apple of his eye. KKV

For now, God bless, from our homestead in the mountains of Kentucky. I hope you enjoy this short post, time saving, and money saving delicious recipe. Feel free to like, share, subscribe or follow. Head on over to listen to my podcast, Homesteading in the Mountains, on Apple Podcasts. My latest post is about growing, using, and dehydrating oregano.

Also check out our recipes for Canning Your Very Own Delicious Apple Butter and Organic Vegan Apple Tea Bread

Have wonderful week!

Zucchini Bread, Green-beans, and More!

Hello, from the mountains of Kentucky. I hope this post finds you well and blessed. It’s a busy time in the mountains! Homesteading is a way of life with great rewards, but also a lot of hard work! We spent most of the day Friday picking beans before the rain moved in. Our house was filled with the wonderful summer aroma of green beans simmering on the stove! While we worked to string and break beans to can. See the link below for our canning recipe. Canning Green Beans the Time-Tested Way However, it’s never too busy to take time to go to church for Friday’s hour of prayer and Bible study. Our topic was very interesting. Do you trust God? The study/conversation was filled with testimonies, scriptures, advice, and wonderful fellowship. It was a great reminder of how much we truly need to trust God, especially in the uncertain times that we are living in.

The first of what we anticipate to be many jars canned!

Friday was also a day for baking. When you have an abundance of zucchini, you flash freeze them and transfer the frozen zucchini to a bag to use for frying later, shred them for winter zucchini bread, make pancakes for the freezer, fry tasty fritters to vacuum seal, and batter fry a few to have with supper. Again, it’s a busy time in the mountains. I can’t complain. It’s one of my favorite times of the year. We are richly blessed to live in the mountains, have land that allows us to garden and have fresh vegetables to enjoy all summer, and an abundant crop to put away for winter.

I didn’t get a picture of the entire loaf before a chunk was already eaten!

Homesteading for us is a healthier way of life. Not everyone in our family follows a plant-based diet, but that doesn’t mean they do not enjoy some of the delicious plant-based dishes or work toward improving their health. A lot of people are prone to think of plant-based or vegan food as bland, dull, and tasteless. But, this zucchini bread is far from that. Our entire family loves it, even those who don’t follow a plant-based diet. I think you’ll enjoy this bread recipe as well. It is moist, sweet, and delicious.

Ingredients:

Line a mixing bowl with cheese cloth or unbleached paper towel. Shred two small or one large zucchini using a fine hand grater into the lined bowl, or two cup measuring cup. Squeeze the liquid from the zucchini. It should equal a cup or a cup and half after the liquid is squeezed out.

  • 1 to 1 & 1/2 cups of shredded zucchini
  • 1 1/2 cup of all purpose unbleached flour (I prefer King Arthur)
  • 1/2 cup organic light brown sugar
  • 1/2 cup organic white sugar
  • 1/2 tsp pink Himalayan salt
  • 1/2 tsp non-caking organic baking soda
  • 1/2 tsp organic baking powder
  • 1-2 tbs organic cinnamon (I usually use two)
  • 1/2 tsp nutmeg
  • 1 tsp ginger
  • 1 tsp pure vanilla
  • 1/2 cup unsweetened applesauce
  • 1//4 cup organic coconut oil
  • 1/4 cup extra virgin olive oil
  • 2 tbs of unsweetened almond milk
  • 1 tbs pure maple syrup
  • 1-2 tbs chopped pecans

Preheat oven to 350. Line loaf pan with unbleached parchment paper. I like to use a cast iron loaf pan. Give the parchment paper a quick spray with organic cooking spray. Mix dry ingredients, other than pecans, add wet ingredients including the shredded zucchini. Do not add the maple syrup or the milk yet. Mix gently. The batter will be thick. Add milk to create a smoother mix that will pour into the pan. You can use more milk if needed. Pour mixture in lined pan, sprinkle the chopped pecans or nut of choice over the top of the mix then drizzle the maple syrup over the top. I like to bake my bread on the middle rack to prevent the bottom from becoming too brown. Set the timer and bake for 50-55 minutes. Ovens will vary and the thickness of your pan can also determine the baking time. For the cast iron loaf pan, 55 minutes is required.

Remove the bread from the oven. I test the bread for doneness with a wooden screwer. If the tester comes out clean, the bread is baked through. Place the pan of bread on a cooling rack. Allow to cool for at least ten to fifteen minutes and lift the loaf out by the parchment paper and place back on the rack to cool. I allow mine to cool about fifteen more minutes and then cover with a clean dish towel to cool an additional thirty minutes before slicing. A bread knife works best for slicing.

This bread is great as a moist treat, or toasted and lightly buttered. For vegetarians, this bread is great dipped in whipped milk and eggs or egg whites, then fried on the griddle for a tasty French toast served with maple syrup. I like to slice the bread and vacuum seal individual slices to go in the freezer for a sweet treat when you don’t have time or don’t want to bake an entire loaf. The possibilities are endless. I hope your family enjoys this bread as much as our family does.

Monday was spent rescuing our corn after rain and wind damage. While one held the corn and the other hoed and heaped fresh mounds of dirt around the base of the stalks. It was a laboring job, but one that had to be done. Fourteen rows of corn was wearing to the ground from excess rain and wind. A lot of hard work, but after a day of two of some sunshine, it is now standing tall. I think we may have lost four stalks. God is good.

I am also excited to bring to you a new recipe for banana-peach bread! Oh my, it is delicious! If you love a good peach cobbler, I think you’ll like this bread! Stay tuned, and watch for this delicious recipe!

I will add this recipe soon! Banana – peach bread!

I hope you and your family enjoy this recipe as much as our family does. For now, God bless from the mountains of Kentucky where homesteading is a way of life. Feel free to comment, like, share, subscribe, and or follow.

My Top Ten Herbs (part five-oregano)

Hello from the mountains of Kentucky! I am excited to share another of my favorite herbs with you. In this post I’ll share my thoughts and ideas about oregano as well as some of my favorite uses, how I dry it for spices, use it as a natural antibiotic, and more. So, let’s get started.

Oregano is member of the mint family. Oregano is perennial that is typically hardy in warmer zones. It prefers relatively hot dry climate. It grows well in beds and pots. However, to ensure it returns in the spring, it should be planted in the ground. It is best to plant oregano in the spring, but it can be planted later in the season. There are several types of oregano including Spanish, Turkish, and Greek, which is the most common and my preferred.

One of our pots of oregano. The painted rock was a gift from our grandson.

Oregano grows well in a sunny area in well-drained soil. I water oregano that I have planted in pots daily, primarily because it is planted in terracotta pots, which drains and dries out easily. I water the oregano in the herb garden every other day, or as needed. I watered it daily during this 92-94 temperatures we’ve been having lately. I like to fertilize my herbs with banana water or a weak tea mixture at least once a week. Banana water is simply water that I soak organic banana peels in over night. This process adds potassium to the soil. The weak tea is made from leftover organic tea bags or leaves infused in a gallon of water. This type of natural fertilizer adds antioxidants to the soil and plants much like tea provides for our bodies.

Our newest addition of oregano in our raised bed.

Oregano is typically thought of as an Italian spice, but it is also a great spice for eggs, tofu scrambles, and it makes a nice addition of flavor to soups, baked potatoes and of course spaghetti, and lasagna. I like my dried oregano use in my homemade spinach tortillas. I have included the link for Vegan Italian Spinach Wraps These delicious wraps take a small amount of time to prepare, they’re easy to make, and they’re healthy. They make a great snack as well as a tasty wrap.

I typically use the oregano plants that I grow in pots for cooking and the oregano in the garden for medicinal purposes, and for harvesting to dry for spices. Pruning the oregano creates a fuller mor bushy plant. I trim and prune it as needed throughout the summer. I like to clip stems to use fresh when I am cooking. When I am ready to harvest, I cut the oregano in the early to mid morning hours before the sun hits the herbs. I clean the herbs by giving them a gentle rinse and patting them dry. A salad spinner can be used to remove any additional moisture. I like to hang bundles of the cut oregano stems beneath the upper kitchen cabinets to dry. Make sure the herbs are completely dry before bundling to prevent mold from forming in the middle of the bundle.

My cooking oregano plant.

I love the aroma that fills the house while it’s drying. When I have a larger harvest, I dry it by adding the cut herbs to the drying rack. Keep the herbs away from direct sunlight when drying. Allow the oregano to air dry until it becomes crunchy. Once the herbs are dry, I like to run them through the spice grinder a few times to create a nice spice to cook with. I also rough grind some of the dried oregano for a more textured spice. I store the herbs in a glass container with a lid and keep them in a cabinet away from direct sunlight. Herbs can be dried in the oven or in a dehydrator. However, air drying is my preferred method. I feel that the herbs are more potent when air dried.

I also like to infuse dried oregano in organic extra virgin olive oil and use it as a rub for aching joints, to sooth minor cuts, and bruises. Many have used oregano oil for centuries as an antibiotic by taking one to two drops of oil daily. To make an internal oil, add dried oregano to oil and place in a dark area for four to six weeks. Next, strain the oil into a small glass bottle with a dropper. Keep the oil stored in a dry and dark area. I typically keep my bottoms of oil in an apothecary chest for easy access and better organization. Oregano oil has been used for parasite infections, digestion, and others have used it for coughs and congestion. However, there is not medical/scientific evidence of the medicinal benefits of oregano oil.

Antique apothecary chest found in Tennessee at an estate sale.

I prefer to use dried oregano in oil in what is called a cold infusion. This type of infusion has been used for centuries. It is less likely to become rancid or gather mold than fresh herbs will. To make an infusion, fill half of a clean glass jar with dried oregano leaves and the remainder of the jar with a good quality organic olive oil. Label and date your jar so you will recognize it with ease. Seal the jar and set aside away from direct sunlight. I typically store my infused jars of oil in the pantry. Allow the oil to infuse the oregano for at least four weeks. The oil maintains its potency better in a cool dry place. I like to add some of the oil in a small glass dropper bottle for internal use. The shelf-life infused oils is typically two years, if the oil is stored correctly. I recently read where some people add a drop of organic vitamin E oil to their infused oil to help increase the shelf life. I personally have not tried this. doTERRA oregano oil is an essential in my medicine cabinet as well. Essential oil is different than infused oil. It is more concentrated and potent. I would love to make essential oils, but the equipment to extract the oils is a bit too pricy for me. So, I buy top-grade essential oils from doTERRA. If you are interested in ordering, selling, or becoming a member of doTerra, simply follow the link https://referral.doterra.me/12640050

I find it interesting that oregano is one of the herbs that many herbalists keep in their survival kit, take camping, and have conveniently located in their medicine cabinets, as well as their spice racks. It’s a great addition of flavor to many dishes, breads, and soups, and a natural healing herb that is very versatile. It is easy to grow, maintain, harvest, and easy to create spices, teas, and oils. I am anxious to hear how you incorporate the pungent beautiful herb of oregano in your daily life.

Head over to the Apple podcast, and search for, Homesteading in the Mountains, to listen my latest episode about oregano.

Feel free to comment, like, and or follow my blog for more posts about how I incorporate herbs, essential oil, plant-based recipes, and homesteading in the mountains. Be sure to check back soon, as I will be posting my new zucchini fritter recipe. It’s a new favorite in our family. God bless from the mountains of Kentucky.

Homesteading in the Mountains

Hello, from the mountains of Kentucky! It’s been a dry hot month in our area of the world. With May being extremely wet, we anticipated June to be dry, but not this dry. The lack of rain has presented challenges for our vegetable garden. We’ve hand watered a couple of times a week and babied all the veggies with hopes and prayers for a good harvest. How’s the weather been in your area?

Foggy morning in the mountains.

We are often asked what it means to homestead. Homesteading was our grandparents way of life, their parents, and even their grandparents. We grew up learning how to farm. So, to our family, homesteading means that we can be self sufficient. Self sufficient means growing, harvesting, and preserving our own fruits and vegetables. We eat from our garden throughout the year. We enjoy fresh vegetables in the summer and fall, and preserve vegetables, soups, and vegetable juices for the winter and early spring months. We make use of hydroponic gardens year round. I like to grow salad lettuce year round in the hydroponic garden. It’s easy, clean, and ensures fresh lettuce at your fingertips. The staples we cannot grow are bought in organic bulk supplies.

Early summer vegetable garden.
Small hydroponic lettuce garden.

Homesteading also means we eat cleaner and healthier. We accomplish this through bypassing as many store bought prepackaged foods as possible. We enjoy baking our families breads, cakes, pies, and cookies, instead of buying unhealthy food that is filled with an abundance of sugars and unhealthy preservatives. One of our favorite homemade bread recipes can be found in the following link. Give Us This Day Our Daily Bread: Homemade Crusty Vegan Bread We also preserve fresh fruits to ensure we have jams and jellies for toast and biscuits. We enjoy foraging berries for dishes and jellies. There’s nothing much better than homemade jam spread on homemade bread for breakfast. Canning My Favorite Peaches

Homemade crusty seeded yeast bread
Canned strawberry preserves

Fresh eggs are gathered daily for breakfast and for baking. Fishing, to us is more than a pastime. Fish is caught from the lakes and rivers for the freezer to use later for fish dinners. The mountains provide an abundance of squirrels, rabbits, and deer for meat that is frozen for roasts, chili, and others dishes. We do not raise cattle, but buy fresh beef and hog meat yearly from friends that provides for the year.

Farm fresh eggs
Canning and preserving peaches.

One part of homesteading that I enjoy immensely is growing our own herbs. The herbs ensure we have spices, teas, tasty leaves for salads, and herbs for medicinal remedies. The herbs provide beautiful blooms that bring in an abundance of pollinators for our garden. The diverse mint that we grow makes great hot or cold tea, is a wonderful additive to cookies and hot chocolates, and can help sooth a bee sting.

Potted peppermint grown for tea.

Essential Oils, Tea Bags, and Bee Stings

Foraging mullein.
Drying mullein for tea.

We enjoy foraging for various plants to use for food, teas, and medicinal purposes. We harvest mullein, pictured above as tea to help alleviate coughing and congestion. We also enjoy bartering with friends and neighbors. If we have an abundance of corn or beans we may barter with friends for a vegetable or fruit that we don’t have.

One post cannot cover it all! This is a brief glimpse into our lives as homesteaders. I guess the best description is that we enjoy being self-sufficient, and being able to sustain our farm that provides for our family. We enjoy the simple things in life, family, friends, gardening, preserving, and nature. We enjoy church and our church families. We love the Lord, His ways, and serving Him. We believe in working for what we have, enjoy thrifting for antiques, repurposing things from the past, reading, and writing. We enjoy holistic living, cooking, baking, and taking care of our animals, and sharing God’s love and His goodness with others. Head on over to Apple Podcasts to listen to my podcast, Homesteading in the Mountains, to learn more about our homestead and homesteading projects.

For now, God bless from the mountains of Kentucky. Feel free to like, comment, and or follow. I enjoy hearing from my readers. Let me know if you would like to read more about our life homesteading in the mountains.

My Favorite Top Ten Herbs (Chocolate Mint part 3)

Hello from the mountains of Kentucky. I hope your week has been filled with blessings and sunshine. Life’s been busy in our neck of the woods! We finally have all our garden planted. The squash and zucchini are blooming and beginning to produce. We harvested our first two this week. The cucumber vines are running and blooming! We have our fence up and have a lot of small cucumbers on the vines. Now comes all the tilling and hoeing! But great rewards will follow!

Zucchini blooms
First cucumber of the season almost ready to pick!

This is the third part of my ten favorite herbs. I want to share my love and experience with chocolate mint, which is my third favorite herb post. Remember, I’m not posting in any particular order.

My chocolate mint bed.

I discovered chocolate mint about ten years ago when a friend gave me a small section she had propagated. I maintained it in a large pot in hopes it would come back the next spring. I was disappointed when it didn’t return. I could not find it at the local nurseries, so I ordered a small plant from Amazon and chose to plant it in one of my herb beds. It has thrived since then. Chocolate mint is in the peppermint family. The leaves of this wonderful mint is a deeper green than peppermint and the underside of the plant and stem is a purplish color. It is hardy in zones 3-9. The aroma is amazing!

Chocolate mint can quickly become invasive. The more it’s pruned, the thicker and bushier the plants become. If left unpruned the plants become leggy. I have had mint spring up outside the bed, in nearby pots, and even random places in the yard. If you are pruning but not harvesting, be careful with the clippings. They will sometimes take root where you discard them.

Chocolate mint makes a refreshing cold tea, by simply washing the leaves and adding them to glass of cold water. You can infuse them with an infuser or as whole leaves. It also makes excellent hot tea, especially in the winter months. Feel free to mix mints for a more bold flavor, add cinnamon for a festive tea, or just enjoy the flavor alone. It’s very refreshing.

I dry my mint by clipping the plants and pruning any damaged leaves. I then wash the mint and gently pat it dry with a clean towel or unbleached paper towel. I like to hang herbs in bundles to dry. Once the mint is dry to the point of crumbling, I give it a rough grind with the mortal pestle, and add to a glass jar and place it in the cabinet away from the light. I add the dried tea leaves to a tea ball or infuser for hot and cold tea.

Chocolate mint drying in the kitchen.

The dried mint can also be ground in a spice grinder for a powdery type spice to use when making brownies, cakes, and as a fun additive to a cup of hot chocolate. The uses for this tasty mint are endless.

I just chocolate mint tea to help sooth an upset stomach, help digestion, and ease indigestion. It is also beneficial in soothing oral mouth pain, and to add antioxidants in my body. It and versatile herb that has been used for centuries. Chocolate mint has a multitude of benefits with great taste whether you enjoy it as a hot or cold tea, or as a spice.

I hope you’ve enjoyed this post. Feel free to ask a question, or leave a comment. You may follow my blog for more recipes, posts about mountain living, herbs, and gardening tips. Homesteading is a wonderful way of life that helps us to be independent, sustainable, and a way of life. God bless from the mountains of Kentucky.

Living Holistically in the Mountains

Good afternoon, from the mountains of Kentucky. I hope your week is going well. It’s been a busy one this week in our neck of the woods. Spring is usually busy with planting, foraging, preserving, harvesting and drying. We’ve managed between long bouts of rain to plant our squash and zucchini, tomatoes, kale, cucumbers, and peppers. The garden is taking shape. Yet, there’s a lot more to plant. A lot of work with great rewards.

We’ve planted and foraged mullein to dry for tea. We’ve found mullein tea good for our respiratory problems, common colds, flu, and bronchitis. It’s a staple in our household. The tea can be made a few different ways. The leaves can be cleaned and dried for steeping hot tea, or the leaves can be cleaned and added to filtered water and placed in a covered glass container in the fridge for cold tea. A little honey in either and we’ve found it to be a tasty bit of nature that has wonderful results. (More to come about the use of mullein.)

Harvesting the bottom mullein leaves.
Iris blooms are my favorite!

Our flowers and herb garden is flourishing this year. I’ve harvested chocolate mint, peppermint, and strawberry mint twice already. We keep fresh mint for cooking, be stings, and for baking. Dried mint is used for steeping delicious teas. Peppermint tea has great medicinal qualities for digestion issues. It’s a great addition to green tea as well, and is tasty in a cool glass of water from our Berkey. Yesterday, was a day for clipping basil, more mint, and chive blooms for seeds. I also harvested tarragon and bit of lemon basil. Our herbs are doing exceptionally well this year. I am a believer that when nature produces an abundance of something, it will be needed in weeks or even months ahead. We enjoy sharing our harvest with the elderly who can no longer garden and those who do not have land for gardens. We are believers of tithing our blessings with others. It seems the more we give, the more our gardens grow and produce.

The basil is thriving!
Fresh strawberry jam!

Yesterday was spent preserving strawberry jam. It’s easy to make and delicious to eat! I will post this recipe soon. I couldn’t wait for weeks to eat the jam! So, I opened a jar this morning and had it on fresh-baked bread for breakfast.

Freshly toasted baked bread and homemade jam!
Home baked seeded yeast bread.

Our kitchen today is an aroma of drying herbs, yeast bread cooking, and banana bread baking. Oh, and lemon essential oil diffusing in the diffuser. Lemon essential oil is great for focus, clarity, and helps deter ants, while making the air smell clean and fresh. Essential oils are part of our daily life. We use them for medicinal purposes, to make cleaning products, to add to recipes, and to help us relax at night. We are firm believers that God created nature for mankind to enjoy and along with the enjoyment, to use for the physical, medical, and even for spiritual needs.

Chocolate mint hanging to dry.

For now, God bless, from the mountains of Kentucky. Happy foraging, planting, and preserving! Feel free to follow and or leave comments or questions. Have a wonderful Thursday!

Our roses are beautiful this year!

Friday in the Mountains “Sound the Alarm!”

Good afternoon, from the mountains of Kentucky! It’s a windy spring day in the mountains. The trees are beautiful! All of the blooming trees are in full color. Friday finds me busy with assignments that signify the spring semester is winding down. During this time, there is always extra work consisting of year end meetings, various writing assignments that need to be scored, classroom observations, and numerous interviews with students entering the education program. Thus, comes added stress to complete work in a timely manner. So, how do I deal with this added stress?

First and foremost, I like to rise early to pray and spend time in the word. Anything we need or questions we have, can be found and answered in His word. Secondly, I love to cook and bake. Cooking and baking are both therapeutic and help relieve anxiety and stress. While in the kitchen, I find it to be an opportune time to focus on Him. I love to listen to good gospel music, inspiring podcasts, and videos about the goodness of God. Today, I listened to a good friend of mine speak about sounding the alarm! This was the topic of the sermon at church yesterday! It’s time to sound the alarm. Time to be about our Father’s business. it’s time to be out in the highways and the byways and asking others to come to church, get to know Christ, and form a relationship with Him. During my time in the kitchen listening to and being inspired by others, it was also a wonderful time to pray.

Spending time in the word is a way to grow and learn.

As I chopped vegetables for a big kettle of homemade soup I called out the names of neighbors, friends, and family. I lifted them up to the Lord for their various needs, and most of all for their salvation. It’s time to sound the alarm! While I kneaded dough, I thought of the process of baking bread. We should follow the instructions in the recipe. If a step in the process is overlooked, the bread may not rise. Likewise, we must always follow the Lord’s instructions. If we overlook others whom the Lord is bidding us to invite to know Him, they may not be saved. If we don’t follow what He asks us to do, we may not grow to our full potential in Christ. Let’s follow His instructions. Sound the alarm!

Homemade crusty seeded yeast bread fresh from the oven!
Homemade vegan beef less veggie soup

So, for now, I’m off to bake my bread! I’m anxious on this rainy spring day to enjoy a bowl of homemade vegetable soup with a slice of crusty homemade bread. This has been a prosperous and insightful Friday in the mountains. I’ll leave you with the message from our Thursday night service! Sound the alarm! Work while there’s time! Sound the alarm! Invite those you may see in the grocery store, witness on social media, encourage all those whom you meet. During her live, my friend shared about a young couple she recently invited to church. They were anxious to come, and they came. It was sad to find out they had wanted to go to church before she asked them, but hadn’t been invited by anyone and didn’t know where to go. Be that person who loves and invites others to get to know Christ. You never know when the person behind you in the checkout line at the store, may be waiting for someone to invite them. Don’t pass opportunities up, instead, sound the alarm! Jesus is coming back! God bless! Feel free to comment and follow.

Vegan Peanut Butter Chocolate Chip Mookies

Hello, from the mountains of Kentucky! It’s been a busy Saturday of baking and spring cleaning! I’ve been on decluttering journey for a couple of weeks. I’m nearing the homestretch of decluttering. Baking for the week ensures I have fresh bread for breakfast toast, lunch, and for supper. It also ensures I have snacks for the week. I also enjoy sharing with others at work, family, and church. But, the biggest reward is that my bread and snacks for the week are healthy, clean, organic, and not processed!

I have baked what I call mookies for years. You might be wondering what a mookie is. It’s not quite a cookie and it’s not quite a muffin. It’s kind of somewhere in between a cookie and a muffin. It’s a mookie. I am anxious to share this recipe with you. It’s a great snack, a healthy snack, awesome with coffee in the morning or tea in the evenings. Our grandchildren love them too. They’re made with minimal ingredients and takes a total twenty minutes to mix and bake. Let’s get started!

Ingredients:

  • 1 over ripe organic banana
  • 1 cup organic all purpose flour
  • 1 tsp of vanilla
  • 1/4 cup organic pure maple syrup
  • 2 tsp non-caking baking powder
  • 2 tbs organic natural peanut butter
  • 1 tbs organic miniature unsweetened chocolate chips

Preheat oven to 350. Line a cookie sheet with parchment paper. Mash the banana and add syrup and vanilla and mix well. Add flour and baking powder and mix. Fold in peanut butter and mix. Finally food in chocolate chips.

Mookie mix

Drop mixture by tablespoons to the lined cookie sheet. Leave a little space between the mookies. Bake for fifteen minutes. I like to brown mine slightly under the broiler. Allow to cool and enjoy!

Peanut butter chocolate chip mookies

These are great without the peanut butter for more of a banana taste. They’re great with chopped walnuts for a take on banana bread flavor. They’re also great with a bit of cocoa powder for a chocolate mookie. The possibilities are limitless.

They’re airy, light, and delicious.

I hope you and your family enjoy this delicious treat as much as our family does. For now, God bless from the mountains of Kentucky.