Preserving Corn Two Ways

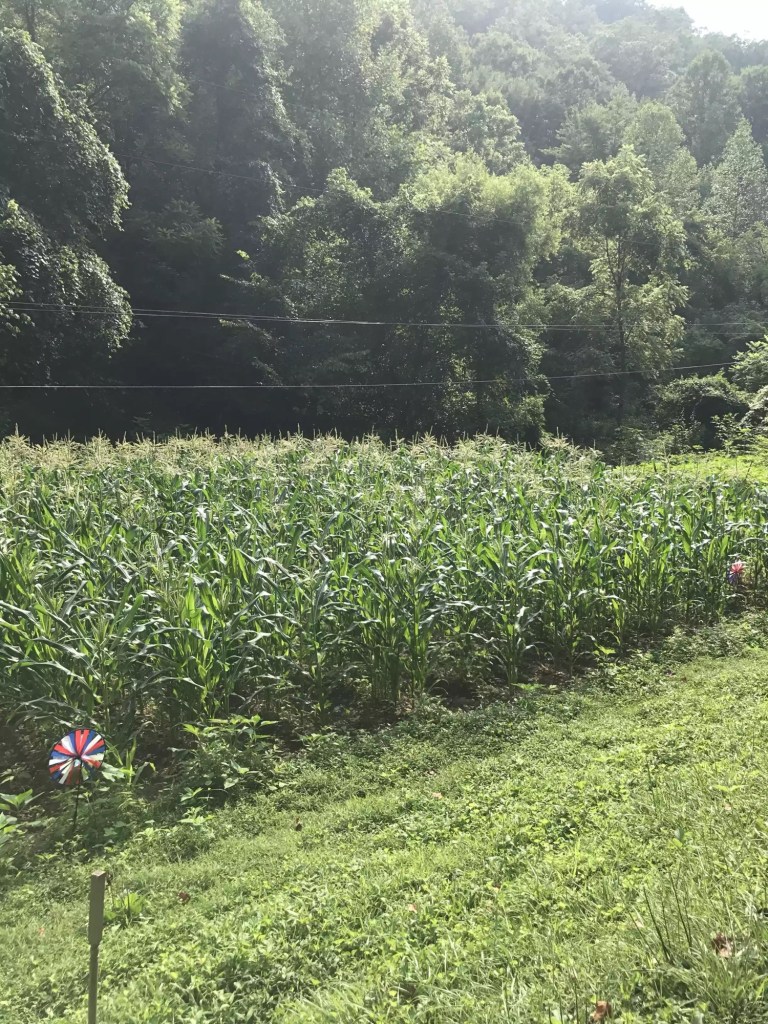
Good morning from the mountains of Kentucky. It’s the time of year that most are cleaning up the remainder of the remnants left in the garden. We too, are at that point. We have scattered tomatoes, and peppers still clinging to the vines and potatoes to yet to dig. Our corn is exhausted and finally put away in the freezer for the cold days of winter. I am excited to share how we preserve our corn so we have corn year around. Grab a cup of coffee or tea and discover how we preserve our corn.

The last ears of corn if the season.

Preserving corn was a tradition handed down to me by my mom and grandmother. I remember sitting on the porch helping them shuck corn in large quantities. Memories like those are vivid in my mind and remind me of the blessings of the knowledge of working the land. I cherish the memories and the gift of rich traditions and knowledge of homesteading and farming. Our heritage helps us save money, be self-sufficient, and provides fresh homegrown food for our family year around.

Our grandson enjoying roaming through the young corn.

Corn can be preserved on the cob or off the cob. Below is the steps for both methods.

Tools required:

  • Sharp knife
  • Large bowl or pan
  • Large Dutch oven
  • Vacuum sealer
  • Vacuum seal bags

Ingredients:

  • Corn
  • Butter
  • Sugar
  • Evaporated milk

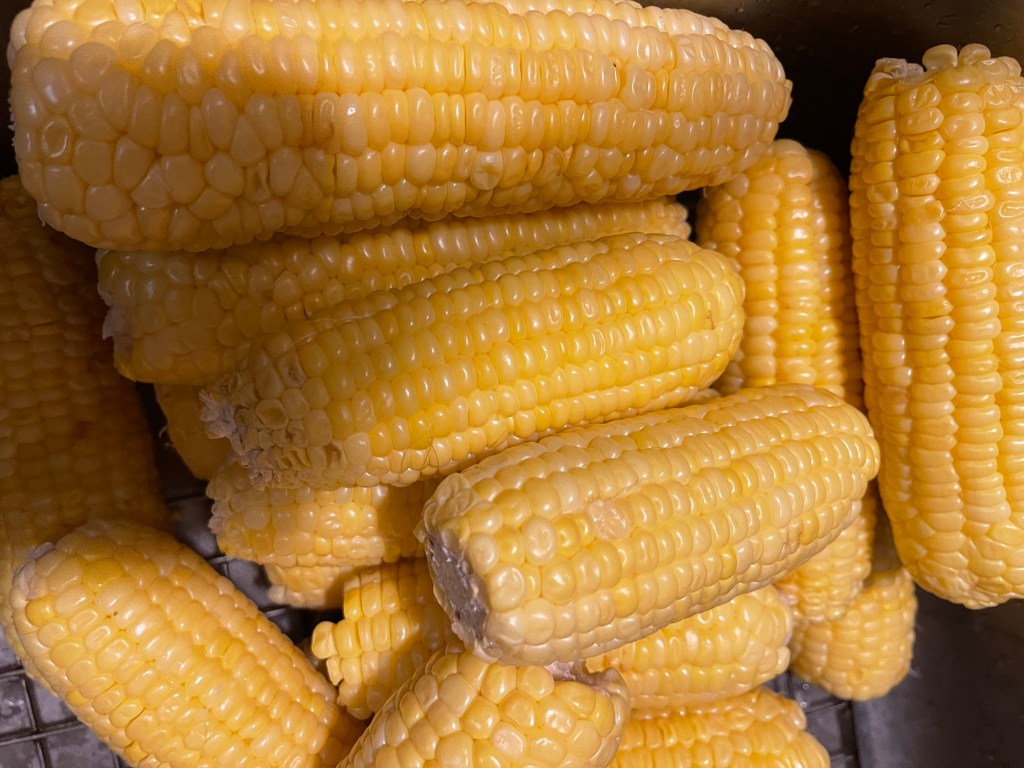
After picking the corn, find a cool pace to shuck the corn. we usually clean ours on the porch in the evening shade. We then discard our shucks into the compost bin, which in turn later becomes fertilizer for our garden. We use a damp cloth to wipe down the corn as we shuck it to help remove stray silks. We freeze anywhere from 50 to 60 ears of corn per family each year. To freeze corn on the cob, we simply vacuum seal anywhere from four to eight ears and add it to the freezer. The key is vacuuming raw dry corn. It’s amazing how fresh the corn is when thawed and prepared. It tastes almost like fresh from the stalk! Do NOT boil corn prior to freezing! Raw is the best method of preserving.

Mid-season corn.

For cream style corn, the method is a bit more complicated but well worth the process! Once the corn is shucked the cutting begins. I like to used the knife picture below to cut the corn off the cob.

Cutting fresh corn from the cob.

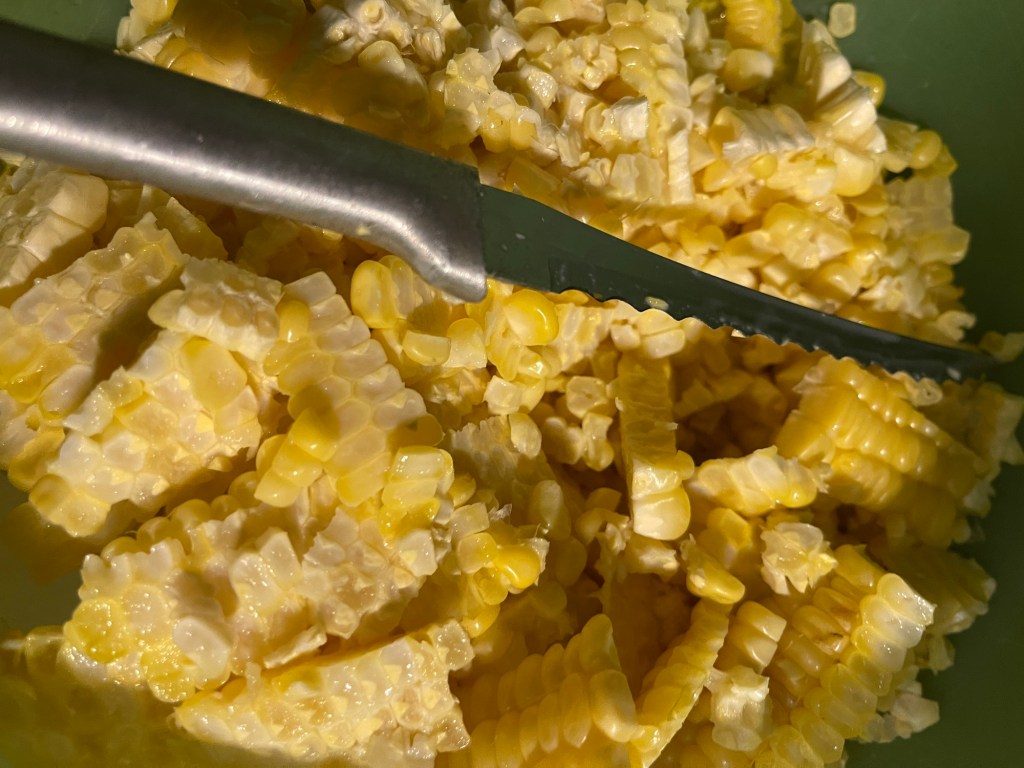
I hold an ear of the corn with the larger end down in a large bowl and cut down the cob to remove the corn from the cob in large sections. Be sure to get all the corn off, including the creamy bits left beneath the kernels of corn as this is what creates the creaminess in the fried corn. Once the bowl or container is full pour the cutoff corn into a large stockpot. Heat on low heat to prevent the corn from scorching. I usually use 6-8 quart cast iron Dutch ovens to prepare corn. Add one cup of organic cane sugar, one large spoon of butter of choice. I use plant butter, but any good quality butter will work. If the corn is not creamy enough, add evaporated milk or plant milk for a vegan option until desired consistency is achieved. Allow corn mixture to cook on very low heat until kernels are tender. I usually simmer my corn on low for about ten minutes stirring frequently. Remove from heat. I allow my corn to cool and place in a covered bowl in the fridge overnight. Allowing it to cool makes it easier to handle when sealing in vacuum seal bags.

Simmering the cutoff corn.

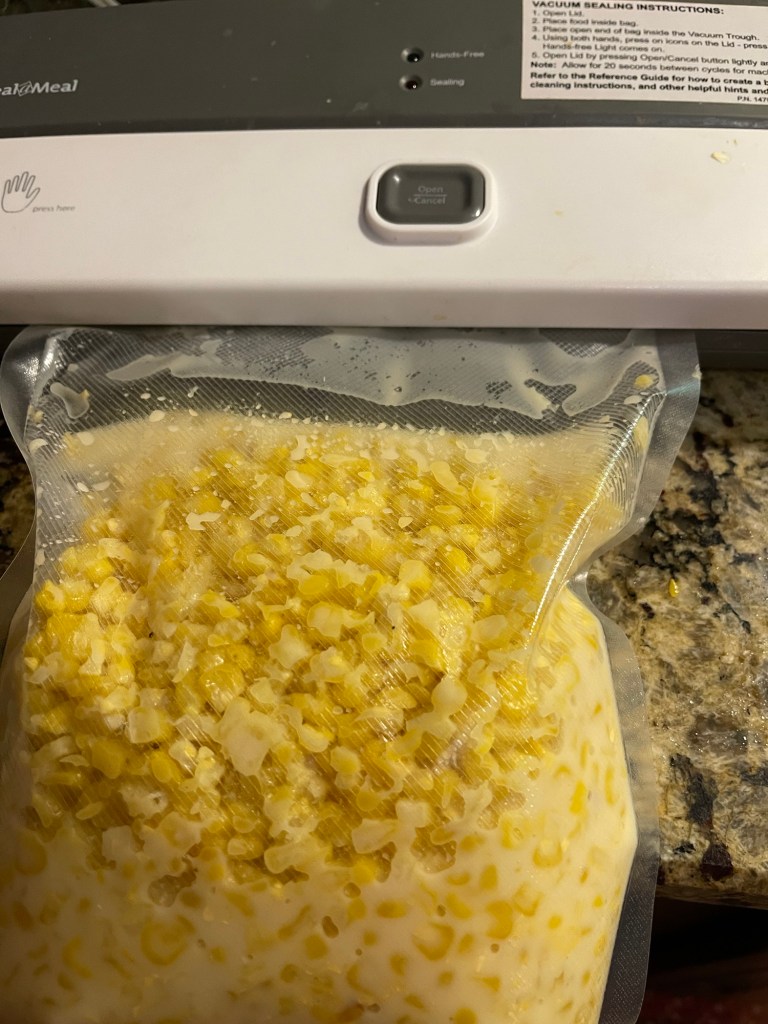
After the corn has cooled over night in the refrigerator, place the corn in desired size vacuum seal bags. Allow enough room between the corn and the edge of the bag for the seal to seal without pulling the liquid from the bag. I typically use quart and gallon bags. This allows me to have a variety of sizes. Either size I choose, I leave a couple of inches free from corn and press the air out and seal the edge of the bag with the vacuum sealer. If the bag begin vacuuming, you can remove a little of the corn and wipe the bag clean and start the sealing process over. The seal prevents air from gathering in the bag while in the freezer, thus allowing it to last longer. I have used zipper quart bags and they work okay, but the corn is not as fresh tasting as it is almost impossible to keep air out of the zip style bags.

TIP: to help with storing multiple bags of corn is to place a piece of wax paper or parchment paper between the bags before placing them in the freezer to prevent them from sticking or freezing together.

Sealing the bag, not vacuum sealing, just sealed.
One batch finished.

We’ve kept corn frozen for a couple of years and found it to be as good on the third year as it was the first year. The key to great corn on the cob is not over boiling it. I have found that dropping the thawed ears of corn in warm water, bringing it up to a boil, and turning it off works best for me. I also thaw it sometimes and wrap a damp paper towel around an ear of corn, and microwave for one minute for a quick tasty ear of corn. I prepare the fried corn by thawing and warming it slowly in a skillet or pan.

I am sure you’ll love it either way you choose to prepare it. Corn is a staple in our home. We eat creamed, fried, boiled, grilled, and add it to soups and other delicious dishes. We enjoy eating what we have grown from seed to the table and knowing we are not putting artificial fertilizers into our body and saving money while eating our own fresh produce. God bless from the mountains of Kentucky. Feel free to like, leave a comment, or subscribe. Also, check out our podcast for more about our homestead. God bless!

https://podcasts.apple.com/us/podcast/homesteading-in-the-mountains/id1757178995

A Busy Day in the Mountains

Hello, from the mountains of Kentucky! I hope your July is off to a beautiful start! We’ve had a blessed week with just enough rain to water our thirsty garden and make the zucchini, summer squash, and cucumbers explode. The number of gorgeous veggies awaiting my attention caused me to wake even earlier today. After having a hot cup of coffee, relaxing with my daily devotional, prayer, and another fascinating chapter of the word, I looked at the tasks that lay ahead of me for the day. Farming looks glamorous to those who see it as all the veggies you can eat, decreased payout at the grocery store, and the many wonderful health benefits. All of these benefits are true, but the work and the labor are also very real… but satisfying. Chores are a big part of planting, growing, maintaining, and harvesting the rewards. After reading a chapter of my chosen summer read, What the Wind Knows, it was time to get up and get started checking things off my list. Yes, I am a list maker! It helps me feel organized.

The day began with watering the herbs, which needed harvesting again. It’s been a great year for all of our herbs. I quickly clipped lavender blooms to dry for flavoring teas, and clipped various types of mint. After washing and drying the herbs, I quickly tied them in bundles to hang for drying. The aroma of fresh herbs drying in the kitchen makes me happy.

Fresh mint hanging in the kitchen! This is chocolate mint. It makes great tea!
Lavender Blooms for flavoring Tea

Weekly household chores were next on the agenda. One by one, I checked them off my list. But, between chores… the squash, zucchini, and cucumbers were reoccurring thoughts. So, I decided to bake a little zucchini bread. I also vacuum sealed a few bags of sliced squash and zucchini for the freezer to enjoy this winter. Next on the list, was the sink full of cucumbers. Checking my time, I decided that I would have time to make seven quarts of spicy kosher dill pickles, which are always tasty any time of the year. If you’ve not tried my recipe for spicy kosher dills, you can follow the link below to learn more. These pickles are a family favorite, as well as a favorite among many of our neighbors. Canning Spicy Kosher Dill Pickles

We’ve had an abundance of summer squash and zucchini this year!

Now to proofread. My editor is expecting the final revisions of the last chapters to be ready later this week. I am in the homestretch of finishing this nearly year long project. I’m excited for my students to have this new workbook in their hands. It is designed to accompany the textbook I wrote in 2019. Thankfully, the abundance of rain we received over the last few weeks allowed me to work ahead of schedule, but also resulted in lots of weeds. That was another thing on the list to attend to. Hoeing usually means all hands on deck! Again, lots of hard work, but very satisfying work.

The zucchini kept calling my name! I ended up grating several zucchini for the freezer for bread this winter. I use a hand-held box grater and a glass measuring cup lined with white paper towel or cheese cloth. I grate the clean zucchini into the cup until the measuring cup is full. This is perfect for breads as my recipe calls for one full cup of grated zucchini. It also works well because the paper towel or cheesecloth is already holding the zucchini, and ready to be squeezed to remove the liquid before freezing. I felt better about having used several of the beautiful green bounty.

Three hours later, seven quarts of spicy kosher pickles are cooling and waiting to be taken to the basement for good eating this winter! Zucchini bread will be cooling soon. One loaf to eat and one for the freezer. Yes, you can freeze whole loaves of homemade bread. Allow the bread to completely cool, remove from loaf pan, and wrap twice with plastic wrap, then once with aluminum foil. Once the bread is frozen, you can vacuum seal for reassurance of no frost gathering on the bread. When you’re ready to eat the bread, allow it to thaw in the fridge. Once it’s completely thawed, remove the vacuum seal and unwrap and enjoy. It’s amazing how moist the bread is.

Spicy Kosher Pickles

I hope you’ve enjoyed spending a little time with me in the mountains of Kentucky. It’s been a busy day, but one that makes me feel accomplished. Feel free to leave comments. I love to hear from my readers. I’ll share the vegan zucchini bread recipe soon. It’s a keeper. Also, I’m excited to share my new Indian relish recipe with you! I’m hoping to have it posted later this week. Check out the picture beneath the bread photo! God bless from the mountains of Kentucky.

Fresh baked chocolate chip zucchini bread.
Indian Relish recipe coming soon!

Don’t Let Those Leftovers Go to Waste…Freeze Them!

Is your refrigerator like mine after Christmas each year? If so, it’s overflowing with dish after dish of delicious leftovers. However, if your family is like mine they are also tired of leftovers, even if they are delicious. The question is…what do you do with all those leftovers? I have asked myself this same question year after year. I usually resolve this problem by feeding the leftovers to our wonderful guard dog, Frosty, and of course the cats. I have also added them to the compost pile, but this year I decided to do something different with my leftovers.

image

This is Frosty…our faithful friend that guards chickens, cats, and our garden.

As I was shopping for groceries this week I reached for one of my favorite foods, southwestern grilled chicken strips. To my surprise there wasn’t one bag left in the cooler. I thought about how I would miss this tasty addition to my salads, breakfast, and even as a side dish. I stood there staring at the cooler as if I could magically will a bag or two of my favorite salad fixing to appear in the cooler. Instead of the bag of chicken appearing I had a vision of adding the left over smoked turkey that still resided in my refrigerator to my salads. It was already pulled from the bone and stored in an air tight container. Smiling to myself I left the store with a plan, and a full cart of items to fill my pantry for a couple of months of clean eating. But, that’s a post for a later date.

image

Vacuumed sealed individual servings of turkey.

After researching how to freeze cooked meats, I decided that I would freeze my leftovers. The next day with my plan, the vacuum sealer and a large bowl of turkey I moved forward with my plan. I was excited as the smoked turkey would be a tasty and healthy alternative to the southwestern chicken strips. It would be delicious warmed up in salads, as a side, or on wraps. Why had I not thought of this before? Soon I had the turkey vacuum sealed, dated, and in the freezer. I was on a roll and wanted to add additional healthy choices to my freezer. I wondered about freezing other leftovers.

I decided after reading further about freezing foods that I would vacuum seal individual portions of the dressing, and slices of a pumpkin roll that my niece brought as a dessert for Christmas dinner. These would be great sides when our granddaughter, who loves both dressing and pumpkins roll, came to visit. These would also be great sides for my husband as well, and I admit, for myself when I have a cheat day.

Freezing foods is a quick and easy process. If you don’t have a vacuum sealer you can still freeze your leftovers. Below are directions for freezing turkey, pumpkin roll, and dressing.

Freezing Turkey:

Remove turkey from bone
Separate turkey into serving sizes
Vacuum seal or wrap in plastic wrap and place in zip lock freezer bag
Date bag with a permanent maker

Freezing Pumpkin Roll:

Slice the pumpkin roll
Place individual pieces on parchment paper in freezer for fifteen minutes
Either vacuum seal or wrap in plastic wrap in place in zip lock freezer bag
Date bag with a permanent marker

Freezing Dressing:

Cut into serving sizes
Place in freezer on parchment paper for fifteen minutes
Wrap in plastic wrap and place in zip lock freezer bag
Date bag with a permanent marker

I’m excited about being able to enjoy smoked turkey, dressing, a baked sweet potato, and a delicious slice of pumpkin roll any day of the year! The smoked turkey will also be great to make turkey wraps for lunch on the go, and a tasty addition to salads.  I love seeing the full section of leftovers in my freezer and the feeling of satisfaction of having little to no waste with Christmas leftovers, while also stocking my freezer with delicious food.

I hope that I’ve inspired you to freeze all of your tasty holiday leftovers. You don’t have to wait for holidays to try this idea…you can begin freezing leftovers any day of the week! It’s also a great way to plan ahead and meal prep for those busy weeks that we all have. Feel free to leave your feedback. I enjoy hearing from each of you. Be sure to check back next week for my New Year’s post where I will share ten inspiring achievable goals to improve your New Year and your life! Wishing you and your family a very happy and blessed New Year!